How to Install a Smart Light
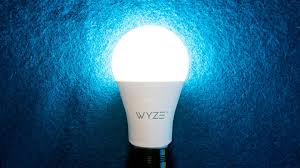
Smart lighting is an innovative technology that offers you the convenience of remotely controlling your home’s lighting from your smartphone, tablet, or smart home hub. Installing a smart light is simple and does not require extensive technical knowledge. In this article, we will walk you through the steps involved in installing and setting up a smart light in your home.
Step 1: Choose the Right Smart Light
The first step is to choose the right smart light for your needs. There are various types of smart lights available in the market, such as bulbs, switches, or complete fixtures. Ensure that your chosen light is compatible with the existing sockets, switches, or fixture in your home.
Step 2: Acquire Necessary Tools
Before beginning the installation process, make sure you have all the necessary tools on hand. These can include:
– A screwdriver (for installing or removing fixtures)
– A power drill (if required for mounting new fixtures)
– Wire strippers (if dealing with wires)
– Safety glasses and gloves for protection
Step 3: Turn Off Power
Before working on any electrical project, ensure that you turn off the power at the circuit breaker or fuse box to avoid potential electric shocks.
Step 4: Replace Old Bulb or Switch
If you’re replacing an existing light bulb with a smart bulb:
– Unscrew the old bulb from its socket
– Screw in the new smart bulb
– Ensure power is off and locational setting requirements are met if necessary
If you are installing a smart switch:
– Remove the faceplate of the existing switch using a screwdriver
– Carefully disconnect wires attached to the old switch using wire strippers if necessary
– Connect wires from the new smart switch according to manufacturer instructions (typically color-coded)
– Screw the new switch into place
– Install the faceplate on top of the new switch
Step 5: Turn Power Back On
Once the smart light is installed, turn the power back on at the circuit breaker or fuse box.
Step 6: Connect to Wi-Fi
Almost all smart lights require a connection to your home Wi-Fi network for remote control functionality. Follow the manufacturer’s instructions to connect your smart light to the Wi-Fi network.
Step 7: Set Up Your Smart Light Using an App
To control your smart light using your phone or tablet, you’ll need to download and install a compatible app. Follow the manufacturer’s instructions for installing and setting up the app. Once set up, you can use the app to control your smart light, switch it on/off, change colors and brightness, or set schedules for it to turn on and off at specific times.
Step 8: Integrate with Your Smart Home System (Optional)
If you have a smart home hub (such as Amazon Echo, Google Home, or Apple HomeKit), you can integrate your new smart light into this system. Follow the hub’s instructions for adding new devices and selecting compatible devices. Once integrated, you can use voice commands through your hub to control the smart light.
And that’s it! You have successfully installed a smart light in your home. Enjoy the convenience and energy savings that come with this innovative technology. Happy lighting!

