
How to Hook up a Crossover: 11 Steps to Enhanced Audio
Introduction:
A crossover is a valuable tool for any audio system, as it allows you to divide your audio signals into different frequencies, so that they can be directed appropriately to your speakers. By using a crossover in your setup, you can drastically improve the audio quality and ensure that each speaker receives the optimal frequency range it was designed for. In this article, we will guide you through 11 straightforward steps to hook up a crossover to your system.
Step 1: Choose the right crossover
Different types of crossovers – active or passive – are available depending on your setup. Active crossovers require an external power source and work with amplifiers and pre-amplifiers. Passive crossovers do not need an external power source and can be directly connected to speaker terminals. Ensure that you select the appropriate type for your needs.
Step 2: Turn off all devices
Before working on any audio equipment, switch off all devices, including amplifiers and pre-amplifiers, to avoid electrical shock and damage.
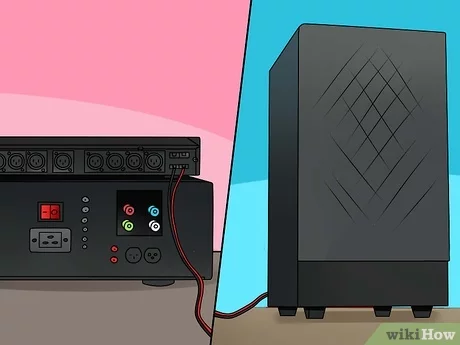
Step 3: Locate input/output ports
On the crossover device, identify the input ports (usually from pre-amplifier or amplifier) and output ports (linked to speakers).
Step 4: Connect input cables
Connect the input cables from your pre-amplifier or amplifier outputs to the corresponding input ports on the crossover. For a typical stereo setup with left and right channels, be sure to connect them accordingly.
Step 5: Adjust crossover settings
Depending on your specific system and speakers, set the crossover points for low-pass and high-pass filters as recommended by the manufacturer.
Step 6: Connect output cables
Now, connect the output cables from each output port on the crossover device to their respective speaker inputs. This typically includes dividing signals for low-frequency woofers (subwoofers), mid-range drivers, and tweeters (high-frequency).
Step 7: Adjust phase controls
Some crossovers and speakers have phase control settings that help synchronize the audio signals for improved clarity. Double-check your documentation for any specific recommendations and adjust accordingly.
Step 8: Test the system
Before securing everything in their final positions, test your setup to ensure all connections are functioning properly. Start with low volume and gradually increase it, listening for any distortion or issues.
Step 9: Fine-tune settings
After initial testing, fine-tune your crossover settings to achieve a seamless blend of frequencies between your various speakers. You may need several iterations of adjustments to find a perfect balance.
Step 10: Check cable connections
Once you have completed the fine-tuning process, double-check all cable connections to ensure they are secure and away from potential damage.
Step 11: Secure and organize cables
Use cable ties or organizers to keep all wires in order, minimizing potential damage or accidental disconnections. Tidy wires also improve the overall aesthetics of your system.
Conclusion:
By following these 11 steps, you should have successfully hooked up a crossover to enhance your audio system’s performance. Enjoy the improved sound quality and a more immersive listening experience.
