
How to Get Rid of a Cut on Your Face
Introduction
A cut on your face can be an unpleasant and embarrassing experience. Whether it’s from a shaving accident, accidental scratch, or even a minor injury, you want to heal the cut as quickly as possible to minimize any pain and potential scarring. In this article, we’ll walk you through several steps that can help you get rid of a facial cut effectively.
Step 1: Clean the Wound
First, it’s essential to clean the wound to prevent infection. Gently rinse the cut with cool water to remove any debris or dirt. You can also use a mild soap or antiseptic wash if needed.
Step 2: Stop the Bleeding
Hold a clean cloth or gauze pad against the cut for a few minutes to stop the bleeding. Maintain gentle pressure until the blood flow subsides. If the bleeding doesn’t stop after about 10 minutes or if the cut is deep, seek medical attention.
Step 3: Apply Antibiotic Ointment
To promote healing and reduce infection risk, apply a thin layer of antibiotic ointment (e.g., Neosporin) on the wound. Make sure you use a cotton swab or freshly washed hands to avoid introducing bacteria to the wound.
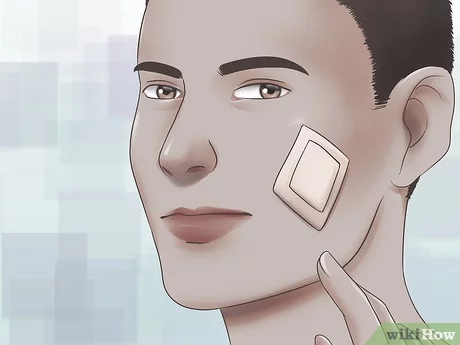
Step 4: Cover with a Bandage
Depending on the size of the cut, you may want to cover it with a small bandage or adhesive strip. This will help protect it from dirt and bacteria while it heals. Change the dressing daily or more frequently if it gets wet or dirty.
Step 5: Keep It Moist
As your cut begins to heal, keeping it moist will help minimize scarring. Continue applying an antibiotic ointment or petroleum jelly (e.g., Vaseline) during this process.
Step 6: Avoid Sun Exposure
While your skin is healing from a facial cut, it may be more sensitive to the sun. Use a broad-spectrum sunscreen (SPF 30+) to protect the area when you go outside. Doing so will also prevent the scar from darkening under sunlight.
Step 7: Consider Over-the-Counter Scar Treatment
Once your cut has healed entirely, consider using an over-the-counter scar treatment, such as silicone sheets, gels, or creams containing ingredients like allantoin or onion bulb extract. These can help reduce the appearance of scars when used regularly as directed.
Step 8: Be Patient
Healing a facial cut takes time, and scars can take several months to a year to fade. Be patient and continue following your aftercare routine for best results.
Conclusion
A facial cut can be an unwelcome surprise, but with proper care and attention, you can minimize its impact on your skin. By following these steps, you can help your wound heal faster and reduce the risk of scarring. Remember to be patient and steadfast in your daily care routine to ensure a smoother healing process.
