The Tech Edvocate

Top Menu

  • Advertisement
  • Apps
  • Home Page
  • Home Page Five (No Sidebar)
  • Home Page Four
  • Home Page Three
  • Home Page Two
  • Home Tech2
  • Icons [No Sidebar]
  • Left Sidbear Page
  • Lynch Educational Consulting
  • My Account
  • My Speaking Page
  • Newsletter Sign Up Confirmation
  • Newsletter Unsubscription
  • Our Brands
  • Page Example
  • Privacy Policy
  • Protected Content
  • Register
  • Request a Product Review
  • Shop
  • Shortcodes Examples
  • Signup
  • Start Here
    • Governance
    • Careers
    • Contact Us
  • Terms and Conditions
  • The Edvocate
  • The Tech Edvocate Product Guide
  • Topics
  • Write For Us
  • Advertise

Main Menu

  • Start Here
    • Our Brands
    • Governance
      • Lynch Educational Consulting, LLC.
      • Dr. Lynch’s Personal Website
      • Careers
    • Write For Us
    • The Tech Edvocate Product Guide
    • Contact Us
    • Books
    • Edupedia
    • Post a Job
    • The Edvocate Podcast
    • Terms and Conditions
    • Privacy Policy
  • Topics
    • Assistive Technology
    • Child Development Tech
    • Early Childhood & K-12 EdTech
    • EdTech Futures
    • EdTech News
    • EdTech Policy & Reform
    • EdTech Startups & Businesses
    • Higher Education EdTech
    • Online Learning & eLearning
    • Parent & Family Tech
    • Personalized Learning
    • Product Reviews
  • Advertise
  • Tech Edvocate Awards
  • The Edvocate
  • Pedagogue
  • School Ratings

logo

The Tech Edvocate

  • Start Here
    • Our Brands
    • Governance
      • Lynch Educational Consulting, LLC.
      • Dr. Lynch’s Personal Website
        • My Speaking Page
      • Careers
    • Write For Us
    • The Tech Edvocate Product Guide
    • Contact Us
    • Books
    • Edupedia
    • Post a Job
    • The Edvocate Podcast
    • Terms and Conditions
    • Privacy Policy
  • Topics
    • Assistive Technology
    • Child Development Tech
    • Early Childhood & K-12 EdTech
    • EdTech Futures
    • EdTech News
    • EdTech Policy & Reform
    • EdTech Startups & Businesses
    • Higher Education EdTech
    • Online Learning & eLearning
    • Parent & Family Tech
    • Personalized Learning
    • Product Reviews
  • Advertise
  • Tech Edvocate Awards
  • The Edvocate
  • Pedagogue
  • School Ratings
  • Unbelievable: This One Ad Sparked Mass Fury — And It’s Not What You Think

  • Urgent: 25,000 Dressers Recalled on Amazon, Wayfair – A Fatal Flaw You Need to Know

  • This Wild AI Startup Feud Is Exposing the Dark Side of Viral Marketing

  • Unbelievable: Judges Just Upheld the Trump Blacklisting of a Major AI Startup

  • The Scandalous PapaSmithy Apology: Why Fans Are Still Furious About FlyQuest’s Controversial Video

  • Macau Gaming Dispute Escalates to Classroom Knife Attack: A Troubling Warning

  • School Surveys & Student Privacy: A Parent Guide for 2026

  • The Billion-Dollar Blunder: Why AI Detection Software Is Failing Our Students

  • China’s 5-Minute EV Charge: The Staggering Truth America Ignores

  • This Astonishing Nikon AI Controversy Exposes Science’s New Frontier

Digital & Mobile Technology
Home›Digital & Mobile Technology›How to Generate SSH Keys in Windows 11

How to Generate SSH Keys in Windows 11
By Matthew Lynch
May 28, 2023
0
Spread the love

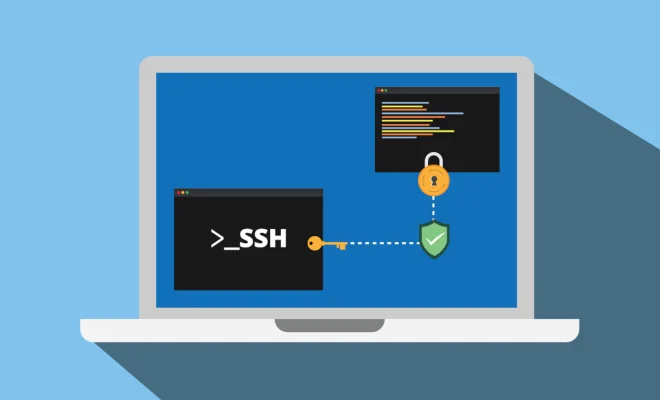
Secure Shell (SSH) is a cryptographic network protocol that enables secure communication and remote access over an unsecured network. SSH keys are a set of security credentials used to establish a secure connection between two computers using the SSH protocol. In this article, we will show you how to generate SSH keys in Windows 11.

Step 1: Download and Install OpenSSH

Before we can generate SSH keys on a Windows 11 computer, we need to ensure that we have installed OpenSSH. OpenSSH is a free and open source SSH client and server that is used to manage remote machines securely. To download and install OpenSSH on your Windows 11 computer, follow these steps:

1. Open the Windows Start menu and search for “PowerShell” in the search bar.

2. Right-click on PowerShell and select “Run as Administrator.”

3. In the PowerShell window, type in the following command and press Enter:

Get-WindowsCapability -Online | ? Name -like ‘OpenSSH.Client*’

4. This command will check if OpenSSH is already installed on your computer. If it is not installed, type the following command to install it:

Add-WindowsCapability -Online -Name OpenSSH.Client~~~~0.0.1.0

5. Wait for the installation to finish, and then close the PowerShell window.

Step 2: Generate SSH Keys

Now that we have installed OpenSSH, we can generate our SSH keys. To generate SSH keys on a Windows 11 computer, follow these steps:

1. Open the Windows Start menu and search for “PowerShell” in the search bar.

2. Right-click on PowerShell and select “Run as Administrator.”

3. In the PowerShell window, type in the following command and press Enter:

ssh-keygen.exe -t rsa

4. This command will generate a 2048-bit RSA encryption key, which is the default key type. However, you can also specify different options if you need a different type of key.

5. You will then be prompted to enter a file name to save the key pair to. The default file name is id_rsa, but you can use any file name that you like.

6. You will also be prompted to enter a passphrase for your key. A passphrase is like a password, but it is longer and more secure. It is used to protect your private key from unauthorized access.

7. After entering your passphrase, the key pair will be generated and saved to the file that you specified.

Step 3: Copy and Install Public Key

Now that we have generated our SSH keys, we need to copy the public key to the remote server that we want to connect to. To do this, follow these steps:

1. Open the Windows Start menu and search for “Notepad” in the search bar.

2. Right-click on Notepad and select “Run as Administrator.”

3. In Notepad, open the file that you saved your public key to. The default file name for the public key is id_rsa.pub.

4. Select the entire contents of the public key file and copy it to your clipboard.

5. Connect to the remote server that you want to connect to using SSH.

6. When prompted for a password, paste your public key into the appropriate field.

7. The remote server will then install your public key and allow you to connect to it using SSH without a password.

Conclusion

Generating SSH keys in Windows 11 is a straightforward process that involves installing OpenSSH and using the ssh-keygen command to generate a key pair. SSH keys provide enhanced security and make it easier to manage remote servers securely. By following the steps outlined in this article, you can generate SSH keys and connect to remote servers using SSH in Windows 11.

Previous Article

How to Forward Calls on Android

Next Article

How to Further Compress Zip Files

Matthew Lynch

Related articles More from author

  • Digital & Mobile Technology

    What Is a GBA File?

    June 4, 2023
    By Matthew Lynch
  • Digital & Mobile Technology

    Sony’s Official (PlayStation 3) PS3 Launch Titles List

    June 9, 2023
    By Matthew Lynch
  • Digital & Mobile Technology

    How to Scan a Document in Windows 11

    May 7, 2023
    By Matthew Lynch
  • Digital & Mobile Technology

    The Ultimate List of Helpful Windows Alt Codes to Insert Special Characters

    June 8, 2023
    By Matthew Lynch
  • Digital & Mobile Technology

    Star Trek vs. Star Wars: Which Is More Technologically Advanced

    July 31, 2023
    By Matthew Lynch
  • Digital & Mobile Technology

    Can You Buy Bitcoins Anonymously With a Credit Card?

    June 23, 2023
    By Matthew Lynch

Search

Login & Registration

  • Log in
  • Entries feed
  • Comments feed
  • WordPress.org

Newsletter

Signup for The Tech Edvocate Newsletter and have the latest in EdTech news and opinion delivered to your email address!

About Us

Since technology is not going anywhere and does more good than harm, adapting is the best course of action. That is where The Tech Edvocate comes in. We plan to cover the PreK-12 and Higher Education EdTech sectors and provide our readers with the latest news and opinion on the subject. From time to time, I will invite other voices to weigh in on important issues in EdTech. We hope to provide a well-rounded, multi-faceted look at the past, present, the future of EdTech in the US and internationally.

We started this journey back in June 2016, and we plan to continue it for many more years to come. I hope that you will join us in this discussion of the past, present and future of EdTech and lend your own insight to the issues that are discussed.

Newsletter

Signup for The Tech Edvocate Newsletter and have the latest in EdTech news and opinion delivered to your email address!

Contact Us

The Tech Edvocate
910 Goddin Street
Richmond, VA 23231
(601) 630-5238
[email protected]

Copyright © 2026 Matthew Lynch. All rights reserved.