How to Dry Acorns for Crafts: 8-Steps

Introduction:
Acorns are more than just nature’s bounty for squirrels; they can also be a wonderful inspiration for crafts. Dried acorns have numerous uses in decorations, ornaments, and even jewelry. Before you can use them for your creative endeavors, though, it’s essential to dry them properly to prevent any mold or insect infestations. Follow these simple steps to learn how to dry acorns for crafts.
1. Gather Acorns:
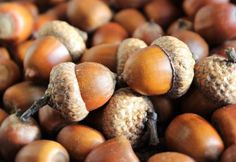
The first step is to collect the acorns you will use for your projects. Look for mature acorns that have fallen from oak trees, ideally ones with intact caps. Avoid any that are cracked or show signs of insect damage.
2. Clean the Acorns:
Rinse the collected acorns thoroughly with water to remove any dirt and debris. Make sure caps are securely attached. If necessary, you can use small dabs of hot glue to reattach loose caps.
3. Boil the Acorns:
Fill a large pot with water and bring it to a boil. Add the cleaned acorns and let them simmer for approximately 10 minutes. Boiling the acorns helps eliminate any insects and their eggs that may be hiding inside.
4. Dry the Acorns:
Remove the acorns from the boiling water with a slotted spoon and spread them out on a towel in a single layer. Use another towel to gently blot away any excess water.
5. Preheat Your Oven:
Set your oven at its lowest temperature setting, typically between 150°F and 200°F (65°C–93°C).
6. Arrange Acorns on a Baking Sheet:
Line a baking sheet with parchment paper or aluminum foil and arrange the boiled acorns in a single layer, ensuring they don’t touch each other.
7. Bake the Acorns:
Place the baking sheet in your preheated oven, leaving the door slightly ajar to allow moisture to escape. Slowly dry the acorns for approximately 2-3 hours or until they no longer feel damp to touch. Make sure to check on the acorns periodically to avoid over-drying or burning them.
8. Let Them Cool and Store:
Once the acorns are fully dried, remove them from the oven and let them cool completely. Store them in a cool, dark place in an airtight container until you’re ready to use them for your crafts.
Conclusion:
Drying acorns for crafts may seem like an elaborate process, but it’s a necessary step to ensure their longevity and prevent any issues with mold or insects. By following these eight straightforward steps, you’ll have a beautiful collection of dried acorns, ready for your creative projects!


