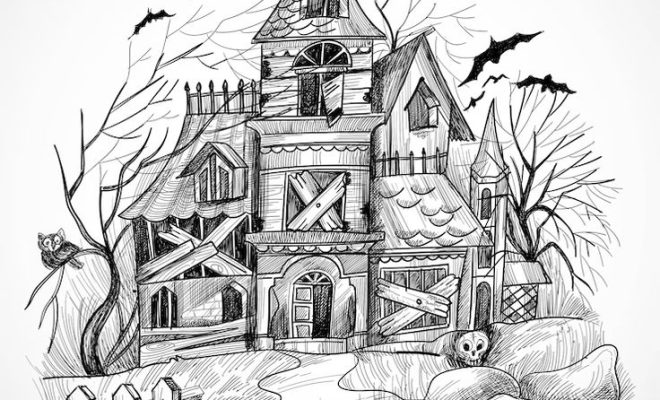
How to Draw a Haunted House: 15 Steps
Step 1: Gather materials
To begin, gather all the necessary materials such as paper, pencils (preferably with softer leads like 2B or 4B), an eraser, and a ruler.
Step 2: Sketch the basic shape
Draw a large rectangle for the overall shape of the haunted house. This will serve as the foundation for your design.
Step 3: Establish perspective lines
Using a ruler, draw two diagonal lines extending outward from the bottom corners of the rectangle. These lines will be your perspective guides.
Step 4: Add another rectangle for the roof
At the top of your first rectangle, draw another rectangle to represent the roof. Make sure it aligns with the edge of the first rectangle.
Step 5: Draw the roof panels
Create two triangular panels by connecting the top corner of one side of your second rectangle to its opposite bottom corner. Repeat on each side.
Step 6: Add a front door
On your main structure, sketch an arched doorway in the center along with a slightly eerie and intricately designed door.
Step 7: Create windows
Add windows at various sizes and shapes around your haunted house. You can include shutters or broken glass for added spookiness.
Step 8: Enhance details
Include details such as cracks and weathering on the walls, roof tiles, wooden planks, brickwork texture, and creepy vines crawling up the side of your house. Be creative!
Step 9: Add a front porch
Design a gloomy front porch with crooked wooden railings. Extend it halfway around your house’s front for an eerie feel.
Step 10: Add stairs leading to the front door
Draw broken or distorted steps leading up to the front door, suggesting age and decay.
Step 11: Sketch additional spooky elements
Add classic Halloween elements, such as a gnarled old tree, tombstones, or a rickety fence surrounding the haunted house.
Step 12: Create shadows and depth
Using your pencil, add shading and shadows to create a sense of depth in your drawing. Make sure the light source is consistent.
Step 13: Add more texture
To further enhance your drawing, add more textures like peeling paint and creepy cobwebs throughout the house.
Step 14: Create ghosts or other supernatural elements
Draw the silhouette of ghostly figures lurking in or around the house to increase its haunted vibe.
Step 15: Final touches
Clean up your sketch with an eraser and intensify any shading or lines. Find areas that need additional details and complete them. Sign your drawing and be proud of your haunted house creation!
In conclusion, creating a fantastic drawing of a haunted house involes incorporating various elements such as textures, perspective lines, shadows, and eerie details. With practice, you’ll be able to create an impressive piece that captures the spooky essence of a haunted house. Happy drawing!