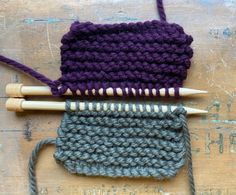
How to Do Kitchener Stitch or Grafting

The Kitchener stitch, also known as grafting, is an essential knitting technique used for seamlessly joining two pieces of knitting. Perfect for closing up the toes of socks or joining the edges of a scarf without a noticeable seam, the Kitchener stitch offers a polished look to your finished projects. Mastering this stitch can elevate your knitting skills and make your handmade garments look more professional and polished. Here’s a comprehensive guide on how to do the Kitchener stitch or grafting.
Step-by-Step Guide to Kitchener Stitch
You’ll need:
1. Two sets of live stitches on knitting needles, with an equal number of stitches on each needle.
2. A tapestry needle with a length of yarn/thread.
Procedure:
Hold the two knitting needles with live stitches parallel to each other, ensuring that the working yarn is on the right side of the rear needle.
1. Thread the tapestry needle with a generous length of working yarn, keeping in mind that this will be used to graft the stitches together.
2. Begin by inserting the tapestry needle purlwise (from right to left) through the first stitch on the front needle but do not remove it from the knitting needle.
3. Next, insert the tapestry needle knitwise (from left to right) through the first stitch on the back needle without removing it as well.
4. Following this, insert your tapestry needle knitwise into that initial front stitch again and slip it off the knitting needle.
5. Now go through the next stitch on your front knitting needle purlwise but do not remove it from the knitting needle.
6. Proceed to insert your tapestry needle purlwise into the initial back stitch you had inserted initially knitwise, then slip it off the back sewing needle.
7. Finally, insert your tapestry needle knitwise into the next stitch on your back knitting needle without removing it from the knitting needle.
8. Repeat steps 5-8 until all stitches have been worked. Be mindful to maintain even tension while grafting, and periodically adjust the tension to match your knitting stitches for a seamless look.
9. Finish your Kitchener stitch by pulling the yarn through the last pair of stitches and weaving in the tail on the wrong side of your project.
Helpful Tips and Tricks:
– Practice the Kitchener stitch on scrap yarn or simple patterns before attempting it on more intricate projects.
– Using a brightly colored contrasting yarn when practicing can aid in understanding each step clearly.
– Always adjust tension as you go. This helps create a seamless appearance to your grafting.
Final Thoughts:
Mastering the Kitchener stitch or grafting is a valuable skill to add to your knitting repertoire. Take your time with each step, and practice on scrap yarn until you feel confident in its execution. With patience and determination, your hand-knit projects will soon dazzle with professional-looking finishes made possible by the artful use of Kitchener stitch.


