How to Dig for Clams

Clam digging, also known as clamming, is a fun and rewarding activity that people of all ages can enjoy. It allows you to connect with nature while harvesting your own fresh seafood for a delicious meal. Follow these simple steps to learn how to dig for clams and start your clamming adventure.
1. Know the location
The first step to successful clam digging is finding an area where clams are present. Research popular clamming spots in your region or consult local fishermen for suggestions. A good spot will usually have sandy or muddy ground near the water’s edge.
2. Check the regulations
Before heading out, familiarize yourself with local regulations, such as licenses, catch limits, size restrictions, and harvesting seasons. This information can typically be found on regional fish and wildlife websites or through local authorities.
3. Choose the right tide
Clamming is best done during low tide when the ocean floor is exposed. Consult tide charts or marine forecast apps to find the ideal time to go clamming. Remember that clams are more likely to be found during a negative (extra low) tide.
4. Gather your equipment
Common tools used for clam digging are a clam rake, shovel, or specialized clamming gun (a PVC pipe with handles). You’ll also need a container or mesh bag to store your catch and some gloves to protect your hands.
5. Identify signs of clams
Once at the beach, look for telltale signs of clams’ presence – small holes or indents in the sand known as “shows” or “clam spouts.” You may also see air bubbles escaping from the hole when water washes over it.
6. Start digging
Approach the hole carefully so as not to scare the clam away. If using a shovel or rake, gently insert it into the ground about 4-6 inches away from the hole, and start digging. If using a clam gun, place it over the hole and push it into the ground. Seal the edges with your foot to create suction and slowly lift the gun, extracting a column of sand.
7. Locate the clam
Check the extracted sand or soil for clams. Gently remove them by hand, ensuring not to break their shells. Place them in your container or mesh bag.
8. Mind your surroundings
Always be aware of your surroundings and the changing tides. Never venture too far from shore without a clear understanding of local conditions and weather patterns.
9. Clean and store your catch
Once you’ve finished digging, thoroughly rinse your clams to remove sand and grit. Store them in a cool, well-ventilated area until you’re ready to cook or transport them home.
10. Enjoy your harvest
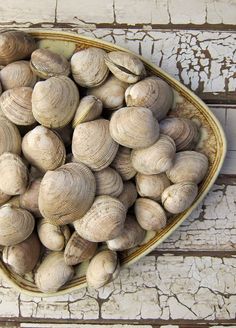
Clams can be prepared in various ways – steamed, fried, baked, or included in chowder recipes. Take pride in knowing that you’ve successfully harvested your own delectable seafood treat.
With these simple steps in mind, you’re now ready to embark on your clam digging adventure. As you gain experience and hone your skills, clamming will become an enjoyable pastime that provides endless opportunities for outdoor fun and delicious culinary rewards. Happy clamming!


