How to Crochet a Bag Easily
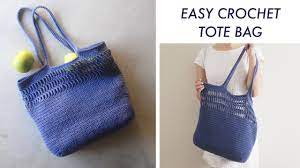
Crocheting a bag is a fun and rewarding project suitable for beginners and experienced crafters alike. With just a few tools, materials, and basic stitches, you can create a beautiful, functional bag to carry your belongings in style. In this article, we’ll walk you through the simple steps to crochet a bag easily.
Materials you’ll need:
1. Yarn (preferably cotton or any medium-weight yarn)
2. A crochet hook appropriate for your yarn (check the label for recommended size)
3. Scissors
4. Stitch markers
5. A yarn needle for weaving in ends
Step 1: Choose your pattern and yarn
Select a pattern that suits your skill level and desired bag shape. If you’re new to crocheting, picking a simple pattern with basic stitches will make it easy to follow along and complete your project. Opt for a durable yarn like cotton, which will produce a sturdy and easy-to-care-for bag.
Step 2: Begin with the base of the bag
Depending on your pattern, start by making a foundation chain or working in rounds to create the base of the bag. The base provides stability and support for your finished item, so follow the pattern’s recommendations closely.
Step 3: Work on the body of the bag
Once you’ve completed the base, now it’s time to work on the body of the bag. This is typically done by working in rows or rounds using a combination of basic crochet stitches such as single crochet (sc), double crochet (dc), or half double crochet (hdc). Follow your pattern’s instructions carefully to ensure you maintain consistent stitch counts throughout.
If desired, add some variety to your bag’s design by using different stitch patterns or incorporating stripes with multiple yarn colors.
Step 4: Shape the top edge and create handles
Upon reaching the desired height of your bag, you may need to shape the top edge to provide a clean, finished look. This is typically achieved by working a row of slip stitches or a simple border. To create the handles, follow your pattern’s instructions for crocheting the desired handle length and attaching them securely to the bag. You may opt for short, easy-to-hold handles or longer ones if you prefer to wear your bag on your shoulder.
Step 5: Finishing touches
Now that you’ve completed crocheting your bag, it’s time to take care of any loose ends and give your creation a polished look. Use a yarn needle to weave in all remaining yarn tails. If necessary, give your bag a gentle blocking treatment by dampening it with water and laying it flat to dry in the desired shape.
Congratulations! You have now successfully crocheted a bag that is not only stylish but practical as well. With practice and patience, you’ll soon find yourself creating numerous variations of bags perfect for gifting or expanding your own collection. Enjoy your new handmade accessory!