How to Cover a Subwoofer Box

Introduction:
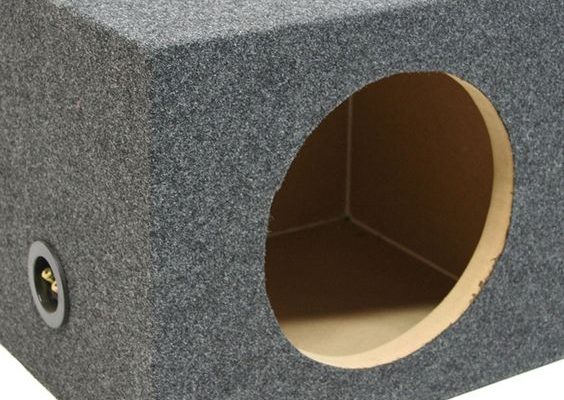
A custom subwoofer box can add a stylish and personal touch to your vehicle’s audio system, as well as improve the performance of the subwoofer itself. One crucial step in constructing your subwoofer box is covering it with an appropriate material not only to enhance its aesthetics but also provide protection against wear and external factors. This article will walk you through the process of covering a subwoofer box effectively.
Materials needed:
1.Subwoofer box
2.Fabric or vinyl/carpet to cover the box (preferably automotive-grade material)
3.Quality adhesive (spray or brush-on)
4.Measuring tape and a pencil
5.Sharp scissors or utility knife
6.Staple gun or strong glue for edges
Step-by-Step Guide:
1.Choose the right material:
The first step is to decide on the type of material you want to use for covering your subwoofer box. The most common options include fabric, vinyl, or carpet, with carpet being the most popular due to its durability and ease of handling.
2.Measure and cut the material:
Using measuring tape and a pencil, carefully measure each side of your subwoofer box (height,width & lenght). Once you have the measurements, lay the fabric or carpet flat on the ground, draw out the necessary dimensions for each side with appropriate seam allowances (allowing additional 2-3 inches on each side for fold-over), and then cut out the pieces using sharp scissors or a utility knife.
3.Clean and prepare the surface:
Wipe down and clean your subwoofer box’s surface to ensure there are no dirt, dust, or debris particles that may cause adhesion problems during application.
4.Apply adhesive and attach the material:
Lay out one piece of your chosen material on a flat work area, making sure that it matches the dimensions of the corresponding side of your subwoofer box. Apply adhesive evenly across the surface of the box, ensuring full coverage without over-saturating it. Carefully place and press the material onto the adhesive-covered surface, smoothing it down to prevent any air bubbles or wrinkles. Repeat this process for each side of your subwoofer box.
5.Secure edges and trim excess material:
Fold over any excess material around the edges of your subwoofer box and secure it in place using a staple gun or strong glue. Trim away any remaining excess material with a pair of scissors or utility knife to create a clean finish.
6.Final touches:
Inspect your newly covered subwoofer box, making sure that all seams and corners are neatly secured and that there are no visible imperfections.
Conclusion:
Covering a subwoofer box can improve its appearance, give it a personalized touch, and add protection against external factors. By following the steps outlined in this article, you can effectively cover your subwoofer box and elevate your car audio setup’s aesthetics to the next level. Enjoy your new custom look and improved audio performance!


