The Tech Edvocate

Top Menu

  • Advertisement
  • Apps
  • Home Page
  • Home Page Five (No Sidebar)
  • Home Page Four
  • Home Page Three
  • Home Page Two
  • Home Tech2
  • Icons [No Sidebar]
  • Left Sidbear Page
  • Lynch Educational Consulting
  • My Account
  • My Speaking Page
  • Newsletter Sign Up Confirmation
  • Newsletter Unsubscription
  • Our Brands
  • Page Example
  • Privacy Policy
  • Protected Content
  • Register
  • Request a Product Review
  • Shop
  • Shortcodes Examples
  • Signup
  • Start Here
    • Governance
    • Careers
    • Contact Us
  • Terms and Conditions
  • The Edvocate
  • The Tech Edvocate Product Guide
  • Topics
  • Write For Us
  • Advertise

Main Menu

  • Start Here
    • Our Brands
    • Governance
      • Lynch Educational Consulting, LLC.
      • Dr. Lynch’s Personal Website
      • Careers
    • Write For Us
    • The Tech Edvocate Product Guide
    • Contact Us
    • Books
    • Edupedia
    • Post a Job
    • The Edvocate Podcast
    • Terms and Conditions
    • Privacy Policy
  • Topics
    • Assistive Technology
    • Child Development Tech
    • Early Childhood & K-12 EdTech
    • EdTech Futures
    • EdTech News
    • EdTech Policy & Reform
    • EdTech Startups & Businesses
    • Higher Education EdTech
    • Online Learning & eLearning
    • Parent & Family Tech
    • Personalized Learning
    • Product Reviews
  • Advertise
  • Tech Edvocate Awards
  • The Edvocate
  • Pedagogue
  • School Ratings

logo

The Tech Edvocate

  • Start Here
    • Our Brands
    • Governance
      • Lynch Educational Consulting, LLC.
      • Dr. Lynch’s Personal Website
        • My Speaking Page
      • Careers
    • Write For Us
    • The Tech Edvocate Product Guide
    • Contact Us
    • Books
    • Edupedia
    • Post a Job
    • The Edvocate Podcast
    • Terms and Conditions
    • Privacy Policy
  • Topics
    • Assistive Technology
    • Child Development Tech
    • Early Childhood & K-12 EdTech
    • EdTech Futures
    • EdTech News
    • EdTech Policy & Reform
    • EdTech Startups & Businesses
    • Higher Education EdTech
    • Online Learning & eLearning
    • Parent & Family Tech
    • Personalized Learning
    • Product Reviews
  • Advertise
  • Tech Edvocate Awards
  • The Edvocate
  • Pedagogue
  • School Ratings
  • A Visitors Guide to Jacksonville (FL), United States

  • The Classic Style of Brooks Brothers Shirts

  • Why Tech and Gaming Enthusiasts Should Jump on Nex Playground’s October Prime Day Deals

  • The Science Behind CrossFit Training

  • A Visitors Guide to Nova Iguaçu, Brazil

  • Product Review: Levoit LVAC-300 – The Self-Emptying Cordless Wonder

  • Philips Norelco OneBlade Hybrid Electric Trimmer

  • Remington PG6025 All-in-1 Lithium Powered Grooming Kit

  • Remington HC4250 Shortcut Pro

  • Wahl Professional 5-Star Magic Clip

Assistive Technology
Home›Assistive Technology›How to Change iTunes Backup Location on Windows 10
How to Change iTunes Backup Location on Windows 10

By Matthew Lynch
June 12, 2023
0
Spread the love

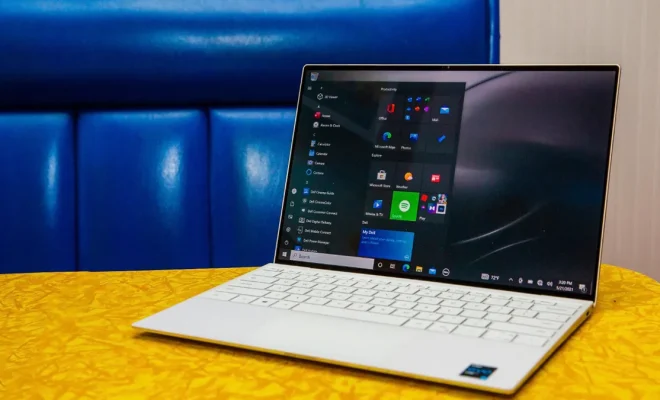
If you’re an enthusiastic iPhone or iPad user, you’re probably backing up your device regularly. When you back up your iOS devices to iTunes on your Windows 10 PC, the backups are usually stored in the default location set by iTunes. However, sometimes you may want to change iTunes backup location on Windows 10 due to several reasons. You may want to move the backups to an external hard drive or backup partition to free up space on your primary drive or save the backups in a separate folder to keep things organized. Whatever your reason, here’s how to change your iTunes backup location on Windows 10.

Step 1: First, locate your iTunes backup folder.

By default, iTunes saves your iPhone and iPad backups in the following locations:

C:\Users\Your User Name\AppData\Roaming\Apple Computer\MobileSync\Backup\

Alternatively, you can head over to the iTunes Preferences panel to see the default backup path or change the location of your backups.

Step 2: Choose your new iTunes backup folder location.

Before you can change the backup location, you need to decide where you want to store the backups. You can create a new folder for backups on another drive, such as an external hard drive, or use an existing folder.

Step 3: Create a new folder if necessary.

If you’ve decided to use a new folder for backups, now is the time to create one. Right-click an empty space on your desktop, hover over “New,” and select “Folder.” Enter a name for your new folder and press the Enter key.

Step 4: Copy the current iTunes backup folder to the new location.

Now that you’ve picked the new backup folder location, it’s time to move the current iTunes backup folder to the new location. To do this, navigate to the current backup folder location (step 1 above), copy it to a clipboard (select the folder and press “Ctrl + C” on your keyboard), then navigate to the new backup folder location (step 2 above) and paste the backup folder (press “Ctrl + V” on your keyboard) into the new location.

Step 5: Open the Command Prompt as an administrator.

You’ll need to use the Command Prompt with administrator-level privileges to change the iTunes backup folder location. To do this, click on the Start menu, search for “Command Prompt,” right-click on it, and select “Run as Administrator.”

Step 6: Create a symbolic link to the new iTunes backup folder location.

Once you’ve opened the Command Prompt window as an administrator, it’s time to create a symbolic link to the new backup folder location. To do this, enter the following command in the Command Prompt window:

mklink /J “C:\Users\Your User Name\Appdata\Roaming\Apple Computer\MobileSync\Backup” “the location of your new folder”

Be sure to replace the second part of the command with the actual location of your new backup folder. For example, if you have created a folder named “iTunes_Backup,” and saved it on drive D:\, the command should look like this:

mklink /J “C:\Users\Your User Name\AppData\Roaming\Apple Computer\MobileSync\Backup” “D:\iTunes_Backup”

Step 7: Verify the new iTunes backup folder location is working.

To ensure that everything is working correctly, open iTunes and check whether it’s backing up your iPhone or iPad. To check the new location of the backups, click on “Edit” from the top menu and select “Preferences.” In the “Devices” tab under “Device Backup Folder,” you should see the link to your new iTunes backup folder location.

In conclusion, changing the default iTunes backup folder location on Windows 10 isn’t as difficult as it may seem. By following the steps in this article, you can customize the backup location as per your convenience and free up space on your primary drive. It’s always a good idea to back up your iPhone or iPad regularly, and by changing the default backup folder to a more spacious location, you can always be assured of having enough space for important data.

Previous Article

Can Your Netflix Account Get Hacked?

Next Article

The Best YouTube Channels to Learn About ...

Matthew Lynch

Related articles More from author

  • Assistive Technology

    How to Edit PDFs in iPhone (or iPad)

    June 6, 2023
    By Matthew Lynch
  • Assistive Technology

    How to Stream Netflix From Phone to TV

    June 11, 2023
    By Matthew Lynch
  • Assistive Technology

    How to Fix Registry Errors on Windows 11

    June 10, 2023
    By Matthew Lynch
  • Assistive Technology

    How to Fix Firefox’s Connection Reset Error

    September 7, 2023
    By Matthew Lynch
  • Assistive Technology

    How to Fix the Remote Desktop Can’t Connect to the Remote Computer Error

    June 6, 2023
    By Matthew Lynch
  • Assistive Technology

    How to Make a Scatter Plot in Excel and Present Your Data

    June 14, 2023
    By Matthew Lynch

Search

Login & Registration

  • Register
  • Log in
  • Entries feed
  • Comments feed
  • WordPress.org

Newsletter

Signup for The Tech Edvocate Newsletter and have the latest in EdTech news and opinion delivered to your email address!

About Us

Since technology is not going anywhere and does more good than harm, adapting is the best course of action. That is where The Tech Edvocate comes in. We plan to cover the PreK-12 and Higher Education EdTech sectors and provide our readers with the latest news and opinion on the subject. From time to time, I will invite other voices to weigh in on important issues in EdTech. We hope to provide a well-rounded, multi-faceted look at the past, present, the future of EdTech in the US and internationally.

We started this journey back in June 2016, and we plan to continue it for many more years to come. I hope that you will join us in this discussion of the past, present and future of EdTech and lend your own insight to the issues that are discussed.

Newsletter

Signup for The Tech Edvocate Newsletter and have the latest in EdTech news and opinion delivered to your email address!

Contact Us

The Tech Edvocate
910 Goddin Street
Richmond, VA 23231
(601) 630-5238
[email protected]

Copyright © 2025 Matthew Lynch. All rights reserved.