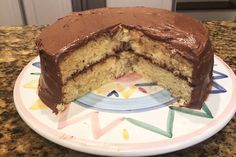
How to Bake a Cake on a Grill: 13 Steps

Baking a cake on a grill might sound unconventional, but it’s surprisingly easy and satisfying! With just a few tweaks to your usual cake baking routine, you can turn your backyard grill into a makeshift oven and whip up deliciously moist and tender cakes. Here’s how to bake a cake on a grill in 13 simple steps:
1. Choose the right grill: A gas or charcoal grill with a lid is essential for baking your cake. The lid allows for even heat distribution and better temperature control.
2. Clean your grill: Before getting started, ensure that your grill grates are clean to avoid any residue or debris from transferring onto your cake.
3. Select a suitable baking pan: To withstand the intense heat of the grill, use a heavy-duty, oven-safe baking pan made of materials like cast iron or thick aluminum.
4. Preheat the grill: Preheat your grill to around 350°F (175°C), adjusting as needed to maintain this temperature throughout the cooking process.
5. Prepare your cake batter: Make your favorite cake recipe just as you would if you were baking it in an oven.
6. Grease the baking pan: Liberally greasing the pan is important for easy removal of the finished cake. Use non-stick cooking spray, butter, or oil depending on your recipe’s requirements.
7. Pour the batter into the pan: Carefully transfer your prepared cake batter into the well-greased baking pan
8. Create indirect heat: Place an oven-safe metal container filled with water on one side of the grill to create indirect heat and avoid burning the bottom of your cake.
9. Place the pan on the grill grate: Set your filled cake pan onto the grill grate opposite from where you placed the container filled with water.
10. Close the lid and monitor temperature: Close the lid of your grill and maintain a temperature of around 350°F (175°C) as evenly as possible.
11. Check for doneness: After around 30 to 45 minutes, start checking your cake for doneness by inserting a toothpick or thin knife into the center. If it comes out clean or with just a few crumbs, the cake is done.
12. Remove and cool: Once your cake is fully baked, carefully remove it from the grill using oven mitts and let it cool in the pan for around 10 minutes before transferring it to a wire rack.
13. Finish and serve: Once completely cooled, decorate your cake with icing, whipped cream, fresh fruit, or other tasty toppings before slicing and enjoying!
With these 13 steps, you can easily convert your backyard grill into an unconventional oven for baking unique and flavorful cakes. Just remember to keep an eye on the temperature and make any necessary adjustments along the way to ensure a properly baked cake that will impress your friends and family. Happy grilling!


