Apply Press-On Nails Like a Pro: Your Ultimate Guide
“`html
Press on nails have become a beauty staple for those looking to achieve a salon-quality manicure at home, and for good reason. Not only are they user-friendly, but they also provide a quick and cost-effective way to switch up your nail game without the commitment of traditional acrylics or gels. If you’ve been wondering how to apply press on nails like a pro, you’ve come to the right place. This comprehensive guide will cover everything from preparation to maintenance, ensuring that your nails look fabulous for as long as possible.
1. Understanding Press On Nails
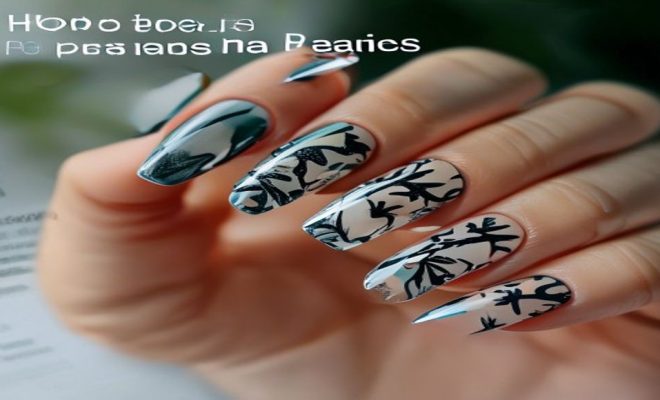
Press on nails are artificial nails that can be adhered to your natural nails to create a polished look. They come in various shapes, sizes, and designs, ranging from classic French tips to intricate nail art. The major appeal of press on nails lies in their convenience; they can be applied at home in a matter of minutes, making them ideal for anyone short on time or funds.
Historically, press on nails have evolved significantly from their early iterations, which were often rigid and lacked the variety we see today. Modern versions are typically made from flexible materials that provide a more natural appearance and a more comfortable fit. With advancements in design and adhesive technology, they’re now easier than ever to apply and remove.
2. Gathering Your Supplies
Before you dive into the application process, it’s essential to gather all necessary supplies. Here’s a quick list of what you’ll need:
- Press on nails
- Nail glue or adhesive tabs
- Nail file
- Nail clipper
- Cotton balls and acetone (for cleanup)
- Cuticle pusher
- Alcohol wipes
- Buffer
Having all your supplies ready not only streamlines the process but also helps ensure that you achieve the best results. Quality matters, so opt for reputable brands to avoid any surprises.
3. Preparing Your Natural Nails
Effective preparation is key to a long-lasting press on manicure. Start by removing any existing nail polish. Use acetone-soaked cotton balls to clean off any residue. Once your nails are polish-free, wash your hands thoroughly to eliminate oils and dirt.
Next, trim and file your natural nails to your desired length and shape. Remember, the press on nails will only adhere properly if your natural nails are neat and smooth. Use a cuticle pusher to push back your cuticles gently, but avoid cutting them, as this can lead to infection. Buff the surface of your nails lightly to create a rougher texture for the adhesive to grip onto.
4. Choosing the Right Size
Press on nails typically come in a variety of sizes to fit different nail shapes. It’s crucial to select the right size for each finger to ensure a natural look. Most press on nail kits include a size guide or a variety of sizes to choose from.
To find the perfect fit, place the press on nail over your natural nail. If it extends beyond the sides of your nail, opt for a smaller size. Remember, a snug fit is essential for longevity, so don’t rush this step. You may even want to take a moment to file the sides of the press on nails if they’re slightly too wide.
5. Applying the Press On Nails
Now comes the fun part: application. Start by selecting the correct nail size for each finger and lining them up in the order you’ll apply them. If you’re using nail glue, apply a small amount to the back of the press on nail and the tip of your natural nail. If you prefer using adhesive tabs, stick them onto the press on nails instead. (See: Press-on nails and nail health.)
Align the press on nail with your cuticle, then press down firmly for about 10 seconds. This helps ensure that the adhesive bonds well. Repeat this process for each nail, moving from pinky to thumb or vice versa. It’s best to work quickly but carefully to achieve the best bond possible.
6. Finishing Touches
After applying all of your press on nails, check for any excess adhesive around the edges. Use a nail file to smooth out any rough spots or to shape the tips if necessary. You can also apply a top coat for added shine and durability, although this step is optional.
To keep your press on nails looking fresh, consider applying a cuticle oil around the edges. This will not only nourish your cuticles but also give your nails a polished appearance. If you’re going for a particularly elaborate look, you could also add nail art or designs on top of your press on nails.
7. Maintaining Your Press On Nails
To keep your press on nails looking flawless, it’s essential to treat them with care. Avoid activities that may put excessive pressure on your nails, such as opening cans or doing any heavy lifting. If you notice any lifting at the edges, you can apply more glue to those areas.
While press on nails are designed for temporary wear, they can last anywhere from a few days to a couple of weeks depending on the quality of the product and how well you care for them. Regularly applying cuticle oil and avoiding water exposure for prolonged periods will help prolong their lifespan.
8. How to Remove Press On Nails
When you’re ready to remove your press on nails, it’s best to do so gently to avoid damaging your natural nails. Start by soaking a cotton ball in acetone and placing it on each nail for a few minutes. This will help dissolve the adhesive. You can then gently pry the edges of the press on nails using a cuticle pusher.
If you experience any resistance while lifting the press on nails, don’t force them off; instead, repeat the soaking process. Once you’ve removed all the nails, wash your hands and apply a nourishing cuticle oil to help revive your natural nails.
9. Current Trends in Press On Nails
In recent years, press on nails have seen a renaissance, with brands launching innovative designs that cater to various tastes and preferences. From minimalist styles to bold, artistic designs, there’s something for everyone. Additionally, companies are now producing press on nails that are more eco-friendly, appealing to the growing consumer demand for sustainability.
Social media platforms like Instagram and TikTok have propelled the popularity of press on nails, with influencers showcasing their unique designs and application techniques. This exposure has led to a burgeoning DIY culture around nail care, which is only expected to grow.
10. Common Mistakes to Avoid When Applying Press On Nails
Even though applying press on nails is simple, it’s easy to make a few common mistakes that could affect their longevity and appearance. Here are some pitfalls to watch out for:
- Skipping Preparation: Not properly preparing your natural nails can result in poor adhesion and a shorter wear time.
- Ignoring Size: Choosing the wrong size can lead to an awkward or uncomfortable fit. Always take the time to find the right size for a seamless look.
- Using Too Much Glue: While a good adhesion is important, using too much glue can cause a mess and may not necessarily lead to a better hold.
- Neglecting Maintenance: Failing to care for your press on nails can lead to lifting and chipping. Regularly apply cuticle oil and avoid excessive water exposure.
11. Expert Tips for a Flawless Look
To take your press on nails to the next level, consider these expert tips: (See: CDC guidelines for nail salons.)
- Choose Quality Products: Invest in a good quality set of press on nails and adhesive. High-quality products often last longer and look better.
- Use a Base Coat: Applying a base coat on your natural nails before using press on nails can create a better adhesive surface and protect your natural nails.
- Experiment with Designs: Don’t be afraid to mix and match styles or even decorate your press on nails with additional nail art or decals for a unique look.
- Practice Makes Perfect: If you’re new to applying press on nails, practice can help you get better and faster at the process over time.
12. Frequently Asked Questions
What are press on nails made of?
Press on nails can be made from various materials, including plastic, acrylic, and gel. Each material has its own benefits, so it’s essential to choose one that suits your style and needs.
Can I reuse press on nails?
Yes, you can reuse press on nails if they are in good condition. Clean them properly after removal, and store them safely. You may need to apply fresh adhesive during your next application.
How long do press on nails last?
The longevity of press on nails depends on various factors, including the adhesive used and how well you take care of them. Generally, they can last anywhere from a few days to two weeks.
Are press on nails safe for my natural nails?
When applied and removed correctly, press on nails are safe for your natural nails. However, improper application or removal can lead to damage, so always follow the guidelines.
Can I shower or swim with press on nails?
It’s best to avoid prolonged exposure to water, especially in the first few hours after application. Excessive water can weaken the adhesive. However, short showers are usually fine.
What if I’m allergic to nail glue?
If you know you have an allergy to certain adhesives, look for press on nails that use adhesive tabs instead of glue, or consult with a dermatologist for hypoallergenic options.
13. Comparative Analysis: Press On Nails vs. Other Nail Options
When considering how to apply press on nails, it’s helpful to look at how they stack up against other nail options, such as traditional acrylics, gels, and even nail wraps. Each option has its pros and cons.
Press On Nails vs. Acrylic Nails
Acrylic nails are crafted from a mixture of liquid monomer and powder polymer, creating a durable and long-lasting enhancement. However, they require professional application and can be damaging to natural nails if not removed properly. Press on nails, on the other hand, are user-friendly and much less invasive. They can be applied and removed at home, making them a more convenient choice for those looking for a temporary look.
Press On Nails vs. Gel Nails
Gel nails are popular for their glossy finish and durability, but similar to acrylics, they require UV light for curing and are best done by professionals. Press on nails don’t require any curing time and can be applied quickly at home with no special equipment. However, gel nails provide a longer-lasting shine and can be customized with intricate designs that may be more difficult to achieve with press on nails alone. (See: Health effects of press-on nails.)
Press On Nails vs. Nail Wraps
Nail wraps are another alternative, made from adhesive materials that can be applied directly to the nail. They often come with intricate designs and patterns but may not offer the same structural integrity as press on nails. If you’re looking for a longer-lasting solution, press on nails typically provide more durability than nail wraps, which can peel or chip more easily.
Ultimately, the choice between these options will depend on your lifestyle, preferences, and what you’re looking for in a nail enhancement. Press on nails offer a blend of convenience and style that’s hard to beat.
14. Cost Analysis: Budgeting for Press On Nails
One of the most appealing aspects of press on nails is their affordability. The cost can vary significantly depending on the brand, materials, and complexity of the designs. Basic press on nail kits can be found for as little as $5 to $10, while more elaborate designs or higher-end brands may range from $15 to $30.
When budgeting for press on nails, consider how often you plan to change your manicure. If you enjoy experimenting with different looks frequently, investing in a few different sets can still be more cost-effective than regular salon visits, which can range from $30 to $100 or more for a manicure. Plus, you have the flexibility to try new styles at home without the pressure of committing to a salon appointment.
15. Expert Perspectives: The Rise of DIY Nail Care
Industry experts have noted a significant rise in DIY nail care, particularly during the pandemic when many people turned to home beauty routines. According to a survey by the NPD Group, nail care sales soared by over 40% in 2020, with press on nails being a significant contributor to this trend.
Beauty influencers and nail technicians emphasize the importance of learning how to apply press on nails effectively, as they not only provide a creative outlet but also allow individuals to express their personality and style. As the DIY culture continues to thrive, many brands are responding with easier-to-use products and tutorials that cater to both beginners and experienced users. This shift has also encouraged a more experimental approach to nail design, where the only limit is one’s imagination.
16. Conclusion
So whether you’re a nail art aficionado or just looking for a quick and easy way to glam up your look, understanding how to apply press on nails effectively can make all the difference. With the right preparation, application, and care, you can enjoy beautiful nails that reflect your style and personality. Embrace the art of nail application, and you’ll have stunning hands that can turn heads!
“`
Trending Now
- our breakdown of the urgent need for ai governance in schools: 10 steps to implementation
- this guide on the unseen risks of ai in education: how misguided implementations could harm students
- Why Cloud-Based Education Software Is Winning…
- this guide on discover the top 8 ai-powered edtech platforms transforming k-12 education
Frequently Asked Questions
How do you prepare your nails for press on nails?
To prepare your nails for press on nails, start by removing any existing polish and gently pushing back your cuticles. Clean your nails with alcohol wipes to remove oils and dirt. It's also helpful to file and buff the surface of your nails for better adhesion.
What supplies do you need for applying press on nails?
You'll need press on nails, nail glue or adhesive tabs, a nail file, nail clipper, cotton balls with acetone for cleanup, a cuticle pusher, alcohol wipes, and a buffer. Having all these supplies ready will streamline the application process and help achieve the best results.
How long do press on nails last?
Press on nails can last anywhere from a few days to two weeks, depending on the quality of the nails, the application technique, and your daily activities. Proper preparation and maintenance can significantly extend their wear time.
Are press on nails safe for your natural nails?
Yes, press on nails are generally safe for your natural nails when applied correctly. However, it's important to follow the application instructions and ensure that your natural nails are clean and healthy to avoid any damage.
How do you remove press on nails safely?
To remove press on nails safely, soak a cotton ball in acetone and place it on the nail, wrapping it in foil for about 10-15 minutes. This helps dissolve the adhesive. Gently wiggle the press on nail to detach it, and avoid forceful removal to protect your natural nails.
What’s your take on this? Share your thoughts in the comments below — we read every one.