How to create custom maps on Google Maps
“`html
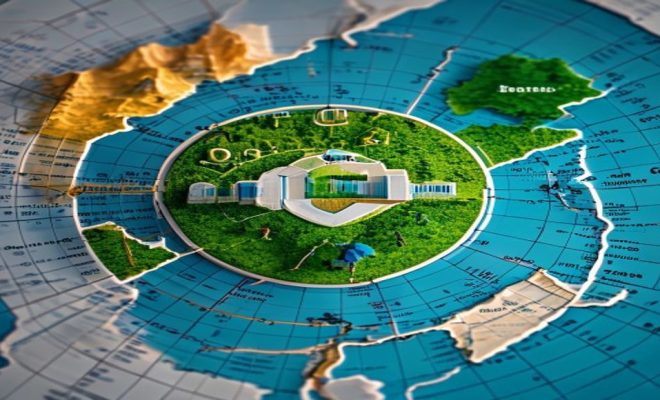
In a world that thrives on personalization, having the ability to create custom maps on Google Maps can be a game-changer. Whether for travel planning, business needs, or personal projects, custom maps allow you to present location data in a way that resonates with your audience. With tools that are intuitive and user-friendly, Google Maps provides a platform where anyone can create detailed, interactive maps tailored to their specific needs. Let’s explore the nine essential steps and insights into making the most of this feature.
1. Understanding the Basics of Google Maps
Before diving into map creation, it’s crucial to understand what Google Maps offers. Launched in 2005, Google Maps has evolved from a simple mapping service to a comprehensive platform filled with features such as directions, street views, and, of course, custom map creation. The platform allows users to view and interact with maps, but it also permits customization that helps convey personal or commercial messages effectively.
With Google Maps, you can create a map that includes points of interest, routes, and even custom overlays. This could range from showing the best restaurants in a city to marking locations relevant to a specific event. The customization tools are designed to be accessible, making map-making possible for both tech-savvy individuals and novices alike.
2. Getting Started: Accessing Google My Maps
The first step in creating your custom map is to access Google My Maps. This is a separate platform from Google Maps that focuses specifically on map creation and customization. You can access it by visiting the Google My Maps website or through your Google account by selecting ‘My Maps’ from the menu.
Once you’re on the My Maps interface, you’ll find a clean, user-friendly layout. You can start a new map by clicking on the “Create a New Map” button. This takes you to a blank map where you can begin adding elements to make it your own. It’s also worth noting that you’ll need a Google account to save your work — so make sure you’re logged in!
3. Adding Markers: Highlighting Key Locations
One of the most fundamental aspects of creating custom maps on Google Maps is adding markers. Markers are used to denote specific locations on your map. For example, if you’re plotting a travel itinerary, you can place markers on hotels, restaurants, and attractions you plan to visit. To add a marker, simply click on the marker icon (usually a pin) and place it on the desired location on the map.
After placing the marker, you can customize it further by adding names, descriptions, and images. This feature is especially useful for providing context to viewers, such as adding a brief description of why a particular location is significant. You can even customize the marker’s color and icon to match your theme or purpose.
4. Drawing Lines and Shapes: Mapping Routes and Areas
Beyond just placing markers, Google My Maps allows you to draw lines and shapes, which can be incredibly beneficial for highlighting specific routes or areas. For instance, if you’re planning a walking tour, you can draw a line to indicate the path you intend to take. This not only provides clarity but also helps others visualize your journey.
To draw a line, click on the line tool and then click along the map to create your desired route. Similarly, you can use the polygon tool to create shapes that highlight specific areas, such as parks or neighborhoods. This feature enhances the interactivity of your maps, making them informative and visually appealing. (See: Google Maps overview on Wikipedia.) new features on Google Maps offers useful background here.
5. Integrating Different Data Layers
One of the powerful features of creating custom maps on Google Maps is the ability to integrate various data layers into your map. This means you can add layers showing different types of information relevant to your audience. For example, if you’re creating a map for a community event, you might include layers showing local amenities, transportation options, or even hazards.
To add a layer, click on the “Add Layer” button and choose what type of data you want to display. This can include traffic information, public transportation routes, or satellite imagery. These layers can be toggled on and off, allowing viewers to customize what they see based on their interests.
6. Styling Your Map: Customization Options
Styling is where your map can really shine. Google My Maps provides a range of customization options that allow you to tailor the appearance of your map to align with your branding or personal aesthetic. You can choose different map styles, adjust colors, and even modify the marker icons further.
By customizing your map’s style, you can create a unique look that makes the map not just functional but also visually appealing. This can be particularly important for businesses looking to promote their locations or events, as a well-styled map can attract more attention and engagement.
7. Sharing and Collaborating: Making Your Map Public
After creating your custom map, the next step is sharing it. Google My Maps makes this easy. You can choose to keep your map private, share it with specific people, or make it public for anyone to see. This flexibility allows for collaboration, meaning multiple users can contribute to the same map.
To share your map, click the “Share” button, where you can adjust the visibility settings and even invite collaborators by email. This feature is fantastic for team projects or planning events where multiple perspectives and inputs are valuable. You can also share the map through a link, allowing for easy access.
8. Embedding Your Map: Integrating with Websites and Blogs
For those who want to take their custom maps to the next level, embedding them on websites or blogs is an excellent way to do so. This makes your map an interactive element on your site, enhancing the user experience. Google My Maps provides an easy way to generate an embed code.
To embed your map, click on the three dots in the map’s title box and select “Embed on my site.” You’ll receive an HTML code that you can copy and paste into your website’s code. This feature is particularly useful for businesses, travel blogs, or organizations that want to provide interactive content for their visitors.
9. Staying Updated: Regularly Refreshing Your Custom Map
Finally, creating a custom map is not a one-time task. Regularly updating your map is essential to ensure that all information is current and relevant. Whether it’s adding new locations, changing descriptions, or updating images, keeping your map fresh makes it a more appealing resource for users.
For example, if you’re using a map for a restaurant guide, you’ll want to update it regularly with new places or changes to existing ones. Additionally, incorporating user feedback can provide insights into what locations are most relevant or useful, helping you continuously improve the map’s quality. (See: Transportation and health by CDC.) (top map creation tools)
10. Use Cases for Custom Maps
Understanding how to create custom maps on Google Maps is just the beginning. Exploring the various use cases can inspire you to make the most out of this tool. Here are a few ideas:
- Travel Planning: Customize a map of your travel itinerary, marking hotels, restaurants, and must-see attractions. This can streamline your journey and keep you organized.
- Event Coordination: Create a map for events such as weddings, parties, or community gatherings. Mark locations of interest, parking areas, and other vital information for guests.
- Real Estate: Real estate agents can use custom maps to showcase properties for sale or rent, highlighting nearby amenities and points of interest.
- Education: Teachers can create maps to illustrate historical events, geographical features, or different cultural landmarks for educational purposes.
- Business Promotion: Local businesses can use maps to highlight their locations, promote nearby attractions, and show routes for customers to follow.
These use cases demonstrate how flexible custom maps can be, adapting to different needs and scenarios.
11. Additional Features to Explore
As you get comfortable with the basics of creating maps, there are additional features that can elevate your mapping experience:
- Custom Styles: Beyond just colors and icons, you can create custom styles that can adjust based on various data points, which can enhance the storytelling aspect of your maps.
- Photo Overlays: Add photo overlays to your maps to give a visual representation of locations, such as before-and-after images for renovation projects.
- URL Links: You can embed links in your markers that lead to websites, social media pages, or additional information about the location, turning your map into a robust resource.
- Custom Icons: Create or upload your own icons for markers to better match your map’s theme or focus, providing a more tailored visual experience.
12. Understanding Map Privacy Settings
When you create custom maps, understanding how to manage privacy settings is key. Here’s a breakdown of the different settings:
- Private: Only you can view the map. This setting is ideal for drafts or personal projects.
- Shared with Specific People: You can invite specific users to view or edit the map. This is perfect for collaborative projects.
- Public: Anyone can view the map, making it ideal for promotional efforts or community events.
The privacy settings allow you to control who can see and interact with your custom maps, ensuring your information is shared appropriately.
13. FAQs About Custom Maps on Google Maps
What is the difference between Google Maps and Google My Maps?
Google Maps is primarily designed for navigation and location discovery, while Google My Maps is a tool for creating personalized maps with markers, shapes, and layers. Related reading: latest Google Maps updates.
Can I collaborate with others on a custom map?
Yes! Google My Maps allows you to share your map with others so they can view or edit it, making it a great tool for group projects.
Is there a limit to the number of markers I can add?
While there is no strict limit, performance might start to lag if you add an excessively large number of markers. Typically, users manage well with hundreds of markers. (See: New features of Google Maps in NY Times.)
Can I access my custom map on mobile devices?
Yes, you can access your custom maps on mobile devices through the Google Maps app, though the editing features are more accessible via a web browser.
What happens if I delete a map?
If you delete a map, it is removed permanently from your Google My Maps account, so make sure to back up any important information before doing so.
14. Practical Tips for Creating Effective Custom Maps
Creating custom maps can be an enjoyable and rewarding task, but there are some practical tips you can follow to ensure your maps are not only effective but also user-friendly:
- Keep It Simple: While it may be tempting to add every detail, a cluttered map can be overwhelming. Focus on key locations and necessary information to keep it clear.
- Use Descriptive Titles: Make your markers and layers easily identifiable with descriptive titles. This helps users understand what they are looking at without confusion.
- Test Your Map: Before sharing your map, test it out yourself or with a friend. Ensure all links work, markers are accurate, and the layout meets your goals.
- Solicit Feedback: After sharing your map, ask for feedback from users. Understanding how they interact with the map can provide insights for improvements.
15. Real-World Case Studies of Custom Maps
Examining real-world examples can inspire your own custom map projects. Here are a few notable case studies:
- Travel Agencies: Many travel agencies utilize custom maps to showcase unique travel packages. By highlighting destinations with personalized markers, they can provide potential travelers with a visual representation of their journey.
- Non-Profit Organizations: Non-profits often use custom maps to display their impact areas. For instance, a charity focused on environmental conservation might mark regions where they have planted trees or conducted cleanups, making their work visually impactful.
- Community Initiatives: Local governments have created custom maps to engage citizens with city planning. By marking proposed developments and existing resources, they invite public comment and participation in community-oriented projects.
16. Future Trends in Custom Mapping
As technology continues to evolve, so does the field of digital mapping. Here are some future trends to keep an eye on:
- Augmented Reality (AR): The integration of AR with custom maps could revolutionize how users experience locations. Imagine pointing your phone at a landmark and seeing historical information or user-generated content overlaid on your screen.
- Real-Time Data Integration: Custom maps may begin to incorporate real-time data, such as traffic conditions or event notifications. This would allow users to make informed decisions based on current circumstances.
- Increased Interactivity: Expect future maps to include more interactive elements, such as user-generated content or options for users to create their own markers and share them with the community.
17. Conclusion
In summary, the ability to create custom maps on Google Maps offers numerous benefits for personal, educational, and business purposes. From adding markers to collaborating with others, the possibilities are nearly endless. So why not explore Google My Maps today and see what custom creations you can bring to life? Your next adventure or project awaits!
“`
Trending Now
Frequently Asked Questions
How do I create a custom map on Google Maps?
To create a custom map on Google Maps, access Google My Maps through your Google account. Click on 'Create a New Map' and start adding elements like points of interest and routes to personalize your map according to your needs.
What features does Google My Maps offer?
Google My Maps offers features such as adding points of interest, creating routes, and customizing overlays. This allows users to tailor maps for specific purposes, like travel planning or business presentations, in an intuitive manner.
Can I share my custom map with others?
Yes, you can share your custom map created in Google My Maps with others. You can adjust the sharing settings to make it public or share it privately with specific individuals via email or a shareable link.
Is Google My Maps free to use?
Yes, Google My Maps is free to use. You can create and customize maps without any cost, making it accessible for personal projects, travel planning, or business needs.
What can I use custom maps for?
Custom maps can be used for various purposes, such as travel itineraries, event planning, business locations, or educational projects. They help present location data in a visually engaging and informative way.
What did we miss? Let us know in the comments and join the conversation.