How to make bread from scratch
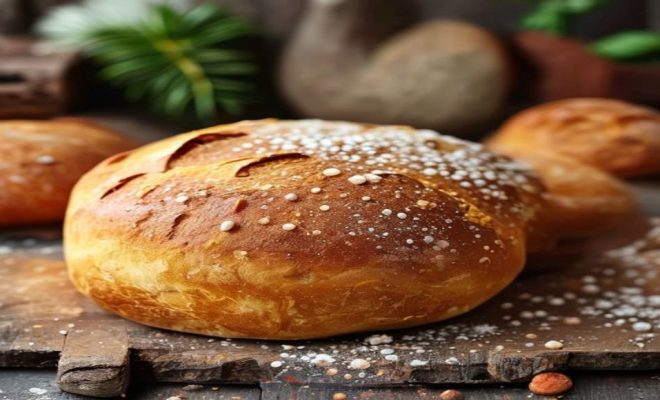
“`html
Baking bread at home can feel like a daunting task, but once you grasp the fundamentals, it’s an incredibly rewarding experience. The process of making bread from scratch not only fills your home with the delicious aroma of freshly baked goods but also allows you to control the ingredients and create something truly special. In this article, we’ll explore how to make bread from scratch, breaking it down into nine essential steps that will guide you through the entire process.
1. Gather Your Ingredients
The foundation of any great loaf begins with the right ingredients. To make bread from scratch, you’ll need:
- Flour: All-purpose flour is versatile, but bread flour, with its higher protein content, is preferred for a chewier texture.
- Water: Use lukewarm water to activate the yeast. The ideal temperature is around 110°F (43°C).
- Yeast: Active dry yeast or instant yeast works best. Each has different activation methods, so check the packaging.
- Salt: Essential for flavor and to control yeast activity.
- Sugar: Optional, but a small amount can help the yeast grow faster.
- Fats: Ingredients like butter or olive oil can enrich the dough and improve the texture.
Once you have these basics, you can experiment with other additions like herbs, seeds, or even whole grains to create different flavors and textures. For example, adding rosemary or thyme can enhance the bread’s aroma and taste, while seeds like sesame or sunflower can provide a delightful crunch. There’s a fuller look at top baking schools worldwide.
2. The Importance of Yeast
Understanding yeast is crucial when you learn how to make bread from scratch. Yeast is a living organism that ferments sugars in the dough, producing carbon dioxide gas, which causes the bread to rise. This fermentation gives bread its unique flavor and airy structure.
When using active dry yeast, you need to ‘proof’ it first. Dissolve it in warm water with a bit of sugar and let it sit for about 5 to 10 minutes until it becomes frothy. This indicates that the yeast is alive and ready to work. Instant yeast doesn’t require proofing and can be mixed directly into the flour, simplifying the process. It’s worth noting that yeast can be sensitive to temperature and moisture levels; make sure not to expose it to extreme heat or cold.
3. Mixing the Dough
Once your yeast is ready, it’s time to mix your ingredients. Start with the dry ingredients: flour, salt, and sugar (if using). After ensuring even distribution, create a well in the center, and pour in your yeast mixture and any fats you’re using. This method helps to ensure that the yeast is evenly distributed throughout the dough.
Mix until a shaggy dough forms. At this stage, you may want to use your hands or a wooden spoon for better mixing. The dough should be slightly sticky but manageable. If it’s too dry, add a little more water, but do it gradually. You can also incorporate additional flavors at this stage, such as garlic powder or cheese, to create a savory loaf.
4. Kneading: The Art of Developing Gluten
Kneading is a critical step in making bread from scratch, as it develops gluten, giving the bread its structure and elasticity. Turn the dough onto a floured surface, and begin to knead it by pressing down with the heels of your hands, folding it over, and rotating it a quarter turn. Repeat this process for about 8 to 10 minutes.
You’ll know your dough is ready when it’s smooth, elastic, and slightly tacky to the touch. A great test for readiness is the “windowpane test.” Stretch a small piece of dough between your fingers; if it forms a thin membrane without tearing, you’ve developed the gluten enough. If you find your dough is too sticky, sprinkling a little flour as you knead can help without compromising its moisture balance.
5. First Rise: Letting the Dough Prove
After kneading, it’s time for the first rise, or fermentation. Place your dough in a lightly oiled bowl, cover it with a damp cloth or plastic wrap, and let it rest in a warm, draft-free area for 1 to 2 hours until it doubles in size. This process not only helps the dough rise but also contributes to flavor development. (See: Learn more about bread.)
During this time, the yeast will continue to ferment, producing gases that make the dough airy. If your kitchen is cold, consider preheating your oven for a minute or two, then turning it off and placing the dough inside to rise. A consistent warm environment encourages optimal yeast activity. You can also try creating a ‘proofing box’ by placing a bowl of hot water alongside the dough, providing a moist and warm atmosphere.
6. Shaping the Dough
Once your dough has risen, it’s time to shape it. Gently punch it down to release the gases, then turn it out onto a floured surface. At this point, you can shape it into various forms: a loaf, rolls, or even baguettes. To shape a loaf, flatten the dough into a rectangle, fold in the sides, and roll it tightly from the top down.
This shaping process is crucial as it helps create surface tension, which results in a beautiful rise in the oven. Once shaped, place the dough seam-side down into a greased loaf pan or onto a baking sheet for free-form loaves. Cover it again and allow it to rise for another 30 minutes to an hour. During this second rise, you can also experiment with toppings like seeds or herbs for added flavor.
7. Baking: Time to Transform
Preheat your oven about 30 minutes before you plan to bake. The ideal temperature for most bread recipes is around 375°F (190°C). Before baking, you can make slashes on the top of the dough with a sharp knife or a razor blade. This allows steam to escape and helps prevent the bread from bursting during baking.
Place your loaf in the center of the oven and bake for 25 to 35 minutes, depending on the size. You’ll know the bread is done when it’s golden brown and sounds hollow when tapped on the bottom. If you have a thermometer, the internal temperature should read around 190°F (88°C). For a crustier loaf, consider using a baking stone and placing a tray of water at the bottom of the oven to create steam.
8. Cooling and Storing Your Bread
After baking, let the bread cool on a wire rack for at least 30 minutes before slicing. This step is often overlooked but crucial. Cooling allows the crumb structure to set properly, resulting in a more pleasant texture.
When it comes to storing your freshly baked bread, it’s best to keep it in a paper bag at room temperature for a day or two. If you want to preserve it for longer, wrap it in plastic wrap or foil and freeze it. Bread is best enjoyed fresh, but freezing can maintain the quality for a few months. Always slice bread after it’s completely cooled to prevent a gummy texture.
9. Experimenting with Flavors and Techniques
Once you’ve mastered the basics of how to make bread from scratch, don’t hesitate to experiment. You can incorporate different flours like whole wheat or rye, add seeds and nuts for texture, or infuse herbs for flavor. The possibilities are truly endless when you get creative.
Consider also trying different baking methods, such as using a Dutch oven for a crustier loaf or experimenting with sourdough techniques for a tangy flavor. Baking bread can be as simple or as complex as you want it to be, making it a fulfilling hobby that can adapt to your skill level. You might also explore creating artisan-style breads, which often incorporate unique ingredients like olives, cheese, or spices for a gourmet touch.
10. Understanding Different Types of Bread
Bread comes in many varieties, each with its unique characteristics and ingredients. When you make bread from scratch, knowing the differences can help you choose the right method and ingredients for your desired outcome. Here’s a look at some popular types of bread: (See: Healthy baking resources from CDC.)
- White Bread: Made with refined flour, this bread is soft and typically has a light texture. It’s great for sandwiches.
- Whole Wheat Bread: Using whole wheat flour retains the bran and germ, providing more nutrients and a denser texture. It has a nuttier flavor.
- Sourdough: Characterized by its tangy taste and chewy crust, sourdough relies on natural fermentation, often requiring a starter culture.
- Baguette: This French bread is long and thin, known for its crispy crust and airy inside. It requires specific shaping techniques.
- Ciabatta: An Italian bread with a chewy crust and open crumb structure, ciabatta is great for bruschetta or sandwiches.
- Focaccia: This flat Italian bread is often flavored with olive oil, herbs, and sea salt, making it delicious for dipping or as a side.
Exploring these different types can provide inspiration for your baking adventures. You may even consider blending different recipes to create something uniquely your own. For example, mixing whole wheat flour with bread flour can yield a bread that’s both nutritious and light.
11. Common Mistakes to Avoid
Even seasoned bakers can make mistakes. Here are some common pitfalls to watch for when you make bread from scratch:
- Using Cold Ingredients: Cold water or ingredients can slow down yeast activation. Always use lukewarm water (around 110°F or 43°C).
- Skipping the Kneading: Kneading develops gluten and ensures proper texture. Don’t rush this step!
- Not Letting the Dough Rise Enough: Under-proofed dough can lead to dense bread. Be patient and let it double in size.
- Incorrect Oven Temperature: Baking at the wrong temperature can result in uneven cooking. Always preheat your oven properly.
- Cutting the Bread Too Soon: Slicing bread before it cools can lead to a gummy texture. Wait at least 30 minutes.
Additionally, measuring your ingredients accurately is crucial. Using too much flour can result in dry bread, while too little can make it too wet. Invest in a kitchen scale for precise measurements, especially if you’re trying out different types of bread. It can be a game-changer!
12. Frequently Asked Questions (FAQ)
What kind of flour is best for making bread?
While all-purpose flour can be used, bread flour is ideal due to its higher protein content, which enhances gluten development and creates a chewier texture. Whole wheat flour can also be used but may need adjustments in hydration.
Can I make bread without yeast?
Yes! Yeast-free bread can be made using baking powder or baking soda as leavening agents. Examples include soda bread and certain quick breads.
How can I make my bread rise higher?
Ensuring your dough is properly kneaded and allowed to rise in a warm environment is key. You can also try adding a little more sugar to feed the yeast or using a higher protein flour. Additionally, incorporating a small amount of vinegar or lemon juice can strengthen the dough and promote higher rising.
Can I make bread using a bread machine?
Absolutely! Bread machines are convenient and can automate much of the process. Just follow the machine’s instructions regarding ingredient order and settings. Many bread machines also have settings for different types of bread, which can simplify the process even further.
What’s the best way to shape dough?
Shaping dough depends on the type of bread you’re making, but generally, it involves flattening the dough, folding it over itself, and rolling it into a loaf or desired shape, ensuring you create surface tension for a good rise. For artisan breads, you might use different techniques such as the ‘coil fold’ to build structure without excessive kneading.
How long can I store homemade bread?
Homemade bread can last for 2-3 days at room temperature. For longer storage, it can be wrapped tightly and frozen for up to 3 months. Just be sure to let it cool completely before wrapping. Consider slicing the bread before freezing so you can easily take out individual pieces as needed. (See: Scientific insights on bread making.)
13. Tips for Success
Here are some additional tips to help you succeed in your bread-making journey:
- Invest in Quality Ingredients: Use high-quality flour and fresh yeast for the best results.
- Keep a Baking Journal: Note the ingredients, methods, and results of each bake. This can help you fine-tune your techniques over time.
- Join a Baking Community: Online forums and local baking classes can provide support, tips, and inspiration.
- Practice Patience: Baking bread is an art that improves with practice. Don’t be discouraged by early failures!
- Use a Kitchen Scale: Measuring ingredients by weight provides accuracy and consistency, leading to better results.
- Enjoy the Process: Baking bread is as much about the experience as it is about the final product. Take your time and have fun!
14. The Health Benefits of Homemade Bread
Making bread from scratch can be a healthier alternative to store-bought options. When you bake at home, you have control over the ingredients, allowing you to avoid preservatives, additives, and high amounts of sugar or salt commonly found in commercial breads. See also leading pastry arts institutions.
Whole grain breads, in particular, offer numerous health benefits, including increased fiber intake, which can improve digestion and lower cholesterol levels. Additionally, by using natural ingredients, you can experiment with healthier alternatives, such as using honey or coconut sugar instead of refined sugars.
It’s also worth noting that making bread can be a mindfulness activity, reducing stress and providing a sense of accomplishment. Engaging with the process of kneading and watching your dough rise can be therapeutic, making it a great way to unwind.
15. Incorporating Bread Baking into Your Lifestyle
If you find joy in making bread from scratch, consider incorporating it into your weekly routine. Set aside a specific day for baking; this can become a family activity or a fun weekend project. You might even explore making different types of bread each week.
Sharing your homemade bread with friends and family can also enhance your social connections. Organize a bread exchange with neighbors or host a small gathering where everyone brings their bread creations. This not only allows you to showcase your skills but also fosters a sense of community.
Making bread from scratch not only provides you with a delicious product but also connects you to an age-old tradition that’s both therapeutic and creative. So roll up your sleeves, gather your ingredients, and enjoy the process of baking your very own loaf at home!
“`
Trending Now
Frequently Asked Questions
What ingredients do I need to make bread from scratch?
To make bread from scratch, you will need all-purpose or bread flour, lukewarm water, active dry or instant yeast, salt, sugar (optional), and fats like butter or olive oil. These ingredients form the foundation of your bread and can be customized with herbs or seeds for added flavor.
How does yeast work in bread making?
Yeast is a living organism that ferments sugars in the dough, producing carbon dioxide gas which causes the bread to rise. This fermentation process is essential for developing the bread's unique flavor and airy structure, making it crucial to understand when making bread from scratch.
What is the ideal temperature for activating yeast?
The ideal temperature for activating yeast is around 110°F (43°C). Using lukewarm water at this temperature helps to ensure that the yeast activates properly, allowing it to ferment the sugars in the dough and contribute to the bread's rise.
Can I add flavors to my homemade bread?
Yes, you can add various flavors to your homemade bread. Ingredients like herbs, seeds, or whole grains can enhance the taste and texture of your bread. For instance, adding rosemary or thyme can boost aroma, while sesame or sunflower seeds can provide a delightful crunch.
What are the steps to making bread from scratch?
Making bread from scratch involves nine essential steps, starting with gathering your ingredients, understanding yeast activation, mixing and kneading the dough, allowing it to rise, shaping it, and then baking. Each step is crucial for achieving a delicious homemade loaf.
Have you experienced this yourself? We'd love to hear your story in the comments.