How to knead dough
“`html
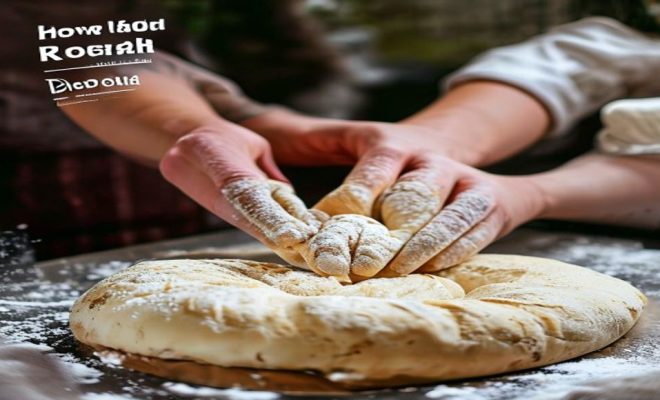
How to knead dough is an essential skill for anyone who aspires to bake bread or prepare pastries at home. Kneading dough not only develops gluten, which gives your bread structure and texture, but it also allows flavors to meld beautifully. In this comprehensive guide, we will explore the science behind kneading, the various techniques you can use, and practical tips to ensure your dough turns out perfectly every time.
1. The Importance of Kneading Dough
Kneading dough is not merely a chore; it’s a crucial process that directly affects the final product. When you knead dough, you’re working the gluten proteins in the flour, which helps create a strong network that traps gases released during fermentation. This is essential for achieving the soft, airy texture that we all love in homemade bread.
A well-kneaded dough will rise properly and develop a nice crumb structure. Conversely, insufficient kneading can result in dense bread with a poor rise, leaving your baked goods less than desirable. Understanding the role of kneading in baking can help you make better bread and pastries.
2. The Science Behind Kneading
At its core, kneading is a mechanical process that develops gluten, which consists of two proteins: glutenin and gliadin. When flour is mixed with water, these proteins absorb water and swell, forming a sticky mass. Kneading stretches and aligns these proteins, resulting in elasticity and strength in the dough.
This process also incorporates air into the mixture, which activates yeast and promotes fermentation. As the dough rises, the gluten network expands, trapping gases and producing a light and fluffy loaf. Without adequate kneading, the dough won’t have the structure it needs to rise effectively.
3. Essential Tools for Kneading Dough
While you can knead dough by hand, having the right tools can make the process easier and more efficient. Here are some essentials: (top baking schools)
- Mixing Bowl: A large, sturdy bowl is necessary for mixing and kneading your dough.
- Bench Scraper: A bench scraper helps you manipulate the dough easily, especially when it’s sticky.
- Rolling Pin: While not always necessary, a rolling pin can help flatten the dough when needed.
- Stand Mixer: If you want to save time and effort, a stand mixer equipped with a dough hook is a fantastic investment.
These tools can enhance your kneading experience, making it smoother and more enjoyable.
4. How to Knead Dough by Hand
Kneading dough by hand is a skill that requires practice, but once you get the hang of it, it can be quite satisfying. Start by flouring your work surface to prevent sticking. Here’s a step-by-step guide:
- Mix the Ingredients: Combine flour, water, yeast, and salt in your mixing bowl until it forms a shaggy dough.
- Flour Your Hands: Dust your hands with flour to prevent sticking.
- Push and Fold: Begin kneading by pushing the dough away from you with the heel of your hand, then fold it over itself. Turn the dough a quarter turn and repeat.
- Continue Kneading: Keep kneading for about 10-15 minutes until the dough is smooth and elastic.
Don’t be discouraged if it feels sticky at first; that’s normal! As you knead, the dough will become more manageable.
5. Using a Stand Mixer to Knead Dough
If you prefer a more hands-off approach, a stand mixer is a great alternative. To knead dough using a stand mixer, simply attach the dough hook and follow these steps:
- Add Ingredients: Place all your ingredients into the mixer bowl.
- Mix on Low Speed: Start mixing on a low speed to combine the ingredients.
- Knead: Increase the speed to medium and let the mixer knead the dough for about 5-10 minutes.
- Check the Dough: After kneading, the dough should be smooth and elastic. If it’s too sticky, add a bit more flour.
A stand mixer can save you time and energy, especially when working with larger batches of dough.
6. Common Mistakes to Avoid When Kneading Dough
Kneading dough isn’t complicated, but there are some common pitfalls that can affect your results. Here’s what to watch out for: (See: Understanding gluten and its properties.)
- Too Much or Too Little Flour: Adding too much flour can lead to dry dough, while too little can make it overly sticky. Always add flour gradually.
- Not Kneading Enough: Insufficient kneading can result in dense bread. Be patient and ensure you knead until the dough is smooth and elastic.
- Skipping the Resting Period: Resting your dough allows the gluten to relax, making it easier to shape. Don’t rush this step!
By avoiding these mistakes, you’ll set yourself up for success in your baking endeavors.
7. How Long to Knead Dough
The duration of kneading can vary depending on the method you use and the type of dough you’re working with. When kneading by hand, aim for about 10 to 15 minutes. If you’re using a stand mixer, 5 to 10 minutes is usually sufficient.
To determine if your dough is properly kneaded, perform the windowpane test: Take a small piece of dough and stretch it. If it forms a thin, translucent membrane without tearing, it’s ready. If it breaks easily, keep kneading.
8. Variations in Dough Recipes and Their Kneading Needs
Different types of dough require different kneading techniques and times. For instance, bread dough generally needs extensive kneading to develop a robust gluten structure. On the other hand, cookie or pastry dough should be mixed only until combined to avoid overworking the gluten, which can lead to tough baked goods.
Understanding the specific needs of your recipe is crucial. For example:
- Whole Wheat Dough: Whole wheat flour contains more bran and germ, which can hinder gluten development. Knead it slightly longer to compensate for this.
- Sourdough Dough: This often requires a gentler touch and may benefit from stretch-and-fold techniques rather than aggressive kneading.
Adjust your kneading according to the specific dough you’re working with to achieve the best results.
9. Creative Uses for Kneaded Dough
Once you’ve mastered how to knead dough, the possibilities are endless! Kneaded dough can be transformed into various delicious baked goods, including:
- Bread: From classic loaves to artisanal varieties, bread is the most common use for kneaded dough.
- Pizza Dough: A well-kneaded pizza dough yields a crispy crust that’s a hit for any pizza night.
- Pasta: Fresh pasta, made from kneaded dough, can elevate your home-cooked meals significantly.
- Pastries: Croissants and danishes require well-kneaded dough for flaky layers.
- Dumplings: Asian dumplings, filled with savory mixtures, depend on the elasticity of well-kneaded dough.
Experimenting with different dough recipes can open up a world of culinary creativity.
10. The Joy of Baking Your Own Bread
In today’s fast-paced world, taking the time to learn how to knead dough and bake your own bread can be incredibly rewarding. Not only does it yield delicious results, but it also provides a therapeutic experience that connects you to the art of baking.
So, roll up your sleeves, gather your ingredients, and enjoy the process! Whether you’re a beginner or a seasoned baker, mastering the kneading technique will undoubtedly enhance your baking skills and bring you one step closer to producing bakery-quality bread from the comfort of your home.
11. Kneading Techniques: A Closer Look
While the basic push-and-fold method is effective, there are various kneading techniques you can explore, depending on your preferences and the type of dough. Here are a few methods worth trying:
11.1. French Fold
This technique is particularly great for wetter doughs. To perform a French fold, follow these steps:
- Stretch the dough out on your work surface into a rectangle.
- Fold the dough in thirds, like a letter.
- Turn the dough 90 degrees and repeat. This helps build strength and develop gluten without excess flour.
11.2. Slap and Fold
A favorite among professional bakers, this technique involves slapping the dough against the work surface to aerate it. Here’s how to do it: (See: Nutrition and its impact on baking.)
- Grab the dough and lift it above your work surface.
- Slap it down with force, then fold it over itself.
- Repeat for 8-10 minutes. This method is particularly effective for high-hydration doughs.
11.3. Stretch and Fold
Ideal for sourdough and artisan breads, stretch and fold is a gentler technique. This is how you do it:
- In a bowl, grab a corner of the dough and stretch it upwards, then fold it over to the opposite side.
- Turn the bowl and repeat this process for all four corners of the dough.
- Let the dough rest for 10-15 minutes before repeating. This allows for gluten development without overworking the dough.
12. Understanding Dough Hydration Levels
The hydration level of your dough significantly affects how you knead it. Hydration refers to the ratio of water to flour in your dough. Here’s how it impacts kneading:
- Low Hydration Dough (50-60%): These doughs are firmer and easier to handle. Kneading is straightforward and typically involves traditional techniques.
- Medium Hydration Dough (60-70%): This dough is stickier and requires a bit more finesse. Techniques like stretch and fold work well to develop gluten.
- High Hydration Dough (70% and above): These doughs are very sticky and require gentle handling. Techniques such as slap and fold or French fold are best for building strength.
13. How to Know When the Dough Is Ready
Understanding when your dough is ready is crucial for successful baking. Besides the windowpane test, consider these indicators:
- Texture: The dough should feel smooth and elastic. It should bounce back when poked, indicating proper gluten development.
- Timing: While timing can vary, a good rule of thumb is to knead until the dough reaches the right texture as described above.
- Appearance: The dough should look slightly shiny and have a uniform shape without any cracks or rough edges.
14. Frequently Asked Questions (FAQs)
14.1. Can I knead dough too much?
Yes, over-kneading can lead to tough dough. If you’re kneading by hand, you’ll usually notice when it’s too much because the dough will become dry and hard. With a mixer, it can be harder to detect, but if it starts to pull away from the bowl and looks dry, it’s time to stop.
14.2. What if my dough is too sticky?
Some stickiness is normal, especially with wet doughs. However, if it’s unmanageable, gradually add small amounts of flour until it’s workable. Be cautious not to add too much, as this can dry out your dough.
14.3. Is kneading necessary for all types of dough?
No, not all doughs require kneading. Some require gentle mixing or no mixing at all, like certain cookie or pastry doughs. Always follow your specific recipe for best results.
14.4. How can I improve my kneading technique?
Practice is key! Keep experimenting with different types of dough and techniques. Watching videos and observing professional bakers can also provide insights and improve your form.
14.5. How does temperature affect dough kneading?
Temperature plays a significant role in dough kneading and fermentation. Warmer dough is easier to knead and rises faster, while cooler dough can take longer to develop. Ideally, work in a cool environment, especially if your kitchen is warm.
15. Final Tips for Perfectly Kneaded Dough
As you continue your journey in baking, keep these tips in mind for kneading dough:
- Be patient and pay attention to the feel of the dough. Knead until it feels right.
- Don’t be afraid to experiment with techniques and find what works best for you and the types of dough you enjoy making.
- Always use a kitchen scale for measuring ingredients for accuracy, which can lead to better results.
- Lastly, enjoy the process! Baking is an art, and the more you practice, the more confident you will become.
16. The Role of Environment in Dough Kneading
Where you knead your dough can significantly impact the outcome, too. Humidity, temperature, and even altitude can influence how your dough behaves. If you live in a humid area, you may need to adjust your flour measurements as the flour can absorb moisture from the air. Conversely, in drier climates, you might need to add a little extra water. If you’re at high altitude, your dough may rise faster, so be prepared to shorten your rising times.
17. How to Incorporate Flavors During Kneading
Kneading isn’t just about developing gluten; it’s also a time to infuse flavors into your dough. You can add herbs, spices, or even cheeses while kneading. Here’s how:
- Herbs and Spices: Add dried herbs like rosemary or thyme directly into your flour before mixing. Fresh herbs can be added during the kneading process.
- Cheese: Grate or cube cheese and fold it into the dough during kneading for savory bread options.
- Sweets: For sweet bread, incorporate cinnamon or vanilla extract into the dough for added flavor.
This approach not only enhances the taste but also makes your bread unique and personal. (See: The art and science of bread baking.)
18. Experimenting with Alternative Flours
If you’re looking to diversify your baking repertoire, consider experimenting with alternative flours. Each type has different gluten content and hydration requirements, affecting how you knead. For example:
- Almond Flour: This gluten-free option doesn’t require kneading but instead benefits from careful mixing.
- Spelt Flour: With a different gluten structure, spelt requires less kneading than traditional wheat flour but still offers a unique flavor.
- Rye Flour: Knead it gently, as it absorbs water differently. It’s great for making dense, flavorful breads.
By adjusting your kneading technique according to the flour you’re using, you can achieve delicious results. We covered leading pastry programs in more detail.
19. Mindful Baking: The Therapeutic Benefits of Kneading Dough
Kneading dough can be a therapeutic experience, offering mindfulness and relief from stress. The rhythmic motions of kneading can be meditative. Here are some ways to enhance this experience:
- Focus on the texture of the dough under your hands. Notice the changes as you knead.
- Play soothing music or podcasts to create a relaxing atmosphere.
- Take deep breaths and enjoy the smell of fresh ingredients as you mix and knead.
Embracing the process can turn baking into a joyful activity rather than a chore.
20. How to Troubleshoot Your Kneaded Dough
Even experienced bakers encounter issues. Here’s how to troubleshoot common dough problems:
- Dough Doesn’t Rise: This could be due to expired yeast. Always check the expiration date before using.
- Sticky Dough: If the dough remains sticky even after kneading, it’s often due to insufficient flour. Add a little at a time during kneading.
- Dense Texture: This can result from over-kneading or not enough yeast. Make sure to use the right amount and let the dough rise adequately.
Understanding these issues can save you from making common mistakes and help you bake confidently.
21. Exploring Regional Dough Recipes
Different cultures have unique approaches to dough. Exploring these can add depth to your baking skills:
- Pizza Dough (Italy): The ideal pizza dough is crispy on the outside but chewy inside, often requiring longer fermentation times to develop flavor.
- Naan (India): This soft, leavened flatbread often incorporates yogurt, giving it a unique texture and flavor.
- Challah (Jewish): A sweet, braided bread that requires a delicate kneading process to maintain its airy texture.
Learning about these regional variations can inspire your baking and introduce you to new flavors and techniques.
“`
Trending Now
Frequently Asked Questions
What is the purpose of kneading dough?
Kneading dough is essential as it develops gluten, which provides structure and texture to bread. This process helps trap gases released during fermentation, resulting in a light and airy loaf. Proper kneading ensures your baked goods rise effectively, while insufficient kneading can lead to dense bread.
How do you know when dough is kneaded enough?
You can tell dough is kneaded enough when it becomes smooth, elastic, and springs back when poked. A well-kneaded dough should also hold its shape and not stick excessively to your hands or the work surface. This indicates that the gluten has developed properly.
Can you knead dough by hand?
Yes, you can knead dough by hand. While it requires more effort and time, hand kneading allows you to feel the dough's texture and elasticity, helping you gauge its readiness. Just ensure to use a clean, sturdy surface and apply consistent pressure while folding and pressing the dough.
What tools do you need for kneading dough?
Essential tools for kneading dough include a large mixing bowl, a clean work surface, and optionally, a dough scraper to help manage the dough. While kneading can be done by hand, a stand mixer with a dough hook can make the process easier and faster.
What happens if you don't knead dough enough?
If you don't knead dough enough, it will lack the necessary gluten structure to rise properly, resulting in dense and heavy bread. Insufficient kneading prevents the dough from trapping gases effectively during fermentation, leading to a poor crumb structure in your baked goods.
Agree or disagree? Drop a comment and tell us what you think.