How to tile bathroom floor
“`html
Tiling a bathroom floor can seem daunting, but with the right knowledge and preparation, it’s a project you can tackle yourself. Not only does bathroom floor tiling elevate the aesthetic of your space, but it also adds value to your home. This comprehensive guide will walk you through everything you need to know about bathroom floor tiling, from selecting materials to installation techniques.
1. The Importance of Bathroom Floor Tiling
Bathroom floor tiling is not just about looks. The right flooring solutions can significantly improve your bathroom’s functionality. Tiles are durable, water-resistant, and easy to clean, making them a perfect fit for a frequently used space like a bathroom. Additionally, a well-tiled floor can help prevent moisture-related problems, such as mold and mildew, which thrive in damp environments.
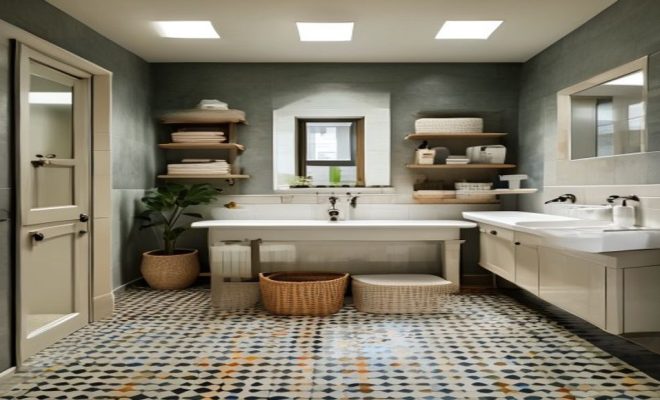
Moreover, bathroom floor tiling offers homeowners a chance to express their style. With a wide variety of colors, patterns, and materials available, you can create a unique look that reflects your personal taste. Whether you prefer classic ceramic tiles, modern porcelain, or natural stone, the options are nearly endless.
2. Choosing the Right Tiles
The first step in bathroom floor tiling is selecting the appropriate tiles. When choosing tiles, consider factors like durability, slip-resistance, and style. Ceramic and porcelain tiles are popular for bathrooms because they are resistant to water and easy to maintain. However, if you’re looking for a more luxurious feel, natural stone tiles such as marble or slate can add elegance to your bathroom.
Additionally, consider the size of your tiles. Larger tiles can create a sleek, modern look and make small bathrooms appear larger, while smaller tiles can add intricate designs and textures. Ensure you also check the coefficient of friction (COF) ratings for slip resistance, especially for bathroom floors that can become wet.
Another consideration is the tile’s finish. Glossy tiles can reflect light and create the illusion of a larger space, but they may be more slippery when wet. Matte tiles, while less reflective, offer a non-slip surface that can be safer in a bathroom setting.
Finally, think about the overall atmosphere you want to create. For instance, a light, bright tile can make a cramped space feel airy and open, while darker hues can bring warmth and a cozy feeling. A well-thought-out tile selection not only enhances your bathroom’s functionality but also creates a sanctuary for relaxation.
3. Essential Tools for Tiling
Before starting your bathroom floor tiling project, gather all the necessary tools. You’ll need basic tools such as a tile cutter or wet saw, trowel, leveling spacers, and a grout float. Don’t forget safety equipment like goggles and knee pads to protect yourself during the process.
Here’s a brief list of tools and materials you should have on hand:
- Tile cutter or wet saw
- Trowel
- Leveling spacers
- Grout float
- Measure tape
- Sponge
- Adhesive
- Grout
- Sealant (for natural stone tiles)
- Utility knife
- Bucket for mixing grout
- Chalk line for layout
- Level
Investing in quality tools can make a significant difference in the ease and outcome of your tiling project. While it may be tempting to skimp on tools, having the right equipment can save time and frustration, leading to a professional-looking finish.
4. Preparing the Bathroom Floor
Proper preparation of the bathroom floor is crucial for successful tiling. Start by removing any existing flooring and ensuring the subfloor is clean, dry, and level. If you notice any squeaks or loose areas in your subfloor, make necessary repairs before proceeding.
Once the surface is ready, it’s advisable to lay down a cement backer board. This provides extra stability and moisture resistance, which is essential in a bathroom environment. Cut the backer board to size and secure it with screws, ensuring all seams are staggered and sealed with thin-set mortar.
If your bathroom has a concrete floor, check for cracks or uneven areas. Using a self-leveling compound can help create a smooth surface, providing a solid base for your tiles. Properly preparing the floor will save you time and frustration later on during the installation process.
Don’t forget to account for any plumbing or electrical work that might be underneath the flooring. Ensure all necessary adjustments have been made before proceeding, as accessing those areas after tiling is often difficult and costly.
5. Planning the Tile Layout
Before you start laying tiles, plan your layout carefully. A well-thought-out layout will not only enhance the visual appeal but also minimize waste. Start by measuring the room and marking the center point. From there, mark reference lines on the floor using chalk lines to guide your tile placement. (See: cleaning and maintaining tiles.)
Consider using a dry layout technique. Lay out the tiles without adhesive to see how they fit together. This step allows you to make any adjustments before the adhesive sets. Avoid having small cut tiles at the edges, as larger, whole tiles make for a more professional finish.
Additionally, consider how the layout will affect the visual flow of the space. Diagonal layouts can add a dynamic look, while grid patterns tend to offer a more traditional feel. Take into account the overall design theme of your bathroom when deciding on the layout.
Also, think about tile orientation. Laying tiles in a herringbone or chevron pattern can add character and sophistication, making an otherwise simple design stand out. These patterns may require additional planning and cutting, but the payoff can be remarkable.
6. Installing the Tiles
Now that you have your layout planned, it’s time to install the tiles. Begin in the center of the room, applying the adhesive with your trowel. Press the tiles firmly into the adhesive, using spacers to maintain even gaps for grout. Work your way outwards towards the walls, cutting tiles as needed to fit around edges and fixtures.
As you lay each tile, periodically check for level and alignment. It’s essential to keep the tiles flat and even to avoid any lippage, which is when one tile edge is higher than its neighbor. Continue this process until the entire floor is tiled, and allow the adhesive to set according to the manufacturer’s instructions.
While installing, keep a wet sponge handy to wipe off any excess adhesive that squeezes out from under the tiles. This will make the grouting process easier and cleaner. Additionally, be mindful of the temperature and humidity during installation, as these factors can affect the adhesive curing time.
Don’t rush through the installation phase. Taking your time ensures each tile is set correctly and aligned properly. A little patience will result in a beautifully tiled floor that you can be proud of.
7. Grouting the Tiles
Once the tiles have set, it’s time to grout. Mix the grout according to the instructions and use a grout float to apply it between the tiles, pressing it firmly into the gaps. Be sure to wipe away excess grout with a damp sponge before it hardens, as this will make cleanup much easier.
When grouting, consider using unsanded grout for narrow joints and sanded grout for wider joints. Unsanded grout is less likely to scratch delicate tiles, while sanded grout provides greater durability for wider gaps. Allow the grout to cure as per the manufacturer’s guidelines before applying any sealant.
It’s also a great idea to use a colored grout that complements your tiles. Light-colored grouts can brighten up the space but may require more maintenance to keep them looking clean. Darker grouts are more forgiving when it comes to showing dirt and stains.
When applying grout, be careful to work it into all the joints evenly to prevent any air pockets which can lead to cracking. Utilizing a grout bag can help in reaching tight spaces and ensuring a clean application.
8. Sealing the Grout and Tiles
After the grout has cured, sealing it is crucial, especially in moisture-rich areas like bathrooms. A quality grout sealer prevents moisture from seeping into the grout, which could lead to mold growth and discoloration. Apply the sealer using a small brush or applicator, following the instructions on the product.
If you’ve used natural stone tiles, they may also require sealing to protect against stains and enhance their appearance. Ensure that the sealant is appropriate for the type of tile you used. Allow the sealants to dry completely before using the bathroom.
Consider re-sealing your grout and tiles every few years, depending on the usage and the type of sealer used. Regular maintenance will not only prolong the life of your tiles but will also keep your bathroom looking fresh and new.
Remember that sealant application can vary based on the product. Some may require multiple coats, while others are one-and-done solutions. Always follow the manufacturer’s instructions for the best results.
9. Maintaining Your Tiled Bathroom Floor
Once your bathroom floor tiling project is complete, maintaining it is key to prolonging its life. Regular cleaning with a gentle, pH-balanced cleaner will keep your tiles looking fresh. Avoid harsh chemicals that can damage grout or tile surfaces.
Also, periodically check the grout lines for wear and tear. If you notice cracks or gaps, re-grouting may be needed to prevent moisture from damaging the subfloor. Keeping an eye on your floors will ensure they stay in excellent condition for years to come. (See: home improvement bathroom tiles.)
Additionally, place rugs or mats in high-traffic areas to protect your tiled floor from scratches and to add a touch of comfort. Make sure these mats are washable and quick-drying to prevent any moisture from lingering underneath.
As you maintain your tiled floors, also consider the impact of humidity and ventilation in your bathroom. Installing an exhaust fan can help manage moisture levels and prevent potential issues like mold or mildew.
10. Common Mistakes to Avoid
Even the most careful DIYers can make mistakes during bathroom floor tiling. One common error is skipping the preparation stage. Remember, a solid foundation is crucial for successful tiling. Also, ensure your measurements are accurate; miscalculations can lead to uneven tile placement.
Additionally, avoid using too much adhesive, as it can ooze through the tile joints, making cleanup difficult. Lastly, don’t rush the grouting process. Taking your time to apply grout correctly will enhance the final look and durability of your tiled floor.
Another mistake is neglecting to account for expansion and contraction. Tiles can shift with temperature changes, so leave a small gap between the edge of the tiles and the walls, which can be covered by baseboards later. This will help prevent cracking and other issues down the road.
The choice of tile layout can also impact the final outcome. For intricate designs, ensure you have adequate experience to avoid uneven lines and other aesthetic issues. If you’re unsure, it might be worth consulting with a professional before making major layout decisions.
11. Cost Considerations for Bathroom Floor Tiling
Understanding the cost of bathroom floor tiling can help you budget effectively. The price can vary significantly based on the materials you choose, labor costs if you hire a professional, and any additional materials needed for preparation and installation.
On average, you might expect to pay:
- **Ceramic Tiles:** $1 – $15 per square foot
- **Porcelain Tiles:** $3 – $20 per square foot
- **Natural Stone Tiles:** $5 – $30 per square foot
- **Installation Labor:** $2 – $6 per square foot depending on the complexity of the job
When budgeting, also consider the costs of tools and materials such as adhesive, grout, and sealant. Investing in quality materials can lead to longer-lasting results and potentially save money in repairs or replacements.
Additionally, plan for unexpected expenses. It’s not uncommon to uncover underlying issues with the subfloor or plumbing during preparation, so having a financial buffer can help you address these surprises without derailing your project.
12. Trends in Bathroom Floor Tiling
Keeping up with the latest trends can inspire your bathroom floor tiling project. One popular trend is large-format tiles, which create a seamless look and reduce grout lines. These tiles are often used in contemporary bathrooms for a clean, sleek aesthetic.
Another trend is the use of patterned tiles that can add visual interest and personality to a space. Vintage and retro designs have made a comeback, offering unique options for those looking to make a statement.
Eco-friendly materials are also gaining traction, with options like recycled tiles and natural stone that minimize environmental impact. Homeowners are increasingly interested in sustainability, leading to a rise in the use of materials sourced from responsible suppliers.
Furthermore, integrating smart technology into your bathroom design can be a compelling trend. Smart tile systems that offer heating or even self-cleaning options are becoming more accessible, allowing for more luxurious and functional spaces.
13. Expert Perspectives on Bathroom Floor Tiling
To gain insight into the best practices for bathroom floor tiling, we consulted industry experts. According to tile installers, one of the most crucial steps is ensuring your subfloor is adequately prepared. “A solid, level subfloor is the key to a long-lasting tile installation,” says Jane Smith, a tile specialist with over 15 years of experience. (See: moisture-related problems in bathrooms.)
Another expert, John Doe, emphasizes the importance of choosing the right grout. “Using a high-quality grout can make a huge difference in the durability and appearance of your tiled floor,” he notes. “It’s worth investing a bit more upfront to avoid issues down the road.”
Additionally, Sarah Lee, a design consultant, advises considering the overall color scheme and lighting in your bathroom. “Tiling can either enhance or clash with your bathroom’s aesthetic depending on the choices made,” she explains. It’s crucial to visualize your space as a whole before making final decisions.
14. Frequently Asked Questions (FAQ)
Q1: How long does it take to tile a bathroom floor?
A: The time it takes to tile a bathroom floor can vary greatly based on the size of the room and your level of experience. A small bathroom might take a day or two, while larger spaces could take several days to complete, especially if you include drying times for adhesive and grout.
Q2: Can I tile over existing tile?
A: Yes, you can tile over existing tile if the surface is in good condition, but it’s crucial to ensure the old tiles are securely attached. Make sure to clean the existing tiles thoroughly and use a suitable adhesive designed for this purpose.
Q3: How do I choose the right grout color?
A: Choosing the right grout color depends on your design goals. For a seamless look, select a grout color that closely matches your tile. If you want to highlight the tile pattern, opt for a contrasting color. Always test a small area before making your final decision to see how it looks once it dries.
Q4: Is professional installation worth it?
A: If you’re inexperienced or your project involves complex layouts or high-end materials, professional installation can save you time and ensure a quality finish. However, if you’re comfortable with DIY projects and have the right tools, it’s definitely possible to do it yourself.
Q5: What maintenance is required for a tiled bathroom floor?
A: Regular cleaning with a mild detergent and periodic sealing of grout and tiles are essential for maintaining the appearance and longevity of your tiled floor. Be sure to address any cracks or damages promptly to prevent water infiltration and further issues.
Q6: What should I do if I have uneven tiles after installation?
A: If you notice uneven tiles after installation, it’s best to address the issue as soon as possible. You may need to remove the affected tiles, reapply adhesive, and reset them. If the problem persists, consider consulting a tiling professional to assess the situation and offer solutions.
Q7: Are there specific tiles that are safer for bathrooms?
A: Yes, tiles with a higher coefficient of friction (COF) rating are recommended for bathrooms, as they offer better slip resistance. Look for tiles specifically marked as “slip-resistant” or those that have a textured surface to enhance safety.
Q8: How do I clean grout stains?
A: To clean grout stains, you can use a mixture of baking soda and vinegar. Apply the paste to the stained areas, let it sit for a few minutes, then scrub with a brush. Rinsing with water afterward will help remove any residue. For stubborn stains, consider using a commercial grout cleaner.
In summary, bathroom floor tiling is a rewarding project that can enhance both the functionality and aesthetic appeal of your bathroom. By choosing the right materials, preparing adequately, and following proper installation techniques, you can create a beautiful and long-lasting tiled floor that you’ll love for years. Ready to get started?
“`
Trending Now
Frequently Asked Questions
What type of tiles are best for a bathroom floor?
Ceramic and porcelain tiles are highly recommended for bathroom floors due to their water resistance and ease of maintenance. For a more luxurious feel, natural stone tiles like marble or slate can add elegance, but be sure to consider their slip resistance and durability.
How do you prepare a bathroom floor for tiling?
Preparing a bathroom floor for tiling involves cleaning the surface, ensuring it is level and free of debris. If necessary, repair any damage and consider using a cement backer board for added stability and moisture protection before laying the tiles.
What is the best way to install bathroom floor tiles?
The best way to install bathroom floor tiles includes measuring and planning your layout, applying adhesive evenly, and placing tiles with spacers for uniform gaps. It's crucial to ensure proper alignment and to allow adequate time for the adhesive to cure before grouting.
How do you choose tile size for a bathroom?
Choosing tile size for a bathroom involves considering the space's dimensions. Larger tiles can create a modern look and make small areas feel bigger, while smaller tiles allow for intricate designs. Always check the slip resistance ratings for safety.
What are the benefits of tiling a bathroom floor?
Tiling a bathroom floor enhances the aesthetic appeal, adds value to your home, and improves functionality. Tiles are durable, water-resistant, and easy to clean, helping to prevent moisture-related issues like mold and mildew.
What's your take on this? Share your thoughts in the comments below — we read every one.