Master the Art of Milk Frothing: Science & Techniques
“`html
1. The Science Behind Milk Frothing
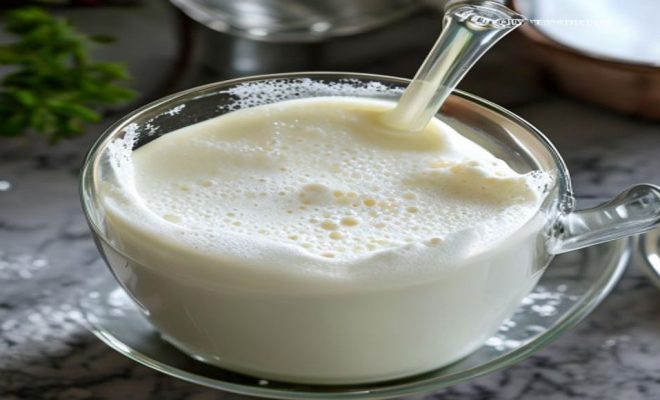
Milk frothing is more than just a technique used to create a visually appealing drink; it’s a science. At its core, frothing involves incorporating air into milk, which causes the proteins and fats to create tiny bubbles, resulting in the creamy texture we love in lattes and cappuccinos. Understanding the science behind these milk frothing techniques can elevate your home coffee experience.
The two main types of milk used for frothing are whole and non-fat. Whole milk contains more fat, which contributes to a richer, creamier texture, while non-fat milk yields a lighter foam. The ideal temperature for frothing is just below boiling, around 150°F (65°C). Heating the milk causes the proteins to denature, allowing them to stabilize the air bubbles created during frothing.
Interestingly, the temperature and composition of milk also affect the stability of the foam. For instance, research suggests that milk with a higher protein content can produce more stable foam. This is why some baristas prefer using milk specifically designed for frothing, as it often contains added proteins for better results.
2. Essential Tools for Frothing Milk
Before diving into the various methods, it’s crucial to equip yourself with the right tools. Depending on your budget and preferences, there are several options available:
- Steam Wand: Typically found on espresso machines, this is the gold standard for professional frothing.
- Handheld Milk Frother: An affordable and portable option that works well for quick frothing tasks.
- French Press: While not designed specifically for frothing, it can create decent foam by pumping the plunger rapidly.
- Milk Frothing Pitcher: A spouted pitcher is essential for controlling the pour and achieving the desired texture.
- Electric Milk Frother: These machines automate the frothing process and can be a good investment if you find yourself frothing milk regularly.
Investing in a quality steam wand or handheld frother can make a significant difference in the texture and consistency of your frothed milk, leading to better results at home. Consider your habits and coffee consumption to choose the right tools for your needs.
3. Technique #1: The Steam Wand Method
The steam wand is the preferred tool for many baristas, as it can produce microfoam that enhances the flavor and mouthfeel of your drink. To use a steam wand effectively, follow these steps:
- Fill your pitcher with cold milk, about one-third full to allow room for expansion.
- Position the steam wand just below the surface of the milk.
- Turn on the steam and angle the pitcher to create a whirlpool effect.
- As the milk froths, gradually lower the pitcher to allow the wand to stay submerged and heat the milk.
- Once the milk reaches around 150°F (65°C), turn off the steam and remove the pitcher.
For a velvety texture, try to create microfoam by incorporating just the right amount of air. This technique requires some practice, but the results are well worth the effort. Additionally, it’s helpful to keep your steam wand clean and free from milk residue, as this can affect the quality of your froth.
4. Technique #2: The Handheld Milk Frother
If you don’t have a steam wand, a handheld milk frother can be a great alternative. This simple device is easy to use and produces decent froth in just a few minutes. Here’s how to use it: (See: Research on milk protein and frothing.)
- Pour cold milk into a tall container. Fill it no more than halfway.
- Submerge the frother into the milk and turn it on.
- Move the frother up and down to incorporate air until you achieve the desired frothiness.
Handheld frothers are particularly useful for those who want a quick and convenient way to enjoy frothed milk without the need for expensive equipment. However, the foam may not be as dense as what you’d achieve with a steam wand. It’s also important to choose a frother with adjustable speeds for better control over the frothing process.
5. Technique #3: The French Press Method
Did you know that a French press can double as a frothing tool? This method is especially handy for those who may not have other frothing equipment. To froth milk using a French press, follow these steps:
- Heat the milk in a separate container until it reaches the desired temperature.
- Pour the milk into the French press, filling it no more than halfway.
- Place the lid on the press and pump the plunger vigorously for about 30 seconds.
The French press creates air bubbles in the milk, resulting in a frothy texture. Keep in mind that this method may require some practice to get the foam just right, but it’s a great option if you’re looking for versatility in your kitchen tools. Additionally, make sure to use a clean French press to avoid mixing flavors from previous brews.
6. Technique #4: The Mason Jar Method
If you’re looking for a frothing technique that requires minimal equipment, the mason jar method might be your best bet. It’s simple and perfect for those in a pinch without access to traditional frothing tools. Here’s how to do it:
- Fill a mason jar with milk about halfway.
- Seal the jar tightly and shake it vigorously for about 30-60 seconds.
- Remove the lid and microwave the jar for about 30 seconds, being careful not to let it overflow.
This method creates a light and fluffy foam. It’s an excellent choice if you want to froth milk without investing in specialized equipment, but be cautious with the hot jar when microwaving! You can also experiment with different shaking techniques to see what yields the best results.
7. Understanding Milk Types and Their Impact on Frothing
Finally, understanding the different types of milk can significantly affect your frothing experience. Whole milk, with its higher fat content, typically yields the richest and most stable foam. Skim or low-fat milk can create froth as well, but it may not have the same creamy texture. Alternative milks, such as almond, soy, or oat milk, also have unique frothing characteristics:
- Almond Milk: Tends to create a lighter foam; look for barista blends for better results.
- Oat Milk: Often praised for its creaminess, it froths well and is a popular dairy alternative.
- Soy Milk: Offers a stable foam but can vary between brands. Experiment to find the best one.
- Coconut Milk: It has a distinctive flavor and can froth well, especially if you choose the creamier varieties.
- Cashew Milk: Creamy and stable, making it a great choice for frothing.
When choosing your milk, consider your desired flavor and texture. Experimenting with different types can lead to exciting discoveries and elevate your coffee experience. For instance, oat milk is known for its ability to create a creamy texture, which many consumers prefer as a dairy substitute.
8. Common Mistakes to Avoid When Frothing Milk
Even seasoned baristas can make mistakes when frothing milk. Avoid these common pitfalls to ensure you achieve the best results:
- Overheating the Milk: Milk should be steamed to around 150°F (65°C). Anything above 160°F (71°C) can scorch the milk and create an unpleasant flavor.
- Too Much Air: While incorporating air is essential for frothing, too much can lead to a dry foam that lacks creaminess.
- Incorrect Pitcher Size: Using a pitcher that’s too small can prevent air from being incorporated properly, while one that’s too large can make it difficult to control the frothing process.
- Not Cleaning Your Equipment: Neglecting to clean your frothing equipment can result in old milk residues affecting taste and texture.
By being mindful of these common mistakes, you can improve your frothing technique and create the perfect cup every time. Also, keep in mind that practice makes perfect; the more you froth, the better you’ll become at it. (See: Study on milk composition and foam stability.)
9. Advanced Milk Frothing Techniques
Once you’ve mastered the basics of milk frothing, you can explore more advanced techniques to impress your friends or enhance your coffee creations. Here are a few methods:
- Texturing Techniques: Learning how to texture milk properly can transform your beverages. This involves using the steam wand in a circular motion to create a smooth, silky texture.
- Layering Flavors: Experiment with adding flavored syrups or spices while frothing. For instance, adding vanilla extract can enhance the flavor of your foam.
- Creating Latte Art: Once you’ve achieved the right texture, practice pouring techniques to create beautiful latte art. This usually involves pouring the milk in a specific pattern to achieve designs like hearts or rosettas.
- Experiment with Temperature: Some baristas suggest frothing milk at different temperatures to create distinct textures and flavors. A lower temperature can yield a sweeter tasting milk.
- Oat Milk Frothing Technique: Oat milk is gaining popularity for its frothing abilities. When using oat milk, agitate the milk starting at a lower temperature, gradually heating while frothing to avoid separation.
10. Popular Coffee Drinks that Use Frothed Milk
Frothing milk isn’t just about aesthetics; it plays a vital role in various coffee drinks. Here are some popular beverages where frothing makes a difference:
- Latte: A combination of espresso and steamed milk with a small amount of froth on top, lattes are creamy and smooth.
- Cappuccino: Equal parts espresso, steamed milk, and froth create a balanced drink that’s rich in flavor and texture.
- Macchiato: This drink features espresso “stained” with a dollop of frothed milk, emphasizing the coffee’s bold flavors.
- Flat White: Similar to a latte but with a higher ratio of coffee to milk, featuring velvety microfoam that enhances the espresso flavor.
- Affogato: A dessert-style drink that combines a scoop of ice cream with a shot of hot espresso, often topped with frothed milk for added richness.
11. FAQ About Milk Frothing Techniques
1. Can I froth milk without a frother?
Yes, you can use methods like the mason jar technique or the French press to froth milk without specialized tools. Just ensure that the milk is heated properly and shaken or pumped vigorously.
2. What type of milk is best for frothing?
Whole milk is ideal for frothing because of its fat content, which creates stable and creamy foam. However, barista blends of alternative milks can also work well.
3. How do I know when my milk is at the right temperature?
A food thermometer is the best way to check, but visually, the milk should feel hot to the touch and have a shiny, glossy appearance without any bubbling or boiling.
4. Why is my frothed milk not staying foamy?
This could be due to overheating the milk, using milk that’s not fresh, or incorporating too much air. Practice your technique and ensure your milk is within the optimal temperature range.
5. Can I froth non-dairy milk?
Absolutely! Many non-dairy milk options can be frothed, but results can vary. Look for barista-specific formulations for the best frothing results.
6. How often should I clean my frothing equipment?
It’s best to clean your frothing tools after each use to prevent milk residue from affecting future frothing and to maintain hygiene. (See: The science of frothing milk.)
7. What is microfoam, and how do I create it?
Microfoam is a fine, velvety foam that integrates air bubbles into the milk. You can create it using a steam wand by positioning it just below the surface of the milk and creating a whirlpool effect.
8. How do I achieve the perfect froth consistency for different drinks?
The consistency of froth varies by drink. For a cappuccino, aim for a drier, thicker foam, while a latte requires a creamier, smoother texture. Adjust your frothing technique and temperature accordingly.
9. Can you froth flavored milk?
Yes, you can froth flavored milk, but adding syrups or extracts during or after frothing may alter the foam’s stability. Consider adding flavors after achieving the desired froth to maintain consistency.
10. What are the best practices for steaming milk with a steam wand?
To get the best results, keep the tip of the steam wand just below the surface of the milk while angling the pitcher for a whirlpool effect. This helps incorporate air efficiently and creates a smooth texture.
Whether you’re a coffee aficionado or a casual drinker, mastering milk frothing techniques opens up new possibilities for your home coffee game. Invest in the right tools, practice different methods, and don’t be afraid to experiment with various milk types. Soon, you’ll be crafting your own impressive lattes, cappuccinos, and more, all with café-quality foam. So, grab your tools, get to frothing, and enjoy the delicious results!
“`
Trending Now
Frequently Asked Questions
What is the best milk for frothing?
Whole milk is often considered the best for frothing due to its higher fat content, which creates a richer, creamier texture. Non-fat milk can also be used, producing a lighter foam, but it may not achieve the same stability and creaminess as whole milk.
How do you froth milk without a frother?
You can froth milk without a frother by using a French press. Simply heat the milk and pump the plunger rapidly to incorporate air. Another method is to shake heated milk in a jar with a tight lid until frothy.
What temperature should milk be for frothing?
The ideal temperature for frothing milk is just below boiling, around 150°F (65°C). Heating the milk to this temperature allows the proteins to denature and stabilize the air bubbles created during frothing.
Can you froth almond milk?
Yes, you can froth almond milk, but results may vary based on the brand and formulation. Look for almond milk specifically labeled as barista or frothing milk, as they often contain added proteins for better foam stability.
What tools do I need to froth milk at home?
Essential tools for frothing milk at home include a steam wand (found on espresso machines), a handheld milk frother, a French press, a milk frothing pitcher for precise pouring, and an electric milk frother for automated frothing.
Have you experienced this yourself? We'd love to hear your story in the comments.