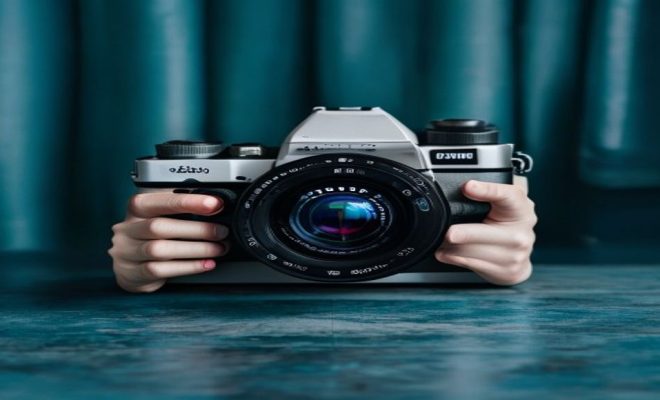
How to test camera on Windows
“`html
In this digital age, ensuring your camera works seamlessly on your Windows device is essential, whether you’re video calling, streaming, or creating content. Knowing how to test camera on Windows can save you from frustrating moments when you need your camera to perform. This comprehensive guide will walk you through various methods to check and optimize your camera functionality on Windows. Let’s dive in!
1. Understanding the Importance of Testing Your Camera
Your webcam is a crucial part of your digital experience. With video conferencing becoming increasingly common, knowing how to test camera on Windows can ensure you’re always ready to connect. A malfunctioning camera can lead to poor communication and a frustrating experience. It’s not just about ensuring the hardware works; it’s about making sure you can share experiences, whether in a personal or professional context.
Moreover, testing your camera can help identify issues related to privacy and security. With cyber threats on the rise, you want to ensure your camera isn’t being accessed without your knowledge. Regularly checking your camera’s functionality and settings can help you maintain control over your privacy.
2. Checking Your Camera’s Connection
The first step to effectively test camera on Windows involves checking the physical connection. If you’re using an external webcam, ensure that it is firmly plugged into your USB port. If your camera is integrated into your device, make sure there are no physical obstructions. Sometimes, dust or a faulty connection can cause the camera to malfunction.
For USB webcams, try plugging the device into different USB ports. This can help determine if the issue lies with the port itself. Additionally, you can check the device manager on Windows to see if the camera is recognized. Navigate to Device Manager by right-clicking on the Start Menu and selecting it. Under the Imaging devices section, look for your camera. If there’s a yellow exclamation mark next to it, there may be a driver issue.
Another potential issue could be power-related. If your camera has an LED indicator, check to see if it lights up when powered on. If it doesn’t, the camera might not be receiving enough power, which can happen if you’re using a USB hub. Connecting directly to the motherboard’s USB port may resolve this issue.
3. Using the Windows Camera App
Windows provides a built-in Camera app that makes it easy to test camera on Windows. To access it, simply type “Camera” in the Windows search bar and select the app. If your camera is functioning correctly, you’ll see a live video feed. This is one of the quickest ways to check if your webcam is operational.
Once the Camera app is open, you can switch between the front and rear cameras if you have a laptop or device with multiple cameras. Additionally, you can take photos or record videos to not only test functionality but also to see the quality of the output. If you encounter any issues while using this app, it might indicate a more profound software or hardware problem.
Interestingly, the Camera app also allows you to adjust settings such as exposure, brightness, and contrast. Exploring these settings can help enhance video quality, especially in poorly lit environments. If you find the default settings don’t suit your needs, tweaking them can lead to noticeable improvements.
4. Adjusting Privacy Settings
Privacy settings can sometimes prevent your camera from working correctly on Windows. To ensure your camera is accessible, go to Settings by clicking on the gear icon in the Start Menu. Navigate to Privacy, and then select Camera from the sidebar.
Here, you can see which apps have permission to use your camera. Ensure that the toggle for Allow apps to access your camera is turned on. If certain applications, like Zoom or Skype, aren’t listed, you’ll need to give them permission to access your camera. This step is crucial, as blocking access may lead to the camera appearing not to work when, in fact, it’s a settings issue. (See: Camera ergonomics and safety guidelines.)
It’s also important to regularly review the list of apps that have access to your camera. Sometimes, apps you no longer use might still have permissions, posing a risk to your privacy. You can revoke these permissions to ensure that only necessary applications can utilize your camera.
5. Conducting a Video Call Test
One of the most practical ways to test camera on Windows is through a video call application. Programs like Skype, Zoom, or Microsoft Teams not only allow you to see if your camera works, but they also provide a live interface where you can check the video quality in real-time. Start a test call or a meeting, and observe how your camera performs.
During the test call, pay attention to the video quality and how smoothly the image appears. Check for any lag, pixelation, or blurriness, which might indicate issues with your camera settings or bandwidth. Moreover, having someone on the other end can help you confirm if your camera is working correctly from their perspective as well.
If you’re testing your camera for an important meeting, it’s a good idea to conduct the test a day or two in advance. This allows you to troubleshoot any issues without the pressure of a live setting. Remember, having a backup plan, such as using a phone as a webcam, can also save the day if technical difficulties arise.
6. Updating Camera Drivers
If your camera isn’t working as expected after testing it, the next step is to check for driver updates. Outdated or corrupted drivers can significantly affect camera performance. To update your camera drivers, head to Device Manager, find your camera under Imaging devices, right-click on it, and select Update driver.
You can choose the option to automatically search for updated driver software. Alternatively, you can visit the manufacturer’s website for your webcam to download the latest drivers manually. Keeping your drivers up-to-date ensures compatibility with the latest software and can resolve many issues regarding camera functionality.
If you continue facing issues even after updating the drivers, consider rolling back to a previous version. Sometimes, newer drivers may not be fully compatible with your hardware. You can do this in the same Device Manager window by selecting the Roll Back Driver option.
7. Using Third-Party Software to Test Your Camera
There are numerous third-party applications available that can help you test camera on Windows. Software like ManyCam and Webcam Test can provide additional features and tests. ManyCam, for instance, allows you to apply effects and filters, which can be a fun way to see how your camera captures different visual inputs.
Webcam Test, on the other hand, is a straightforward online tool where you can check your camera in real time. Simply visit their site, and it will prompt you to allow access to your camera. This method is handy if you want a quick test without installing any software. These tools can also help you capture snapshots and record videos for further analysis.
In addition to testing, many of these applications also come with features to enhance your video calls, like virtual backgrounds and overlays. This can be especially useful for content creators looking to add a professional touch to their streams or videos. Exploring these features can provide a more dynamic experience than using the built-in Windows apps alone.
8. Troubleshooting Common Camera Issues
Even after following all the steps to test camera on Windows, you might encounter issues that require troubleshooting. Some common problems include a black screen, poor video quality, or the camera not being recognized by Windows. If you face a black screen, it could be due to a software conflict or an issue with the camera settings.
To troubleshoot, you can start by restarting your computer, which often resolves minor glitches. If the problem persists, try uninstalling and reinstalling the camera software via Device Manager. If the camera still doesn’t work, checking for hardware damage or contacting technical support might be necessary. Additionally, consider performing a system restore to a time when the camera was functioning correctly. (See: Tips for effective video conferencing.)
For poor video quality, ensure that your lighting conditions are optimal. Low light can lead to grainy videos, so experimenting with different lighting setups can make a significant difference. You might also want to check your internet connection if you’re experiencing lags or drops during video calls.
9. Ensuring Optimal Camera Quality
After successfully testing your camera, it’s essential to ensure it’s set up for optimal performance. Lighting plays a significant role in video quality; ensure you have good lighting in your environment to avoid dark or grainy images. Natural light is often the best, so position yourself facing a window if possible.
Additionally, consider your camera’s resolution settings. In many applications, you can adjust the video quality settings. Opt for the highest resolution your camera supports for the best clarity. Also, ensure that your internet connection is stable if you’re streaming or video calling, as poor connectivity can affect video quality significantly.
Using a tripod or stabilizing your device can also enhance video quality by preventing shaky footage. Furthermore, be aware of your background, as a clean and organized space can create a more professional appearance on camera. If necessary, consider using a virtual background for a more polished look.
10. Regular Maintenance and Updates
Finally, just like any other piece of technology, regular maintenance is key to keeping your camera in top shape. Make it a habit to check for updates, both for your camera drivers and your operating system. Regular updates can fix bugs and improve performance, ensuring your camera always operates smoothly.
Additionally, consider cleaning your camera lens periodically to avoid dust and smudges affecting the video quality. A microfiber cloth is ideal for this task. Lastly, stay informed about any emerging issues related to your specific camera model by checking forums or the manufacturer’s website.
Stay proactive about any software that uses your camera as well. Many applications regularly update and may introduce new features or fix bugs. Regularly checking for updates can ensure you’re taking full advantage of what’s available.
11. Frequently Asked Questions (FAQ)
Can I use my smartphone as a webcam on Windows?
Yes, you can use your smartphone as a webcam on Windows. Applications like DroidCam or EpocCam allow you to connect your smartphone camera to your computer via USB or Wi-Fi. This can provide higher quality video than some built-in webcams.
What should I do if my camera is not showing up in Device Manager?
If your camera doesn’t appear in Device Manager, it might be a hardware issue. Check the physical connections, and ensure your camera is powered on. Also, try connecting it to a different USB port or another computer to see if it’s recognized there.
How do I know if my webcam is being used by another application?
If your webcam is not working, it may be in use by another application. Close all programs that could potentially be using the camera, like video conferencing apps or photo capture tools. Additionally, you can check the Task Manager to see if any background processes are utilizing your camera. (See: Importance of health communication.)
Is it normal for my camera to have a slight delay?
Some delay is normal, especially if your internet connection is slow or unstable. However, if the delay is significant, it could indicate issues with your hardware or software settings. Ensuring a stable connection and closing other bandwidth-heavy applications can help reduce lag.
How often should I test my camera?
It’s a good practice to test your camera before important video calls or streaming sessions. Regularly testing can help you catch any issues early on, but a thorough check once a month should suffice for casual use. If you notice changes in performance, test again sooner.
What to do if my camera quality is poor?
If you’re experiencing poor camera quality, it could be due to various factors. Start by checking your lighting conditions; natural light is always preferable. Additionally, ensure your camera lens is clean, as smudges can significantly reduce video clarity. If using an external camera, check the resolution settings in your application and adjust to the highest quality available. Sometimes, simply reconnecting the camera or restarting your device can rectify the issue.
Can my computer’s antivirus interfere with my camera?
Yes, antivirus software can sometimes interfere with camera functionality. Some security programs may disable access to your camera as a precautionary measure. Check your antivirus settings to ensure it’s not blocking your camera or the applications that require access to it. You may need to add exceptions for certain programs to function correctly.
How can I enhance the audio quality during video calls?
Audio quality is just as crucial as video quality during calls. Invest in a good-quality microphone, or use a headset with a built-in mic for better sound clarity. Also, try to reduce background noise by choosing a quiet environment. Adjusting the audio settings in your video conferencing software can also help, allowing you to select the preferred audio input and output devices for optimal performance.
Are there specific apps recommended for testing camera quality?
Yes, there are a few apps that stand out for testing camera quality. Aside from the Windows Camera app, consider using OBS Studio, which is popular for video streaming and can provide insights into your camera’s performance. Additionally, applications like Zoom or Skype not only allow for video calls but also have built-in settings to adjust and check video quality during calls.
In summary, knowing how to test camera on Windows is not just about checking if it works; it’s about ensuring a seamless digital experience in a world that increasingly relies on virtual interactions. Follow these guidelines to maintain your camera in perfect condition and enjoy clear, reliable video communication.
“`
Trending Now
Frequently Asked Questions
How do I check if my camera is working on Windows?
To check if your camera is working on Windows, open the Camera app by searching for it in the Start menu. If the camera feed appears, it's functioning correctly. You can also check Device Manager to see if the camera is recognized under 'Imaging devices.'
What should I do if my camera is not detected on Windows?
If your camera is not detected on Windows, first check the physical connections. Ensure the webcam is securely plugged in or that there are no obstructions for built-in cameras. You can also try different USB ports or update the camera drivers in Device Manager.
How can I test my webcam for video calls?
To test your webcam for video calls, open the Camera app and ensure your video feed is clear. You can also use video conferencing software like Zoom or Skype to create a test call and check the video quality before important meetings.
Why is my camera not working on Windows 10?
If your camera is not working on Windows 10, it could be due to driver issues, privacy settings, or hardware problems. Check Device Manager for driver updates, ensure camera access is allowed in privacy settings, and verify the physical connections.
How do I fix a blurry camera on Windows?
To fix a blurry camera on Windows, clean the camera lens gently with a microfiber cloth. Check the camera settings in the Camera app for resolution options. If the issue persists, consider updating your camera drivers or adjusting lighting conditions during use.
Have you experienced this yourself? We’d love to hear your story in the comments.