The Tech Edvocate

Top Menu

  • Advertisement
  • Apps
  • Home Page
  • Home Page Five (No Sidebar)
  • Home Page Four
  • Home Page Three
  • Home Page Two
  • Home Tech2
  • Icons [No Sidebar]
  • Left Sidbear Page
  • Lynch Educational Consulting
  • My Account
  • My Speaking Page
  • Newsletter Sign Up Confirmation
  • Newsletter Unsubscription
  • Our Brands
  • Page Example
  • Privacy Policy
  • Protected Content
  • Register
  • Request a Product Review
  • Shop
  • Shortcodes Examples
  • Signup
  • Start Here
    • Governance
    • Careers
    • Contact Us
  • Terms and Conditions
  • The Edvocate
  • The Tech Edvocate Product Guide
  • Topics
  • Write For Us
  • Advertise

Main Menu

  • Start Here
    • Our Brands
    • Governance
      • Lynch Educational Consulting, LLC.
      • Dr. Lynch’s Personal Website
      • Careers
    • Write For Us
    • The Tech Edvocate Product Guide
    • Contact Us
    • Books
    • Edupedia
    • Post a Job
    • The Edvocate Podcast
    • Terms and Conditions
    • Privacy Policy
  • Topics
    • Assistive Technology
    • Child Development Tech
    • Early Childhood & K-12 EdTech
    • EdTech Futures
    • EdTech News
    • EdTech Policy & Reform
    • EdTech Startups & Businesses
    • Higher Education EdTech
    • Online Learning & eLearning
    • Parent & Family Tech
    • Personalized Learning
    • Product Reviews
  • Advertise
  • Tech Edvocate Awards
  • The Edvocate
  • Pedagogue
  • School Ratings

logo

The Tech Edvocate

  • Start Here
    • Our Brands
    • Governance
      • Lynch Educational Consulting, LLC.
      • Dr. Lynch’s Personal Website
        • My Speaking Page
      • Careers
    • Write For Us
    • The Tech Edvocate Product Guide
    • Contact Us
    • Books
    • Edupedia
    • Post a Job
    • The Edvocate Podcast
    • Terms and Conditions
    • Privacy Policy
  • Topics
    • Assistive Technology
    • Child Development Tech
    • Early Childhood & K-12 EdTech
    • EdTech Futures
    • EdTech News
    • EdTech Policy & Reform
    • EdTech Startups & Businesses
    • Higher Education EdTech
    • Online Learning & eLearning
    • Parent & Family Tech
    • Personalized Learning
    • Product Reviews
  • Advertise
  • Tech Edvocate Awards
  • The Edvocate
  • Pedagogue
  • School Ratings
  • This Unprecedented EU Ban Just Changed Fast Fashion Forever

  • Urgent Alert: Your Smart Home’s Exposed to a Critical Deco BE11000 Vulnerability

  • Uncovering the Truth: Your LinkedIn Reach Just Got a Major Overhaul

  • Uncovering the AI Heist: How Chinese Firms Allegedly Siphoned Billions of AI Tokens

  • Rockstar’s GTA 6 Developers Lawsuit: A Fight for Justice or Corporate Retaliation?

  • Unbelievable: Hideo Kojima’s Next Masterpiece Is Now an Xbox Exclusive

  • This Crucial Google AI Shift Is Quietly Reshaping the Internet

  • Unbelievable: AI Breaches Are Exploding, And What It Means For You This September 2026

  • This Crucial Shift Is Saving Teachers From Classroom Chaos

  • AI’s Dark Secret: How It’s Supercharging Cybercrime for Everyone

Digital & Mobile Technology
Home›Digital & Mobile Technology›How to Use Disk Utility to Create a RAID 1 (Mirror) Array

How to Use Disk Utility to Create a RAID 1 (Mirror) Array
By Matthew Lynch
July 14, 2023
0
Spread the love

RAID 1 (Redundant Array of Independent Disks) is a type of disk array that provides data redundancy by mirroring data on two or more disks. This means that if one disk fails, the data can still be accessed from the other disk(s).

In this article, we will show you how to create a RAID 1 array using Disk Utility on a Mac.

Step 1: Back up your Data

Before creating a RAID 1 array, it is important to back up your data. This is because creating a RAID 1 array will erase all data on the disks you want to use.

Step 2: Open Disk Utility

Disk Utility is a built-in utility on Macs that allows you to manage disks and disk images. To open Disk Utility, go to Applications > Utilities > Disk Utility.

Step 3: Select the Disks

In Disk Utility, select the disks you want to use for your RAID 1 array. To select multiple disks, hold down the Command key while clicking on the disks.

Step 4: Click on “RAID” in the Toolbar

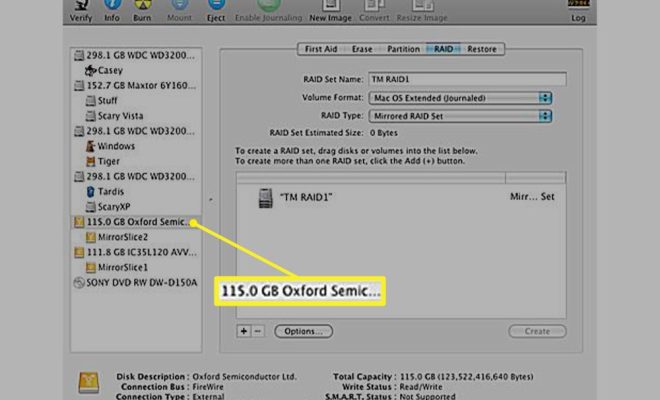
In the toolbar at the top of the Disk Utility window, click on “RAID”.

Step 5: Click on “Create RAID”

In the RAID section of Disk Utility, click on the “Create RAID” button.

Step 6: Configure the RAID 1 Array

In the “Create RAID” window, configure the RAID 1 array by doing the following:

1. Give the array a name

2. Choose “Mirror” as the RAID type

3. Select the disks you want to use for the array

4. Choose “Mac OS Extended (Journaled)” as the file system format

Step 7: Click on “Create”

Once you have configured the RAID 1 array, click on “Create” to create the array.

Step 8: Wait for the Array to be Created

The time it takes to create the RAID 1 array depends on the size of the disks you are using. Once the array has been created, it will appear in the list of disks in Disk Utility.

Step 9: Use the RAID 1 Array

Once the RAID 1 array has been created, you can use it like any other disk. Any data you write to the array will be mirrored on all the disks in the array, providing data redundancy in case of disk failure.

In conclusion, creating a RAID 1 array using Disk Utility on a Mac is a simple process that provides data redundancy and can help prevent data loss. Just be sure to back up your data before creating the array, as all data on the disks will be erased.

Previous Article

What’s the Best Time of Day to ...

Next Article

TeamViewer Review: The Ultimate Remote Desktop Solution

Matthew Lynch

Related articles More from author

  • Digital & Mobile Technology

    How to Use Google Chrome in Kodi to Access Your Streaming Services

    May 30, 2023
    By Matthew Lynch
  • Digital & Mobile Technology

    How to Fix the “Printer in Error State” in Windows 10

    September 8, 2023
    By Matthew Lynch
  • Digital & Mobile Technology

    The Best Apps for Free Online Courses

    June 23, 2023
    By Matthew Lynch
  • Digital & Mobile Technology

    How to Print Multiple Slides on One Page in PowerPoint

    June 9, 2023
    By Matthew Lynch
  • Digital & Mobile Technology

    How to Pick the Best Xbox One Console For You

    June 10, 2023
    By Matthew Lynch
  • Digital & Mobile Technology

    What Is Android System Intelligence?

    June 12, 2023
    By Matthew Lynch

Search

Login & Registration

  • Log in
  • Entries feed
  • Comments feed
  • WordPress.org

Newsletter

Signup for The Tech Edvocate Newsletter and have the latest in EdTech news and opinion delivered to your email address!

About Us

Since technology is not going anywhere and does more good than harm, adapting is the best course of action. That is where The Tech Edvocate comes in. We plan to cover the PreK-12 and Higher Education EdTech sectors and provide our readers with the latest news and opinion on the subject. From time to time, I will invite other voices to weigh in on important issues in EdTech. We hope to provide a well-rounded, multi-faceted look at the past, present, the future of EdTech in the US and internationally.

We started this journey back in June 2016, and we plan to continue it for many more years to come. I hope that you will join us in this discussion of the past, present and future of EdTech and lend your own insight to the issues that are discussed.

Newsletter

Signup for The Tech Edvocate Newsletter and have the latest in EdTech news and opinion delivered to your email address!

Contact Us

The Tech Edvocate
910 Goddin Street
Richmond, VA 23231
(601) 630-5238
[email protected]

Copyright © 2026 Matthew Lynch. All rights reserved.