4 Ways to Draw a Puppy
Introduction:
Drawing a puppy can be an enjoyable and rewarding activity for both beginners and experienced artists alike. By following these four simple methods, you will be able to create a variety of adorable sketches of your furry friend. Let’s dive right in.
Method 1: Simple Cartoon Puppy
1. Start by drawing a circle for the head and a slightly larger oval shape for the body.
2. Sketch two semi-circles on either side of the head for the ears.
3. Inside the head circle, draw two large ovals for the eyes and a small triangle for the nose.
4. Below the nose, add a curved line for the mouth and small dots for whiskers.
5. Connect the head to the body with two curved lines for the neck.
6. Add small ovals for paws, followed by curved lines to form legs.
7. Finish your cartoon puppy by drawing a wagging tail and adding any desired facial expressions or markings.
Method 2: Realistic Puppy
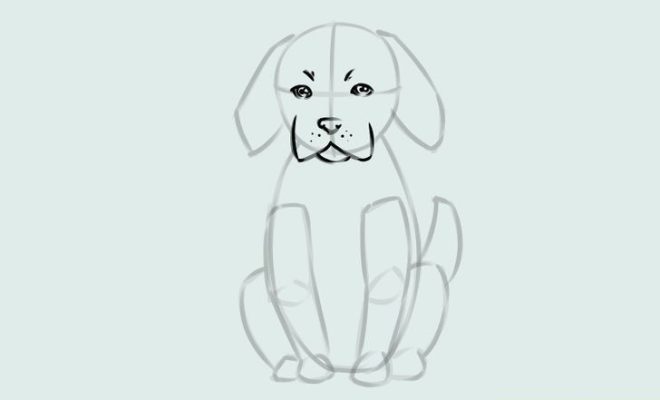
1. Begin with an oval shape for the head and another one at an angle for the body.
2. Add guide lines inside the head oval – one vertical and one horizontal – to help position facial features.
3. Sketch almond-shaped eyes along the horizontal guideline, then draw a triangle nose on top of another smaller triangle to create shading effects.
4. Draw a mouth by extending lines downward from the nose, emphasizing a “W” shape to define lips.
5. Create floppy ears on both sides of the head, with curved lines extending from top to bottom.
6. Define legs by sketching cylinders attached to slightly oversized paws that taper down to rounded tips.
7. Incorporate a long tail starting from its base attached to the body and ending in a pointy tip.
8. Refine your drawing by erasing unnecessary lines, adding details such as fur, and shading to give depth.
Method 3: Cute, Chubby Puppy
1. Start with a round head, followed by an even larger rounder body shape.
2. Use two semi-circles for ears and heart-shaped ovals for the eyes.
3. Add a triangle nose and an inverted “Y” shape for the mouth.
4. Create short, stubby legs with oval paws at each end.
5. Sketch a short wavy tail towards the rear of the body.
6. Complete your drawing by adding cute facial expressions and fur patterns.
Method 4: Abstract Puppy
1. Initiate the drawing with random shapes like circles, triangles, or rectangles for the head and body.
2. Experiment with different shapes for ears, such as extended triangles or squiggles.
3. Design the eyes using unique styles like swirls or starbursts.
4. Add a creative down-pointed curve or spiral as a nose, followed by a simple line for the mouth.
5. Render elongated tube-like legs with unconventional paw shapes such as stars or zigzags.
6. Finish off with an extraordinary tail design that complements your abstract concept.
Conclusion:
Drawing a puppy can be approached in various ways to suit individual preferences or artistic styles. By mastering these four methods, you will develop versatile skills while having fun creating your canine masterpieces. Don’t forget to practice and experiment; eventually, you will discover your unique style!

