3 Ways to Make Burlap Flowers
Introduction:
Burlap flowers are versatile and charming decorations that can elevate any craft project or home décor. They are easy to make and require just a few materials that you might already have at hand. This article will guide you through three different methods to create burlap flowers, making it easy for you to add a rustic and elegant touch to your space.
Method 1: Rolled Burlap Flowers
Materials:
– Burlap fabric
– Scissors
– Hot glue gun and glue sticks
– Optional: Embellishments like beads or pearls
Instructions:
1. Cut a strip of burlap fabric measuring approximately 2 inches wide and 18 inches long.
2. Fold the strip in half lengthwise, creating a thin band.
3. Apply a line of hot glue along the folded edge and start rolling the burlap tightly at one end to create the flower’s center.
4. Continue rolling the burlap outward while applying dabs of hot glue periodically, securing the layers together.
5. Adjust the layers as needed to achieve your desired flower size and shape.
6. Trim any excess burlap and secure with hot glue.
7. Optional: Add embellishments like beads or pearls to the center of your flower for an added touch.
Method 2: Looped Burlap Flowers
Materials:
– Burlap fabric
– Scissors
– Hot glue gun and glue sticks
– Cardboard circle (2-inch diameter)
Instructions:
1. Cut several burlap strips measuring 1 inch wide and 12 inches long.
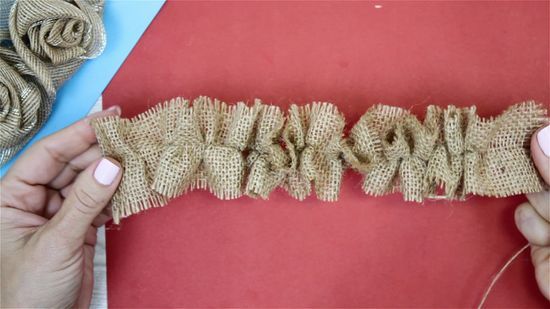
2. Take a strip and fold it in half lengthwise. Create a loop by tucking one end into the other, leaving both cut ends free.
3. Glue one end of the looped strip onto the edge of the cardboard circle.
4. Repeat with additional strips, overlapping them until you have covered the entire circle with loops.
5. Continue layering loops on top of the first layer to create more volume for the flower.
6. When you’re happy with the volume, trim any excess burlap and secure with hot glue.
Method 3: Petal Burlap Flowers
Materials:
– Burlap fabric
– Scissors
– Hot glue gun and glue sticks
– Cardboard circle (2-inch diameter)
– Template for petals
Instructions:
1. Cut your desired petal template from a piece of paper or cardstock.
2. Trace and cut multiple burlap petals from the fabric using your template.
3. Fold each petal in half and apply hot glue along the folded edge.
4. Glue the first petal onto the edge of the cardboard circle, positioning it so that the fold is facing outward.
5. Repeat with additional petals, overlapping them slightly until you’ve covered the entire circle.
6. Continue layering petals on top of the first layer, staggering their placement, to create a fuller-looking flower.
7. When you’re pleased with the volume, trim any excess burlap and secure with hot glue.
Conclusion:
Making burlap flowers is an enjoyable and rewarding project that can add rustic charm to various settings. Exploring these three techniques provides a great starting point, allowing you to become more creative and customize your burlap flowers to fit any occasion or theme.