3 Ways to Block Senders in Gmail

Introduction:
Gmail is a popular email service provided by Google that has millions of users worldwide. While it offers great features and tools, it is not immune to annoying spam emails or unwanted senders. It’s essential to know how to block senders in Gmail, so your inbox remains clean and clutter-free. This article will outline three different ways to block senders from your Gmail account.
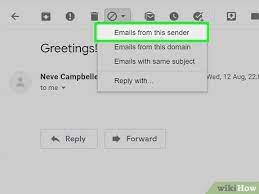
1. Blocking From an Email Message
This method is the simplest and quickest way to block a sender directly from the email message:
a. Open Gmail and sign in with your Google account.
b. Locate the email from the sender you wish to block.
c. Open the email and click on the three vertical dots (More options) located at the top-right of the email window.
d. In the drop-down menu that appears, select “Block [Sender’s Name].”
e. Click “Block” in the confirmation window that pops up.
The sender is now blocked and all future emails from them will automatically be moved to your Spam folder.
2. Blocking From Your Contacts List
If you have unwanted senders in your contacts list, you can easily block them by accessing the list:
a. Open Gmail and sign in.
b. Click on the Google apps icon (a 3×3 grid of dots) on the top-right of your screen.
c. Select “Contacts” from the dropdown menu.
d. Locate and click on the contact you want to block in your contacts list.
e. Once their details are displayed, click on the three vertical dots icon at the top-right of the contact information panel.
f. Choose “Block [Contact’s Name]” from the dropdown menu.
g. Confirm blocking by selecting “Block” in the pop-up window.
3. Creating a Filter for Specific Email Addresses
This method allows you to create filters to block specific email addresses, even if they are not in your contacts:
a. Open Gmail and sign in.
b. Click the gear icon at the top-right and select “See all settings” from the dropdown menu.
c. In the settings window, click on the “Filters and Blocked Addresses” tab.
d. Click on “Create a new filter” located at the bottom of the page.
e. Enter the email address you want to block in the “From” field.
f. Once you have entered the email address, click on “Create filter.”
g. In the next window, check the box next to “Delete it,” which means that future emails from that sender will be automatically deleted. You can also check “Always mark it as spam” to send their emails directly to your Spam folder.
h. Finally, click on “Create filter” to put the new filter into effect.
Conclusion:
These three methods enable you to effectively block unwanted senders in Gmail while keeping your inbox organized and clutter-free. By knowing how to block senders directly from an email, from your contacts list, or by creating a filter for specific addresses, you can prevent unwanted emails from reaching your inbox and maintain control over your Gmail experience.


