3 Ways to Add Photoshop Filters
Adobe Photoshop is an incredibly versatile tool that offers a wide range of filters and effects to enhance your images. Photoshop filters are a go-to feature for photographers, designers, and other creative professionals who want to add a unique touch to their projects. In this article, we will explore three different ways to add filters in Photoshop.
1.Using the Filter Gallery
The Filter Gallery is the most straightforward way to apply filters in Photoshop. It contains an extensive collection of built-in filters ready at your fingertips. Here’s how to use the Filter Gallery:
Step 1: Open your image in Photoshop and make sure the layer you want to apply the filter on is selected.
Step 2: Go to the top menu and click on “Filter,” then “Filter Gallery.”
Step 3: The Filter Gallery window will appear, showcasing various filter categories on the right, such as Artistic, Brush Strokes, Distort, and more. Click on a category to expand it and see all available filters under that group.
Step 4: Select a filter by clicking on its thumbnail and watch how it transforms your image in the preview window. Use the sliders and settings on the bottom right side of the Filter Gallery window to adjust the intensity and other properties of the filter.
Step 5: When you’re happy with your selection, click “OK” to apply the filter effect to your image.
2.Applying Smart Filters
Smart Filters are non-destructive filters that can be applied on Smart Objects in Photoshop. They allow you to tweak or remove any effects without harming your original image information. Here’s how to use Smart Filters:
Step 1: Open your image in Photoshop and convert it into a Smart Object by right-clicking on the layer or thumbnail and selecting “Convert to Smart Object.”
Step 2: Go to “Filter” on the top menu and select any desired filter from the list. Note that not all filters are available as Smart Filters in the menu.
Step 3: Apply the chosen filter to your Smart Object, and you’ll notice a tiny icon added to your layer thumbnail, indicating that it has Smart Filters applied.
Step 4: Double-click on the filter under the layer in the Layers panel to adjust its settings or click the eye icon next to it to toggle its visibility.
Step 5: If you wish to remove a Smart Filter, click on it and drag it down to the trash icon in the Layers panel.
3.Customizing Filter Effects with Blend Modes
Blend modes can take your filter effects to another level by defining how your filtered layer interacts with the layers beneath it. Here’s how to combine blend modes with filters:
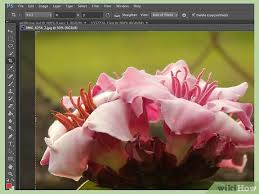
Step 1: Open your image in Photoshop and create a duplicate layer of your image. Make sure you work on the duplicate layer when applying filters.
Step 2: Apply any filter using either the Filter Gallery or any other method mentioned above.
Step 3: Open the Layers panel (Window > Layers) and locate your filtered layer. Click on the drop-down box for blend modes located at the top of the panel; options include Normal, Multiply, Screen, Overlay, etc.
Step 4: Experiment with different blend modes until you find a combination that creates a unique effect for your image.
In conclusion, Photoshop filters can greatly enhance and transform images. By mastering these three methods – using the Filter Gallery, applying Smart Filters, and customizing with Blend Modes – you can unleash unlimited creative potential and elevate your digital artistry.