How to Marble Paper

Marbled paper art, a centuries-old decorative technique, has been admired for its unique patterns and eye-catching colors. Once commonly used for bookbinding and endpapers, it has become an increasingly popular form of art in contemporary design. Whether you’re looking to add a touch of elegance to your next DIY project or create personalized gifts, learning how to marble paper is a skill that can bring endless creative possibilities. Here’s a step-by-step guide to help you get started.
Materials needed:
1. Shallow tray or baking sheet
2. Acrylic paints
3. Water
4. Thicker paper (like watercolor paper or cardstock)
5. Wooden skewers, toothpicks, or a rubber comb
6. Paper towels
7. Rubber gloves (to keep your hands clean)
Step 1: Prepare the tray and paints
Fill a shallow tray or baking sheet with a layer of water, about ½ inch deep. Select your desired acrylic paint colors for marbling and squeeze them into separate small containers.
Step 2: Add the paint to the water
Pour a small amount of each color into the water one at a time. Each color should spread out on the water’s surface, creating an interesting pattern. You may need to experiment with different paint brands as some brands spread better than others.
Step 3: Swirl the colors together
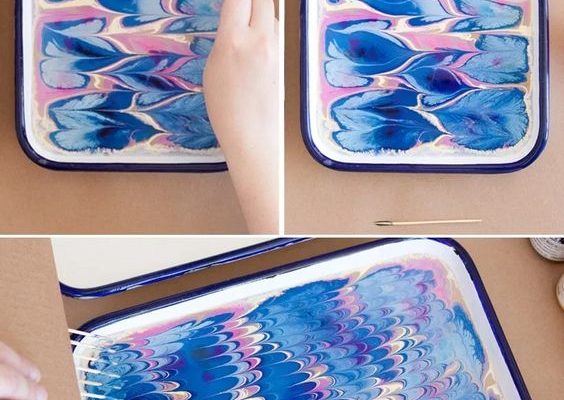
Using wooden skewers, toothpicks or a rubber comb, gently swirl the paint colors together on the water’s surface to create your desired effect. Experiment with different patterns using various swirling motions or zigzagging lines until you achieve your desired design.
Step 4: Dip your paper
Carefully lay your piece of paper on top of the water by holding it by two corners. Gently press down so that the entire surface of the paper makes contact with the paint-water mixture. Let the paper rest for a few seconds to absorb the colors.
Step 5: Remove and dry the paper
Lift your paper off the water, letting any excess water drip back into the tray. Hold the paper up at an angle and let it flow downward to create streaks of color or gently wave it in the air to set the design. You may also blot any excess water with paper towels if needed.
Step 6: Lay your paper flat to dry
Carefully lay your marbled paper on a clean, flat surface to dry. Avoid touching the surface of the paper, as it can smudge the delicate design. Allow it to dry thoroughly, usually for a few hours or overnight.
Step 7: Clean up and repeat
Once your marbled masterpiece is completely dry, you can use it for various purposes such as card-making, scrapbooking, or even framing as wall art. To continue marbling more papers or change colors, simply scoop out any remaining paint from the tray and start again with fresh water and new paint colors.
With these simple steps, you’re well on your way to creating unique and beautiful marbled papers! Keep exploring different color combinations and swirling techniques to produce stunning mottled effects that make each creation truly one-of-a-kind.


