How to sculpt in Blender
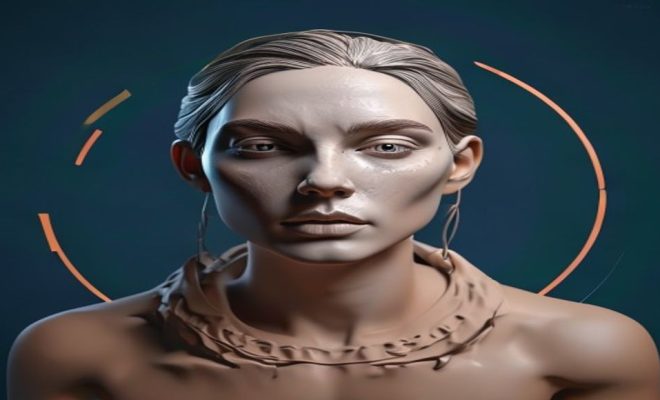
When you first dive into the world of 3D modeling, you quickly realize there’s a vast ocean of techniques and tools to learn. But for many artists, the real magic happens when you move beyond hard-surface modeling and venture into sculpting. It’s here that digital clay truly comes alive, allowing you to shape organic forms with an intuitive, hands-on feel that’s reminiscent of traditional sculpting. And if you’re working with free, open-source software, Blender is undeniably the king. This isn’t just a powerful modeling suite; it’s a formidable sculpting environment that rivals many dedicated commercial applications.
Whether you’re aiming to create intricate character designs, detailed environmental assets, or simply experiment with digital form, a robust Blender sculpting tutorial is your roadmap. We’re going to break down the essential techniques, tools, and workflows that will transform your approach to digital sculpting in Blender, taking you from a curious beginner to someone confidently manipulating virtual clay. Forget the steep learning curve; we’ll show you how to leverage Blender’s powerful features to bring your artistic visions to life, one brushstroke at a time.
1. Getting Started: Setting Up Your Sculpting Workspace
Before you even think about pushing polygons around, you need to set up your workspace properly. Blender’s default layout is great for general modeling, but for sculpting, you’ll want something optimized for the task. The easiest way to do this is to simply switch to the ‘Sculpting’ workspace tab at the top of your Blender window. This immediately reconfigures your interface, bringing the most commonly used sculpting brushes, tools, and panels to the forefront. You’ll see the 3D viewport dominate the center, flanked by the tool shelf on the left (with all your brushes) and properties panels on the right.
Beyond the default layout, consider customizing a few things. You’ll definitely want a graphics tablet (like a Wacom or Huion) for pressure sensitivity – trying to sculpt with just a mouse is like trying to paint a masterpiece with a brick. Ensure your tablet drivers are installed and working correctly. Also, get comfortable with Blender’s navigation: middle-mouse button to rotate, Shift+middle-mouse to pan, and scroll wheel to zoom. These are muscle memory you’ll build quickly, and they’re crucial for fluid sculpting. Finally, having a good lighting setup in your viewport (often controlled by the HDRI options in the Shading popover) can dramatically improve your ability to see the forms you’re creating.
2. Understanding Dynotopo and Voxel Remeshing: Dynamic Detail Management
One of the biggest hurdles in traditional polygon modeling for organic forms is managing mesh density. Add too many subdivisions too early, and your computer grinds to a halt; too few, and you can’t sculpt fine details. Blender offers two incredibly powerful solutions for this: Dynotopo and Voxel Remeshing, and understanding when to use each is key to any advanced Blender sculpting tutorial.
Dynotopo (Dynamic Topology) is a game-changer for initial blocking and adding detail without worrying about your mesh structure. When enabled (it’s a toggle in the top toolbar, often near the ‘Symmetry’ options), Dynotopo dynamically adds and removes geometry as you sculpt. If you make a large stroke, it adds polygons; if you smooth an area, it removes them. This means you can start with a very simple sphere and sculpt complex forms, and Blender will generate the necessary geometry on the fly. You control the level of detail with a ‘Detail Size’ setting – smaller values mean more polygons and finer detail. The beauty of Dynotopo is its freedom; you’re not constrained by a fixed mesh resolution, making it perfect for concepting and roughing out shapes.
Voxel Remeshing, on the other hand, is a more controlled, global re-meshing solution. It’s found in the ‘Object Data Properties’ tab (the green triangle icon, under the ‘Remesh’ section). When you hit ‘Remesh’, Blender essentially converts your mesh into a volume of voxels (3D pixels) and then creates a new, uniform mesh based on that volume. This is incredibly useful for cleaning up messy Dynotopo meshes, merging multiple sculpted objects into one seamless mesh, or simply getting a consistent polygon density across your entire model. You control the resolution with the ‘Voxel Size’ parameter; smaller values create a denser mesh. The downside is that it can smooth out very fine details if the voxel size is too large, so it’s often used at various stages: after blocking out major forms, after merging parts, or before adding very fine surface details.
3. Essential Sculpting Brushes and Their Applications
Blender comes packed with a robust set of sculpting brushes, each designed for a specific purpose. Getting to know these is fundamental for any effective Blender sculpting tutorial. You’ll find them on the left-hand toolbar in the Sculpting workspace. Let’s look at some of the most critical ones: (See: 3D modeling overview on Wikipedia.)
- Draw/Clay/Clay Strips: These are your foundational brushes. ‘Draw’ adds volume, ‘Clay’ builds up material more subtly, and ‘Clay Strips’ adds distinct, layered strokes, mimicking traditional clay tools. Clay Strips is often preferred for building up primary and secondary forms due to its natural feel.
- Smooth: Absolutely essential. Holding ‘Shift’ while using any other brush will temporarily activate the smooth brush, or you can select it directly. It evens out surfaces, removes jaggedness, and blends forms. Don’t be afraid to use it often!
- Grab: This is your primary brush for moving large sections of your mesh. It’s incredibly useful for adjusting proportions, pushing and pulling forms, and getting your overall silhouette right. You can adjust its radius to affect larger or smaller areas.
- Crease: Creates sharp indentations and edges. Think of it for wrinkles, folds, or defining anatomical features like nostrils or eyelids. Holding ‘Ctrl’ with the Crease brush will make it pull material out, creating sharp ridges.
- Inflate/Deflate: ‘Inflate’ pushes material outwards evenly, great for swelling forms or adding muscle volume. ‘Deflate’ (Ctrl+Inflate) pushes inwards, useful for creating hollows.
- Pinch: Pulls vertices towards the center of the brush, effectively sharpening existing edges or creating new ones by gathering geometry.
- Scrape/Flatten: ‘Scrape’ removes material and flattens surfaces, as if you’re scraping off clay. ‘Flatten’ attempts to make the surface under the brush perfectly flat. These are excellent for defining planes and hard surfaces within an organic sculpt.
- Mask: This isn’t a sculpting brush in the traditional sense, but it’s a critical tool. You can paint a mask onto your mesh (Ctrl+LMB by default), protecting those areas from further sculpting. This is invaluable for isolating parts of your model, sharpening edges, or pushing/pulling areas without affecting adjacent geometry. You can blur, clear, or invert masks from the ‘Mask’ menu.
Experiment with these. Adjust their strength (F key), radius (F key, then drag), and falloff (Shift+F) to see how they behave. The key is to understand what each brush is designed to do and integrate them into your workflow.
4. Leveraging Symmetry and Mirroring for Efficiency
Human anatomy, and indeed many organic forms, exhibit symmetry. Trying to sculpt both sides of a character’s face perfectly by hand would be an exercise in frustration and inconsistency. That’s where Blender’s symmetry tools come in. You’ll find these options in the top toolbar, usually labeled with ‘X’, ‘Y’, and ‘Z’ axes.
By default, when you start sculpting a new object, you’ll want to enable ‘X’ axis symmetry. This mirrors all your brush strokes from one side of the object to the other, making character sculpting, in particular, dramatically faster and more accurate. As you sculpt, any detail you add on the left will instantly appear on the right. You can also enable ‘Radial’ symmetry, which duplicates strokes around a central point, incredibly useful for things like tentacles, tree branches, or decorative patterns.
It’s important to start with your object centered at the world origin (0,0,0) for symmetry to work correctly. If your object isn’t perfectly symmetrical to begin with, or if you need to fix a slight asymmetry, you can use the ‘Symmetrize’ tool (found in the ‘Sculpt’ menu at the top of the 3D viewport) to project one side of your mesh onto the other. Just be mindful that this is a destructive operation, so save your work first! Utilizing symmetry effectively is a cornerstone of any efficient Blender sculpting tutorial.
5. Masking and Polygrouping for Precision Control
As your sculpts become more complex, you’ll inevitably need to work on specific areas without affecting others. This is where masking and polygrouping become indispensable. Think of masking as digitally painting a protective layer onto your mesh, while polygrouping allows you to organize your mesh into selectable regions.
Masking in Blender is incredibly powerful. You can paint masks directly onto your mesh using the ‘Mask’ brush (Shift+M to switch, or select from the toolbar). Masked areas appear darker and are unaffected by sculpting brushes. You can invert the mask (Ctrl+I), clear it (Alt+M), blur it (Shift+A), or even extract masked areas as new geometry. For example, you might mask out an area for an ear, then use the ‘Extract Mask’ feature to pull out new geometry that you can then sculpt into an ear, ensuring it’s perfectly flush with the head.
Polygroups (often referred to as Face Sets in Blender) are a way to logically segment your mesh. You can create them using the ‘Face Sets’ brush (Shift+W to toggle), or by pressing ‘W’ and drawing on your mesh. Different areas will be assigned different colors, indicating distinct face sets. The real power of face sets comes when you use them with other tools: you can auto-mask sculpting brushes to only affect the face set you’re currently sculpting, hide face sets, or even use them to create clean selections for retopology later on. For instance, you could quickly define face sets for the head, torso, and limbs of a character, then easily isolate those parts for detailed work without worrying about accidentally sculpting across boundaries. This level of control is crucial for advanced sculpting workflows.
6. Sculpting Layers and Multi-Resolution Workflow
Imagine being able to add fine details to your sculpt, then step back and adjust a major form, and then revert to your fine details without losing anything. That’s the power of a multi-resolution workflow combined with sculpting layers, although Blender’s implementation of ‘layers’ is a bit different from how you might think of them in Photoshop. (See: Scientific articles on 3D modeling.)
The Multi-Resolution Modifier is your best friend here. It allows you to subdivide your mesh multiple times, creating different levels of detail, but without applying those subdivisions destructively. You can sculpt on a low-resolution base mesh (Subdivision Level 0), then subdivide it to level 1 and add medium details, then subdivide again to level 2 or 3 for fine details. The beauty is you can always jump back down to a lower subdivision level, make large changes, and then jump back up, and Blender will attempt to project your fine details onto the new shape. This non-destructive workflow is invaluable for iteration and refinement.
While Blender doesn’t have a dedicated ‘sculpting layer’ system like some other software, you can achieve a similar effect using shape keys. A Shape Key essentially stores a ‘snapshot’ of your mesh’s vertex positions. You can create a base shape key, then sculpt a new detail, and create another shape key. Then, you can blend between these shape keys using a slider, effectively turning on or off specific sculpted details. This is particularly useful for adding different expressions to a character or creating variations of a design. While not as intuitive as dedicated layers, it offers a powerful way to manage variations and non-destructive changes.
7. Optimizing Performance: Keeping Blender Running Smoothly
Sculpting can be incredibly demanding on your computer’s resources, especially when you’re working with high-resolution meshes. Nothing kills creative flow faster than a laggy viewport. Here’s how to keep Blender running smoothly during your Blender sculpting tutorial:
- GPU vs. CPU: Ensure Blender is set to use your GPU for rendering and viewport display if you have a dedicated graphics card. Go to Edit > Preferences > System, and select your GPU under ‘Cycles Render Devices’.
- Viewport Shading: In the 3D viewport, click the ‘Viewport Shading’ dropdown (the sphere icon) and consider switching to ‘Solid’ mode with ‘MatCap’ enabled. MatCaps (Material Capture) are pre-rendered materials that provide good surface definition without the computational cost of real-time lighting. Disable ‘Scene Lights’ and ‘Scene World’ if you don’t need them.
- Simplify Display: Under the ‘Viewport Display’ section of your object’s properties, you can often simplify the display of modifiers, especially the Multi-Resolution modifier. When working on lower subdivision levels, turn off the higher levels in the viewport to reduce polygon count.
- Small ‘Detail Size’ for Dynotopo: While Dynotopo is great, a very small ‘Detail Size’ can quickly generate millions of polygons. Use larger detail sizes for blocking out, and only go smaller when you’re adding fine details to specific areas.
- Voxel Remeshing Sparingly: Each time you remesh, Blender recalculates the entire mesh. While powerful, avoid remeshing every few minutes. Use it strategically to clean up your mesh after significant form changes or merging.
- Hide Parts of the Mesh: If you’re working on a very dense model, you can temporarily hide parts of it using masking and the ‘H’ key. This significantly reduces the geometry Blender needs to display and process.
Regularly saving your work (Ctrl+S) is also a no-brainer, just in case Blender decides to have a moment!
8. Refining Details: Alphas, Stencils, and Texture Brushes
Once you’ve established your primary and secondary forms, it’s time to add those intricate surface details that bring your sculpt to life. This is where alphas, stencils, and texture brushes become invaluable tools in your Blender sculpting tutorial arsenal.
Alphas are grayscale images that dictate the shape of your brush stroke. Think of them like digital stamps. You can load an alpha (found in the ‘Texture’ tab of the brush properties) and use it with brushes like ‘Draw’ or ‘Crease’ to quickly add repeatable patterns, skin pores, scales, wrinkles, or surface imperfections. Blender comes with some basic alphas, but you can create your own or download extensive packs online. The trick is to play with the brush settings – especially ‘Spacing’ and ‘Jitter’ – to control how the alpha is applied along your stroke.
Stencils work similarly to alphas but give you more interactive control. Instead of painting a fixed alpha, a stencil projects an image onto your mesh, and you sculpt through it. This is fantastic for adding complex patterns, topographical details, or even projecting photographic reference directly onto your model to guide your sculpting. You activate a stencil by loading an image into the ‘Texture’ tab and setting its ‘Mapping’ to ‘Stencil’. Then, in the 3D viewport, you can move, scale, and rotate the stencil (Right-click to move, Shift+Right-click to scale, Ctrl+Right-click to rotate) while sculpting through it. (See: Harvard University resources on digital art.)
Texture Brushes take this a step further by using a texture to influence the brush stroke’s strength and direction. This is often used for subtle surface noise, dirt, or organic textures that aren’t easily achieved with simple alphas. You can load any image as a texture for your brush and experiment with different blending modes and mapping options to get unique effects. The combination of these tools allows for an incredible range of surface detailing, pushing your sculpts beyond mere form into believable texture.
9. Retopology and UV Unwrapping: Preparing Your Sculpt for Production
While sculpting in Blender is incredibly liberating, the mesh you create (especially with Dynotopo or multiple Voxel Remeshes) is rarely suitable for animation, game engines, or efficient texturing. It’s often a chaotic mess of triangles and uneven quads, with a wildly inconsistent polygon density. This brings us to two critical post-sculpting steps: retopology and UV unwrapping.
Retopology is the process of creating a new, clean, low-polygon mesh over your high-resolution sculpt. This new mesh will have efficient, evenly spaced quads (four-sided polygons), optimized for deformation (animation) and texturing. Blender offers several ways to do this. You can manually retopologize using tools like ‘Shrinkwrap’ modifier (which projects your new low-poly mesh onto the high-poly sculpt) and ‘Snap to Face’ (which makes your new verts stick to the surface). There are also add-ons like ‘Retopoflow’ that streamline the manual process. Blender’s built-in ‘QuadriFlow’ remesher (under the ‘Remesh’ modifier) is also an option for automatic retopology, though it sometimes requires manual cleanup. The goal is a mesh that can easily be deformed by an armature and that has clean edge loops around areas of deformation (like eyes, mouth, and joints).
Once you have your clean, low-poly mesh, you need to perform UV Unwrapping. This is the process of flattening your 3D mesh into a 2D plane, much like unfolding a cardboard box. These 2D ‘UV maps’ are where you’ll paint your textures (color, normal maps, roughness, etc.). Good UVs are crucial for high-quality texturing without distortion. Blender has excellent UV tools: use ‘Seams’ to define where your mesh will be cut, then press ‘U’ in the UV Editing workspace and select ‘Unwrap’. You’ll then arrange these flattened pieces (UV islands) in the UV editor to maximize space and minimize distortion. Finally, you’ll ‘bake’ the high-resolution details from your sculpt (like normal maps and ambient occlusion) onto your new low-poly mesh using its UVs, effectively transferring all that beautiful detail without the heavy polygon count.
Mastering Blender sculpting is a journey of continuous learning and practice. From understanding the fundamental brushes and dynamic topology to the intricacies of masking, multi-resolution workflows, and finally, preparing your assets for production, Blender provides a comprehensive toolkit. Don’t be afraid to experiment, make mistakes, and constantly refer back to tutorials and reference material. The digital clay awaits your touch, ready to be molded into whatever your imagination conjures.
Trending Now
Frequently Asked Questions
What is sculpting in Blender?
Sculpting in Blender is a technique that allows artists to manipulate digital clay in a way that mimics traditional sculpting. It offers an intuitive, hands-on approach to creating organic forms, making it ideal for character designs and detailed environmental assets.
How do I set up my sculpting workspace in Blender?
To set up your sculpting workspace in Blender, switch to the 'Sculpting' workspace tab at the top of the window. This layout optimizes your interface by bringing commonly used sculpting brushes and tools to the forefront, enhancing your workflow.
What tools are essential for sculpting in Blender?
Essential tools for sculpting in Blender include various brushes that allow for shaping, detailing, and texturing your models. Familiarizing yourself with the different brush types and their settings is crucial for effective sculpting.
Can I use a graphics tablet for sculpting in Blender?
Yes, using a graphics tablet, such as a Wacom, significantly enhances the sculpting experience in Blender. It allows for more precise control and a more natural feel when manipulating digital clay, making it easier to achieve intricate details.
Is Blender good for beginners in sculpting?
Blender is an excellent choice for beginners in sculpting. Its free and open-source nature, combined with powerful features and a supportive community, makes it accessible for new artists looking to learn and experiment with digital sculpting.
Agree or disagree? Drop a comment and tell us what you think.