How to shoot night photography
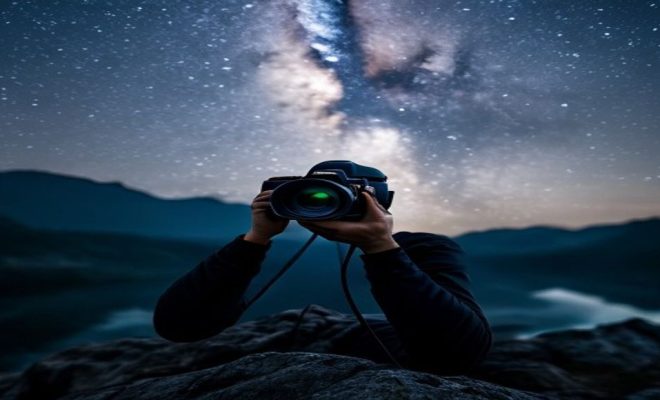
“`html
Navigating the world of night photography can feel daunting, yet it holds the promise of extraordinary beauty and creativity. When the sun sets and darkness blankets the landscape, a new realm of visual opportunities emerges. This article will provide you with essential night photography tips that will elevate your nighttime shooting skills, whether you’re a novice or a seasoned photographer.
1. Understanding Low Light Conditions
Before diving into the technical aspects of capturing night scenes, it’s crucial to understand how low light affects your images. In nighttime photography, the natural light is scarce, leading to challenges like motion blur and noise.
Low-light conditions mean your camera sensor needs to work harder to gather light. This can result in longer exposure times, which, if not managed properly, may lead to blurry images. Understanding light levels and how they fluctuate during nighttime is vital for making informed decisions about your camera settings.
2. Choose the Right Equipment
Your choice of equipment heavily influences the quality of your night photography. While you don’t need the most expensive gear to get started, certain tools can significantly enhance your results. A DSLR or mirrorless camera is ideal due to their larger sensors that perform better in low light.
Additionally, a sturdy tripod is a must-have. It stabilizes your camera and prevents shaking during long exposures. If you’re planning to shoot astrophotography or capture cityscapes, a remote shutter release can also prevent camera movement when taking the shot.
Consider also investing in a fast lens. Lenses with larger apertures (like f/1.4 or f/1.8) allow more light to enter, giving you greater flexibility in darker environments. This can be particularly beneficial when shooting in urban settings where ambient light can vary greatly.
3. Mastering Camera Settings
Understanding how to manipulate your camera settings is one of the most important night photography tips you’ll ever learn. Start with a low ISO setting to minimize noise, but depending on your camera’s capabilities, you may need to experiment. A good starting point could be ISO 800, adjusting as necessary.
Next, consider your aperture. A wider aperture (lower f-number) allows more light to hit the sensor, producing a brighter image. However, this also affects your depth of field. For landscapes, you might want a smaller aperture to keep more of the scene in focus. Finally, shutter speed should be adjusted based on your composition; longer exposures can create beautiful light trails but can also introduce blur.
It’s also beneficial to use your camera’s histogram to assess exposure accurately. Night photos can often fool your eyes, leading you to believe an image is properly exposed when it may not be. Regularly checking the histogram will help ensure you’re not losing details in shadows or highlights.
4. Utilizing Manual Focus
Auto-focus features can struggle in the dark, often leading to misfocus or frustration. Switching to manual focus allows you to dictate precisely where your camera focuses. This is especially critical when shooting in low light and when capturing intricate details, such as stars or city lights.
One effective method for achieving sharp focus is to zoom in on your live view display while aiming at a bright light source. Adjust the focus until the light appears sharp, then zoom back out to frame your shot. This technique ensures your subject is in focus even in challenging lighting conditions.
When focusing manually, it’s also helpful to use focus peaking, if your camera supports it. This feature highlights the edges of the area in focus, making it easier to achieve razor-sharp images, especially in low-light settings.
5. Play with Exposure Time
Long exposure is a hallmark of night photography, transforming ordinary scenes into ethereal masterpieces. Experiment with exposure times to see how light interacts with your surroundings. A few seconds can reveal unique light trails from passing cars, while several minutes can capture stunning star trails.
However, the longer your exposure, the more you need to consider camera stability. Use your tripod and remote shutter release to avoid any movement. Additionally, consider using neutral density (ND) filters to control the light entering your lens, allowing for longer exposures without overexposure. (See: Research on low light photography.)
Don’t shy away from experimenting with different exposure lengths. Sometimes, shorter exposures can yield dramatic results, especially in urban environments with lots of dynamic lighting. Play around with the timing until you find what works best for your creative vision.
6. Composition is Key
As with any photography, composition plays a crucial role in night photography. Take the time to consider your framing and how various elements within the scene interact. The rule of thirds is a classic guideline that can be particularly effective in night photography, helping to create balanced and engaging images.
Don’t forget to incorporate foreground interest, which can add depth and context to your images. Whether it’s a silhouette of a tree against a starry sky or urban architecture illuminated by streetlights, these elements can enhance the storytelling aspect of your night shots.
Additionally, leading lines can be an effective compositional tool. They guide the viewer’s eye through the image, creating a path that draws attention to your subject. This technique can be particularly captivating when shooting roads, pathways, or rivers at night, where the play of light and shadow can be mesmerizing.
7. Post-Processing Your Night Images
Your work doesn’t end once you leave the shoot—post-processing is where you can bring your night photography to life. Programs like Adobe Lightroom or Photoshop allow you to fine-tune exposure, contrast, and colors. Adjusting the white balance can really make the stars pop or help mitigate any unwanted color casts from streetlights.
Additionally, consider techniques like stacking images for astrophotography, which can help reduce noise and enhance detail in your night sky shots. A little time spent in editing can transform your photos from good to breathtaking, allowing you to showcase the magic of night photography.
Using noise reduction tools during post-processing can significantly enhance the quality of your images. High ISO settings can introduce noise that distracts from the scene. By applying noise reduction carefully, you can maintain detail while improving overall image quality.
8. Safety and Preparation
While focusing on the art of night photography, don’t overlook your safety. Shooting in the dark can pose risks, especially in unknown or secluded areas. Always let someone know where you’re going and consider going with a friend. Bringing a flashlight can help you navigate and set up your equipment safely.
Moreover, be aware of your surroundings. Wildlife, uneven terrain, and environmental conditions can all present unexpected challenges. Being prepared not only enhances your safety but also ensures you can focus on capturing stunning images.
It’s also wise to familiarize yourself with local regulations regarding night photography, especially in parks or urban areas. Some locations may have restrictions on the use of tripods or flash photography after certain hours, so doing your homework beforehand can save you from potential issues.
9. Keeping Your Gear in Top Shape
Finally, maintaining your photography gear is essential for consistent performance, especially when shooting in less-than-ideal conditions. Ensure your lenses are clean, and regularly check your camera’s settings and battery life before a night out to avoid unpleasant surprises.
Consider the weather, too. If rain or humidity is in the forecast, protective gear like a rain cover for your camera can prevent damage. Keeping your equipment in good condition will allow you to concentrate on creativity rather than repairs.
Investing in a cleaning kit can be beneficial as well. Dust and debris can easily accumulate on sensors and lenses, leading to unwanted artifacts in your photos. Regular maintenance ensures your gear performs at its best, especially in challenging environments.
10. Exploring Different Night Photography Styles
There are various styles and genres within night photography that you can explore to further enhance your skills. Each style brings its own set of techniques and creative opportunities.
Astrophotography: This involves capturing the night sky, including stars, planets, and the Milky Way. It requires long exposure times and often involves stacking multiple images for better detail. Researching star trails and understanding the best time and locations for astrophotography can significantly improve your results.
Urban Nightscapes: Capturing city scenes at night can showcase the vibrancy and energy of urban life. Look for interesting architecture, neon lights, and bustling streets. Experiment with reflections in puddles or glass buildings to add depth to your images. (See: Study on camera sensors in low light.)
Light Painting: In this creative style, you use a light source, such as a flashlight or sparklers, to “paint” your scene during a long exposure. This technique allows for incredible artistic expression and can create visually stunning results, transforming ordinary subjects into extraordinary works of art.
11. Common Challenges in Night Photography
Even seasoned photographers face challenges when shooting at night. Recognizing these can help you prepare and adapt more effectively during your sessions.
Noise: As mentioned earlier, noise can be a significant issue in night photography due to high ISO settings. Managing ISO, using noise reduction in post-processing, and utilizing proper exposure techniques can help mitigate this challenge.
Focusing: Low-light conditions make focusing tricky. Practicing manual focus and using techniques like focus peaking can help ensure sharp images. It’s also helpful to use bright objects in your frame to assist with focusing.
Exposure Control: Balancing exposure in a scene with bright lights and dark shadows can be challenging. Bracketing your shots—taking multiple images at different exposure levels—can help you capture the best result, allowing you to choose the best exposure during editing.
12. Expert Perspectives: Insights from Night Photography Professionals
Hearing from those who excel in night photography can provide invaluable insights. Many professional photographers share tips and experiences that can inspire you and guide you through challenges.
For instance, acclaimed night photographer David Kingham emphasizes the importance of patience and experimentation. “The night offers a unique set of challenges, but also a chance to discover unexpected beauty. Spend time at each location, observe the light changes, and don’t rush your shots,” he advises.
Another well-known figure, Elia Locardi, advocates for the use of planning tools like photo apps that track the Milky Way and weather conditions. “Being prepared is essential. Knowing when and where to shoot can make all the difference in your night photography,” he explains.
13. FAQs About Night Photography
What is the best time for night photography?
The best time for night photography is usually during the blue hour, just after sunset, or after the city lights are fully illuminated. However, if you’re shooting stars or the Milky Way, late night to early morning is optimal.
How do I avoid noise in my night photos?
To minimize noise, keep your ISO as low as possible, use long exposures with a tripod, and apply noise reduction in post-processing. Some cameras also have built-in noise reduction settings that can be helpful.
Can I shoot night photography with a smartphone?
Absolutely! While DSLRs and mirrorless cameras offer more control, many smartphones have impressive low-light capabilities. Use a tripod, and take advantage of night mode features to enhance your results.
Should I use a flash for night photography?
Generally, avoid using flash for landscape night photography as it can disrupt the natural ambiance. However, for portraits or close-up subjects, flash can be used creatively to illuminate your subject without overpowering the background.
How do I find good locations for night photography?
Research local parks, urban areas, or scenic viewpoints. Online photography forums or social media can also provide inspiration and tips from fellow photographers about the best spots in your area.
14. Advanced Techniques for Night Photography
Once you’ve grasped the basics, diving into advanced techniques can set your night photography apart. Incorporating these techniques can yield stunning results and help you develop a unique style. (See: Tips for better night photography.)
Star Tracking: This technique involves using a star tracker, a device that moves your camera in sync with the rotation of the Earth. This allows you to take longer exposures without star trails, capturing crisp, detailed stars. It’s an excellent technique for astrophotographers looking to achieve a clear night sky.
Time-Lapse Photography: Time-lapse photography at night can reveal stunning changes, especially in urban settings. By taking a series of images at set intervals and then compiling them into a video, you can showcase the transition from day to night or the movement of stars across the sky. This technique requires careful planning and a solid understanding of camera settings.
Light Trails: Capturing light trails from vehicles or celestial bodies can add dynamism to your night photos. Use long exposures to create ethereal lines of light that enhance the storytelling aspect of your images. Experiment with different shutter speeds and locations to see how the light interacts with your surroundings.
15. Using Filters for Night Photography
Filters can be a game changer in night photography. They help manage light, enhance colors, and create effects that you might not achieve otherwise. Here are a few types of filters to consider:
Neutral Density (ND) Filters: These filters reduce the amount of light entering the lens without affecting color. They allow for longer exposures without overexposing the shot, making them ideal for capturing light trails or smooth water effects in a night scene.
Polarizing Filters: While typically used during the day to reduce glare, polarizing filters can also enhance the color saturation of the night sky, making stars appear more vivid. They help to manage reflections in urban environments, allowing for clearer images of lights reflecting off water or glass.
Color Filters: Using color filters can add creative effects to your night photography, particularly in urban environments. They can enhance the colors of streetlights or create dramatic contrasts in your images. Experimenting with color gels can lead to exciting and unexpected outcomes in your photography.
16. Community and Resources
Engaging with the photography community can be incredibly beneficial for learning and growing your skills. Many photographers share their work and experiences online, providing inspiration and practical tips. Joining local photography clubs or online forums can connect you with others who share your passion.
Additionally, countless resources are available online. Websites, YouTube channels, and photography blogs dedicated to night photography offer tutorials, reviews of gear, and inspiration. Consider following photographers who specialize in night photography on social media to keep the creativity flowing and learn from their techniques.
By incorporating these night photography tips into your practice, you’ll be well on your way to creating captivating images that convey the beauty of night. Remember, the key is to keep experimenting and refining your skills—every shot is an opportunity to learn. So grab your gear, embrace the darkness, and let your creativity shine!
“`
Trending Now
Frequently Asked Questions
What equipment do I need for night photography?
For night photography, a DSLR or mirrorless camera is recommended due to their superior performance in low light. A sturdy tripod is essential to prevent camera shake during long exposures, and consider using a fast lens with a larger aperture (like f/1.4 or f/1.8) to allow more light for better results.
How do I set my camera for night photography?
To set your camera for night photography, use manual mode to control exposure settings. Start with a low ISO to minimize noise, a wide aperture to capture more light, and adjust the shutter speed based on the amount of light available, ensuring it's long enough to gather sufficient light without causing motion blur.
What are the challenges of night photography?
Night photography presents challenges such as low light conditions that can lead to motion blur and increased noise. As the camera sensor works harder to gather light, longer exposure times are needed, which requires careful management to avoid blurry images and ensure sharp, clear photos.
Can I use my smartphone for night photography?
Yes, you can use a smartphone for night photography, especially newer models equipped with advanced low-light capabilities. While they may not match the quality of DSLRs or mirrorless cameras, using features like night mode or longer exposure settings can help you capture beautiful nighttime images.
What tips can improve my night photography skills?
To improve your night photography skills, practice understanding low light conditions, choose the right equipment like a sturdy tripod and fast lens, and master your camera settings. Experiment with different exposure times and compositions to enhance your creativity and capture stunning nighttime images.
What did we miss? Let us know in the comments and join the conversation.