Build Your Own Classic Adirondack Chair: A DIY Guide
“`html
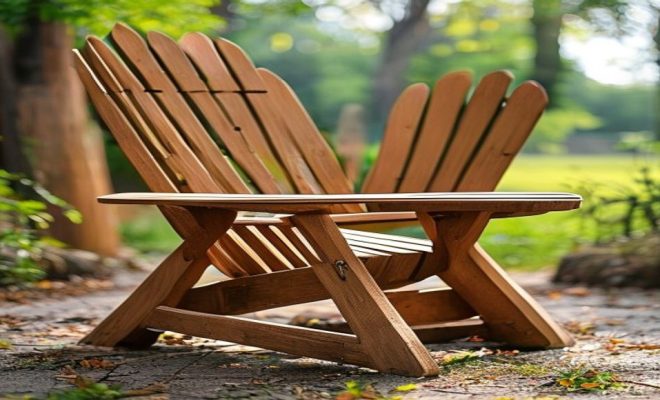
If you’re seeking a cozy addition to your outdoor space, you might want to consider building your own Adirondack chair. Not only does this classic design offer comfort and style, but it also provides a rewarding DIY project that can enhance your woodworking skills. In this comprehensive guide, we’ll walk you through how to make an Adirondack chair, from gathering tools and materials to completing the final assembly.
1. Understanding the Adirondack Chair
The Adirondack chair, with its iconic wide armrests and slanted back, originated in the early 20th century in the Adirondack Mountains of New York. Its design was created by Thomas Lee in 1903 as a way to provide comfort while enjoying the beautiful outdoor scenery. The chair was initially made from wood, but modern variations now include materials like plastic and metal, catering to a broader audience interested in outdoor furniture.
What makes the Adirondack chair particularly appealing is its ergonomic design, which promotes relaxation. With a deep seat and a reclining back, it’s the perfect spot to unwind with a book or enjoy a warm beverage. For those who appreciate craftsmanship, building your own Adirondack chair lets you customize dimensions, materials, and finishes to suit your personal taste and outdoor decor.
2. Gathering the Right Tools and Materials
Before diving into the construction process, it’s crucial to assemble all the necessary tools and materials. Here’s a list of what you’ll need:
- Materials: Choose either cedar, pine, or composite wood. Cedar is a favorite due to its natural resistance to rot.
- Tools: You’ll need a saw (circular or miter), drill, measuring tape, level, sandpaper, and a paintbrush (if applying finish).
- Hardware: Collect screws, wood glue, and optional outdoor sealant or paint.
Having everything ready before you start will make the process smoother and prevent unnecessary trips to the hardware store. It’s also a good idea to wear safety gear like goggles and gloves while working with tools.
3. Measuring and Cutting the Wood
Once you have your tools and materials, the next step is to measure and cut the wood to size. The standard dimensions for an Adirondack chair include:
- Backrest: 36 inches long
- Seat: 18 inches wide and 22 inches deep
- Legs: 18 inches high
Using these dimensions, mark the wood using a pencil and measuring tape, ensuring precision for each piece. Cut the wood using your saw, taking care to follow the marked lines accurately. After cutting, it’s essential to sand the edges to avoid splinters and create a polished look.
4. Assembling the Seat and Backrest
Now comes the exciting part: assembly! Start with the seat. Lay the horizontal slats side by side, leaving small gaps between them for water drainage. Use wood glue and screws to secure each slat to two vertical support beams, forming a robust frame.
For the backrest, you can choose to create a slatted look similar to the seat. Attach the slats to the support beams using the same method as before. Make sure that the backrest is securely fastened at an angle that is comfortable for reclining. This angle is typically around 20-30 degrees, which promotes a relaxing seating position.
5. Creating the Armrests
The armrests are not only functional but also contribute significantly to the chair’s overall aesthetic. Typically, they are about 22 inches long and rise 7-10 inches from the seat. To make them, cut two pieces of wood to size and shape them to fit over the backrest securely.
Attach the armrests to the chair frame using screws and wood glue, ensuring they are level with the seat for comfort. The right height makes all the difference when it comes to relaxing in your newly constructed chair. (See: Adirondack chair history and design.)
6. Adding the Legs
The legs of an Adirondack chair are crucial for stability. Assembling the legs involves using two front legs and two back legs, which are designed to provide a slight angle for added comfort. For the front legs, cut them to about 18 inches high.
Attach the front legs to the seat frame using screws, ensuring they are perpendicular to the ground. For the back legs, you’ll want to create a slight slope to match the backrest. Once attached, check for sturdiness and adjust as needed before proceeding to the next steps.
7. Finishing Touches
With the chair assembled, it’s time to add your finishing touches. Consider applying an outdoor sealant or paint to protect the wood from weather elements. If you’re using untreated wood, a good coat of sealant can prolong its life significantly.
Choose a color that complements your outdoor space. Whether you go for a natural wood finish or a vibrant hue, make sure to follow the manufacturer’s instructions for applying the sealant or paint. Allow adequate drying time before using the chair to ensure the best finish.
8. Common Mistakes to Avoid
While building an Adirondack chair can be straightforward, there are some common pitfalls that DIYers often encounter. One of the biggest mistakes is not measuring accurately. Always double-check your measurements before making cuts, as this can save you time and materials.
Another mistake is rushing through the assembly without ensuring everything is level and secure. Take your time with each step, and don’t hesitate to make adjustments if something seems off. Finally, neglecting to weatherproof your chair can lead to premature deterioration, so always prioritize this step.
9. Maintenance Tips for Your Adirondack Chair
Once you’ve built your Adirondack chair, the next step is to maintain it properly. Regular cleaning is essential, especially if it’s exposed to the elements. Use a mild soap solution and a soft brush to clean off dirt and grime. Avoid harsh chemicals that could damage the finish.
Reapply sealant or paint as needed, typically every couple of years, depending on your local weather conditions. If you notice any signs of wear, such as splintering or fading, it’s a good idea to address these issues promptly to prolong the life of your chair.
10. Variations on the Adirondack Chair
While the classic Adirondack chair design is timeless, you might want to explore different variations to suit your style or needs. Here are a few popular options:
- Child-sized Adirondack Chairs: Perfect for the little ones! These chairs maintain the same charm as the adult version but in a smaller size.
- Rocking Adirondack Chairs: A delightful twist that adds a rocking mechanism, ideal for added comfort and relaxation.
- Adirondack Loungers: These are often designed with an extended backrest and reclining features for ultimate lounging.
- Adirondack Loveseats: Perfect for couples, these are wider, allowing two people to sit comfortably together.
- Folding Adirondack Chairs: If space is a concern, look for a folding design that can be easily stored when not in use.
Exploring these variations offers an exciting opportunity to customize your outdoor furniture while still keeping the spirit of the Adirondack chair alive. Each style has its own charm and can enhance your outdoor experience in different ways.
11. Using Alternative Materials
While wood is the traditional material for Adirondack chairs, many people opt for alternative materials that can provide different aesthetic and functional benefits. Here are some options:
- Recycled Plastic: Eco-friendly and highly durable, recycled plastic chairs are resistant to fading and don’t require much maintenance.
- Metal: Aluminum or steel chairs offer a modern twist, known for their sleek designs and long-lasting durability, though they may require cushions for comfort.
- Composite Wood: A blend of wood fibers and plastic, composite wood chairs mimic the look of wood without the upkeep, making them a practical choice.
Choosing the right material for your Adirondack chair can greatly influence its durability, comfort, and appearance. Consider your local climate and how much maintenance you’re willing to perform when selecting materials.
12. Building a Custom Adirondack Chair
If you want to take your woodworking skills to the next level, consider customizing your Adirondack chair. This can involve altering dimensions, adding unique features, or even integrating storage solutions. Here are a few ideas: (See: New York State Parks Adirondack chair design.)
- Integrated Cup Holders: Design your armrests with built-in cup holders to keep your drinks secure while you relax.
- Storage Spaces: Create additional compartments under the seat or within the armrests for storing cushions or outdoor essentials.
- Personalized Carvings: Use a wood-burning tool to engrave your name or a favorite design into the backrest for a personal touch.
Customizing your chair not only improves functionality but also makes it a unique piece of art that reflects your personality.
13. Expert Perspectives on Adirondack Chairs
To gain further insights into the appeal of Adirondack chairs, we consulted woodworking experts and DIY enthusiasts. Many expressed that the charm of the Adirondack chair lies in its simplicity and comfort.
“What I love about making Adirondack chairs is that they blend form and function perfectly,” shares Martha Jenkins, a seasoned woodworker. “They invite relaxation, and you feel accomplished when you sit in a chair you’ve made with your own hands.”
Furthermore, experts agree on the importance of using quality materials. “Choosing durable wood or composite materials ensures that your chair withstands the elements and remains a staple in your outdoor space for years,” says John Miller, a furniture designer.
Their insights highlight not just the process of building but also the satisfaction that comes from creating something enduring and beautiful.
14. Frequently Asked Questions (FAQ)
What is the best wood for an Adirondack chair?
Cedar is often recommended due to its natural resistance to rot and insects. Other good options include teak and pressure-treated pine, which offer durability and weather resistance.
How long does it take to build an Adirondack chair?
The time it takes can vary depending on your experience and the complexity of your design. On average, expect to spend about four to six hours on the project, including assembly and finishing.
Can I use screws instead of nails for assembling the chair?
Absolutely! Screws provide a more secure and stable connection compared to nails, making them ideal for this type of project.
Is it necessary to seal my Adirondack chair?
Yes, sealing your chair helps protect it against moisture, UV rays, and other weather elements, prolonging its life significantly.
Can I paint my Adirondack chair?
Yes, painting is a great way to customize your chair and add a pop of color to your outdoor space. Just ensure you use outdoor paint formulated for wood surfaces.
What is the weight limit for an Adirondack chair?
Most standard Adirondack chairs can support around 300 to 400 pounds, depending on the materials and construction methods used. Always ensure your design is robust for safety. (See: Ergonomic design principles.)
How can I make my Adirondack chair more comfortable?
Adding cushions can greatly enhance comfort. Look for outdoor cushions that are water-resistant and UV protected. Additionally, consider making the seat deeper or adding a slight recline to the backrest for a more relaxed position.
Can I use my Adirondack chair indoors?
Yes, you can use it indoors! Many people love the rustic charm they bring to living spaces. Just keep in mind that untreated wood may require some finishing to avoid damage from indoor humidity.
Are there any safety tips I should keep in mind while building?
Always wear protective gear such as goggles and a dust mask. When using power tools, be sure to follow the manufacturer’s guidelines for each tool. Additionally, keep your work area clean to avoid accidents.
15. Conclusion: Enjoying Your Creation
Building your own Adirondack chair can be a fulfilling project that allows you to showcase your woodworking skills while creating a lovely piece of outdoor furniture. With this guide on how to make an Adirondack chair, you have all the steps you need to embark on this adventure.
Once your chair is complete, take the time to relax in it. You’ll not only appreciate the comfort and design but also the satisfaction of knowing you crafted it yourself. Whether you place it on a porch, deck, or in the garden, your Adirondack chair will surely become a cherished spot for relaxation and enjoyment.
16. Incorporating Accessories for Your Adirondack Chair
To enhance the experience of your Adirondack chair, consider accessorizing it with a few thoughtful additions. Accessories not only add functionality but can also make your chair even more inviting and comfortable.
- Cushions and Throws: Outdoor cushions and a cozy throw blanket can make your chair more comfortable and add a splash of color. Look for fade-resistant fabrics that will withstand outdoor conditions.
- Side Tables: A small side table can be the perfect companion to your Adirondack chair, providing a place for drinks, snacks, or books. You can even build a matching table using leftover materials from your chair project.
- Shade Options: Consider adding a small umbrella or a canopy to provide shade while you enjoy your chair on sunny days. This can enhance comfort and allow for use in a wider range of weather conditions.
- Outdoor Lighting: If you plan to use your chair in the evenings, add some outdoor fairy lights or a small lantern nearby to create a warm and inviting ambiance.
17. Choosing the Right Location for Your Adirondack Chair
Location can significantly impact your Adirondack chair experience. Here are some tips for selecting the perfect spot:
- View and Sunlight: Place your chair where you can enjoy the best views of your outdoor space, whether that’s a garden, a lake, or a pleasant sunset. Consider the sun’s path throughout the day to find a balance of sunlight and shade.
- Proximity to Activities: If you have a pool, fire pit, or garden area where family and friends gather, positioning your chair nearby can enhance social interactions and make it a go-to spot for relaxation.
- Surface Level: Ensure your chair is placed on a flat, stable surface to avoid wobbling. If you have a deck, concrete patio, or even grass, these can all be excellent surfaces for stability.
18. The Environmental Impact of Building Adirondack Chairs
Consideration for the environment is essential when selecting materials for your Adirondack chair. Here are some points to keep in mind:
- Sustainable Wood Choices: If opting for wood, consider sourcing it from sustainable forests. Look for certifications like FSC (Forest Stewardship Council) that ensure responsible management of forest resources.
- Recycled Materials: Using recycled plastic or repurposed wood can minimize waste and reduce your carbon footprint. These materials often prove to be more durable and require less maintenance.
- Longevity and Maintenance: Building a high-quality chair that requires less frequent replacement not only saves money but also benefits the environment by reducing waste.
“`
Trending Now
Frequently Asked Questions
What materials do I need to build an Adirondack chair?
To build an Adirondack chair, you'll need materials like cedar, pine, or composite wood. Cedar is a popular choice due to its natural resistance to rot. Additionally, gather screws, wood glue, and optional outdoor sealant or paint for finishing touches.
What tools are required to make an Adirondack chair?
Essential tools for constructing an Adirondack chair include a saw (circular or miter), drill, measuring tape, level, sandpaper, and a paintbrush if you plan to apply a finish. Having all these tools ready will streamline the building process.
How do I customize my Adirondack chair?
You can customize your Adirondack chair by selecting different dimensions, materials, and finishes that match your personal taste and outdoor decor. This flexibility allows you to create a chair that fits perfectly in your space while reflecting your style.
What is the origin of the Adirondack chair?
The Adirondack chair originated in the early 20th century in the Adirondack Mountains of New York. It was designed by Thomas Lee in 1903 to provide comfort while enjoying outdoor scenery, featuring wide armrests and a slanted back for relaxation.
Why is the Adirondack chair so popular?
The Adirondack chair is popular due to its ergonomic design, which promotes relaxation with a deep seat and reclining back. Its classic style, combined with the option to build it yourself, makes it a favorite for outdoor spaces.
What’s your take on this? Share your thoughts in the comments below — we read every one.