How to make Roman shades
“`html
Roman shades are not just functional window coverings; they can also serve as a striking design element in your home. Whether you’re looking to block out the sun, add a touch of elegance, or simply refresh your decor, learning how to make Roman shades can be an incredibly rewarding DIY project. In this guide, we will explore the steps you need to create your own Roman shades, including materials, measurements, and tips to ensure a professional finish.
1. Understanding Roman Shades
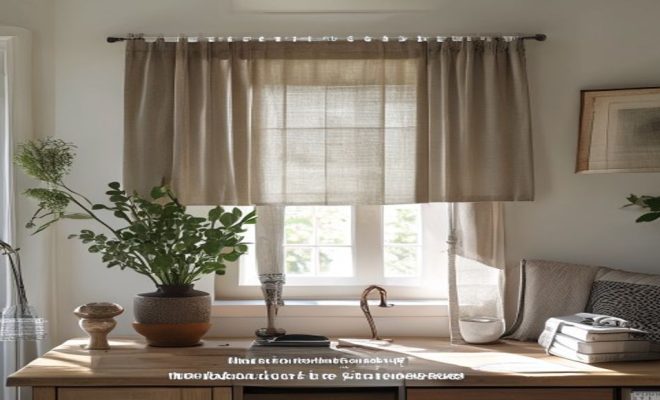
Before diving into the crafting process, it’s essential to understand what Roman shades are. These window treatments are made from fabric that folds neatly in a series of horizontal pleats when raised. Unlike traditional blinds, Roman shades provide a softer look while still offering excellent light control. They can be made from a variety of materials, including cotton, linen, or even blackout fabrics, making them highly versatile.
In addition to their aesthetic appeal, Roman shades have been around for centuries. Their origins can be traced back to ancient Rome, where they were used to protect interiors from sunlight and dust. Today, they are a popular choice among homeowners looking for a balance between style and function.
2. Gathering Your Materials
To embark on your Roman shade-making journey, start by gathering all necessary materials. Here’s a comprehensive list:
- Fabric: Choose a fabric that complements your decor; consider patterns, textures, and light-filtering properties.
- Lining: If you want to block light, consider a blackout lining.
- Wooden dowel rods: These will help give structure to your shades.
- Measuring tape: Accurate measurements are crucial for a perfect fit.
- Sewing machine: While hand-stitching is possible, a sewing machine will speed up the process.
- Thread and scissors: Match your thread color to your fabric for a seamless look.
- Mounting hardware: You’ll need brackets and a cord lock for operation.
Having everything on hand before you start will help streamline the process and prevent you from having to make multiple trips to the store.
3. Measuring Your Windows
Accurate measurements are the cornerstone of creating effective Roman shades. Begin by measuring the width and height of your window. Decide whether you want your shades to be inside-mounted (fitting inside the window frame) or outside-mounted (covering the window frame). For inside mounting, measure the width at the top, middle, and bottom, and take the narrowest measurement. For outside mounting, add a few inches on each side for light coverage.
Next, measure the height from the top of the window frame to the desired length below the sill. It’s advisable to add a few extra inches to ensure complete coverage when the shades are down, as well as to account for the mounting hardware. Keep these measurements handy, as they will guide you throughout the sewing and construction process.
4. Cutting the Fabric
With your measurements in hand, it’s time to cut your fabric and lining. Lay your fabric on a flat surface and use a straight edge to ensure you cut straight lines. Add seam allowances — typically around 1 inch — to your measurements to create hems. If you’re using a lining, cut it to the same size as your main fabric.
For a polished look, consider finishing the edges with a serger or zigzag stitch to prevent fraying. This step is particularly important for natural fibers like linen or cotton. Remember, a clean cut will significantly enhance the overall appearance of your finished Roman shades. (See: Understanding Roman shades history.)
5. Sewing the Fabric and Lining
Now comes the fun part—sewing your fabric and lining together. Place the fabric face up and the lining face down, aligning the edges. Pin or clip the layers together to keep them in place while sewing. You’ll want to sew around the perimeter, leaving an opening at the bottom for inserting the wooden dowels later. Use a straight stitch, and remember to backstitch at the beginning and end to secure your seams.
Once you’ve sewn the edges, turn the fabric right side out through the opening. Use a blunt object to push out the corners for a crisp finish. Iron the fabric to remove any wrinkles and ensure the shades lay flat. At this stage, you can also fold and sew the bottom edge to create a hem, giving your shades a finished look.
6. Creating the Pleats
One of the defining features of Roman shades is their beautiful pleats. To create these, you’ll need to decide how many folds you want and where they should be placed. Typically, pleats are spaced about 6 to 8 inches apart. Mark the positions on the back of the fabric with tailor’s chalk or a fabric marker. Then, sew the pleats in place, securing them with either a straight stitch or a series of tacking stitches.
To ensure the shades operate smoothly, be cautious not to make the pleats too tight. You should be able to pull the shades up and down without resistance. If you’re using dowels to hold the pleats, cut the dowels to the specified lengths and insert them into the hems of each pleat. This will help maintain the shape and structure of the shades.
7. Installing Your Roman Shades
With your Roman shades completed, it’s time to bring them to life by installing them in your window. Start by attaching the mounting hardware according to the manufacturer’s instructions. Use a level to ensure they’re straight; there’s nothing worse than crooked shades ruining the aesthetic of a room.
Once the hardware is in place, hang your shades and test them to ensure they operate smoothly. Depending on the design, you may want to add cord locks to control the height of the shades easily. With a few adjustments, you can perfect the look and operation of your new Roman shades.
8. Maintenance and Care
Caring for your Roman shades is crucial to keeping them looking fresh and new. Most fabric shades can be spot cleaned with a damp cloth; however, it’s wise to avoid soaking the fabric to prevent water damage. For deeper cleaning, many fabrics can be machine washed on a gentle cycle. Always check the care instructions for your specific fabric before proceeding.
To prevent dust buildup, consider vacuuming your shades periodically with a brush attachment. If your shades are lined, ensure that you maintain the lining’s integrity as well, as it plays a critical role in light control and insulation.
9. Design Tips and Trends
As you embark on creating your Roman shades, keep in mind some current design trends that can elevate your project. Color is a significant factor — consider using bold, bright fabrics to make a statement or soft neutrals for a more tranquil feel. Patterns can also add personality; floral or geometric designs can create focal points in a room.
Additionally, don’t shy away from mixing materials. Combining fabrics like linen with a heavier cotton can create visual interest and depth. Layering Roman shades with sheer curtains can also add dimension and flexibility to light control. As you learn how to make Roman shades, remember that the best designs reflect your personal style and enhance your living space.
10. Exploring Different Styles of Roman Shades
When it comes to Roman shades, there are several styles to consider. Each style can dramatically change the look and feel of your room. Here’s a brief overview of popular Roman shade styles: (See: Safety considerations for home projects.)
- Classic Roman Shades: These are the traditional style that features soft folds and a clean look. They can be made with various fabrics, allowing for customization based on your décor.
- Flat Roman Shades: This minimalist style lays flat when extended and doesn’t have the same pleats as the classic style. They’re perfect for a more modern aesthetic.
- Hobbled Roman Shades: These shades retain the soft folds even when fully extended, giving them a more luxurious look. They work well with heavier fabrics.
- Relaxed Roman Shades: This style has a soft curve at the bottom and does not have traditional pleats. It provides a casual, more relaxed appearance that enhances a laid-back environment.
Choosing the right style for your room can depend on several factors, including your existing décor, the amount of natural light you wish to control, and your personal taste. Each style can be adapted to suit different functional needs while still being aesthetically pleasing.
11. Common Mistakes to Avoid
Even seasoned DIYers can make mistakes when working on a new project. Here are some common pitfalls to watch out for when learning how to make Roman shades:
- Poor Measurements: One of the most common mistakes is not measuring correctly, which can lead to shades that don’t fit properly. Double-check your measurements, and consider using a second set of eyes to confirm them.
- Choosing the Wrong Fabric: Not all fabrics are suitable for Roman shades. Ensure you select a fabric that can hold its shape and withstand wear over time.
- Not Pre-Washing Fabric: It’s a good practice to pre-wash your fabric to prevent shrinking after your shades are made, especially if you plan to clean them later.
- Neglecting Sunlight Considerations: If your shades will be installed in a sun-drenched room, consider using UV-resistant fabric to prevent fading.
Avoiding these common mistakes can save you time, money, and frustration, ensuring that your Roman shades turn out beautifully and functionally.
12. Frequently Asked Questions (FAQ)
How long does it take to make Roman shades?
The time it takes to make Roman shades can vary depending on your skill level and the complexity of the design. On average, expect to spend anywhere from a few hours to a couple of days to complete the project, including cutting, sewing, and installation.
Do Roman shades provide enough light control?
Yes, Roman shades can provide excellent light control, especially if made with blackout lining. They can be adjusted to allow varying levels of light into your space, making them a versatile option for different rooms.
Can I wash my Roman shades?
Most fabric Roman shades can be spot cleaned or washed on a gentle cycle. However, always check the fabric care instructions as some materials may have specific cleaning requirements.
What if my shades don’t fit correctly?
If your shades don’t fit, check to see if your measurements were accurate. If they’re slightly off, you may be able to make adjustments to the mounting hardware or the fabric itself. If the shades are significantly off, you might need to redo the project using better measurements.
Can I use different fabrics for lining and the main shade?
Absolutely! Mixing fabrics can add dimension and style to your Roman shades. Just ensure that the fabrics complement each other and that the lining provides the functionality you need, such as light blocking or insulation.
13. Incorporating Automation into Your Roman Shades
As technology advances, many homeowners are opting for automated window treatments. This can also apply to Roman shades, allowing you to control them with a remote or mobile app. There are several benefits to this approach: (See: DIY Roman shades tips and tricks.)
- Convenience: You can easily control your shades from anywhere in the room or even outside of it.
- Energy Efficiency: Automated shades can be programmed to open and close at specific times, helping to regulate indoor temperatures and reduce energy bills.
- Child Safety: By eliminating cords, automated shades reduce the risk of strangulation for young children and pets.
When installing automated Roman shades, ensure that you follow all safety guidelines and instructions provided by the manufacturer. This may include additional wiring or special mounting hardware.
14. Additional Customization Ideas
Customization is one of the most exciting aspects of making your own Roman shades. Here are some ideas to personalize your shades even further:
- Trim and Accessories: Consider adding decorative trim, such as fringe or tassels, along the edges of your shades. This can enhance the overall design and add a touch of elegance.
- Fabric Paint or Stencils: If you’re feeling artistic, you can use fabric paint or stencils to add patterns or designs to your shades. This works particularly well on solid fabrics and can create a unique look.
- Layering Techniques: Don’t stop at just one layer; consider layering your Roman shades with sheer curtains or other types of window treatments for a more dynamic and customizable light control option.
- Interchangeable Panels: If you get tired of the same look, try creating panels that can be easily swapped out. This allows you to change your decor seasonally or whenever you feel like a change.
Experimenting with these ideas can expand your creativity and make your Roman shades truly one-of-a-kind.
15. Budgeting for Your Project
When it comes to DIY projects, budgeting is key. Here’s a simple breakdown of potential costs you might incur when making Roman shades:
- Fabric: Depending on the quality and type, fabric can range from $5 to $30 per yard.
- Lining: If you choose to use a blackout lining, this can cost between $3 to $15 per yard.
- Hardware: Mounting hardware typically costs around $10 to $40 based on the complexity of the mechanism.
- Sewing Supplies: Don’t forget about thread, scissors, and any additional tools, which can total about $20 to $50.
In total, you might spend anywhere from $50 to $200 on materials, depending on your choices. Planning ahead allows you to allocate your budget wisely and avoid overspending on impulse buys.
In summary, crafting your own Roman shades is a rewarding undertaking that allows you to personalize your home while honing your DIY skills. With the right materials and techniques, you can create beautiful window treatments that add charm and functionality to any room.
“`
Trending Now
- this guide on a visitors guide to northshore, new zealand
- What’s on a High School Transcript? Understanding the Components
- “5 Evidence-Based Strategies to Improve Math…
- How Nonverbal Communication Impacts Conflict Resolution…
- this guide on the role of fine motor skills in kindergarten readiness and academic success
Frequently Asked Questions
What materials do I need to make Roman shades?
To make Roman shades, you will need fabric that suits your decor, blackout lining if you want to block light, wooden dowel rods for structure, a measuring tape for accurate measurements, a sewing machine, thread that matches your fabric, scissors, and mounting hardware including brackets and a cord lock.
How do I measure for Roman shades?
To measure for Roman shades, start by measuring the width and height of your window. For a snug fit, subtract a few inches from the width and height. Ensure you measure at multiple points to account for any irregularities, and be sure to note these measurements for cutting your fabric accurately.
Can I use any fabric for Roman shades?
Yes, you can use various fabrics for Roman shades, including cotton, linen, and even blackout fabrics. Choose a fabric that complements your home decor and consider its light-filtering properties to achieve the desired level of privacy and light control.
Are Roman shades easy to install?
Yes, Roman shades are relatively easy to install. After making the shades, you will need to attach the mounting hardware to the window frame or wall. Follow the manufacturer's instructions for the brackets and cord lock to ensure a secure and functional installation.
How do I ensure my Roman shades look professional?
To achieve a professional look with your Roman shades, focus on precise measurements, use quality materials, and take your time with sewing. Additionally, matching thread color to your fabric and ensuring even pleats will enhance the overall appearance of your finished shades.
Agree or disagree? Drop a comment and tell us what you think.