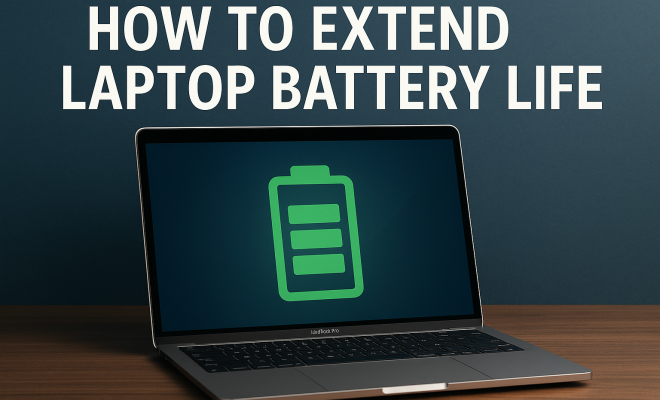
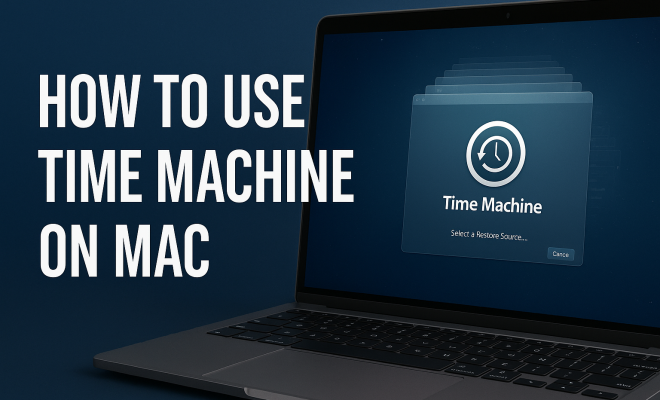
How to use Time Machine on Mac
“`html
Whether you’re a new Mac user or a seasoned pro, understanding how to use Time Machine on Mac can save you countless headaches. This built-in backup feature provides a seamless way to protect your data, ensuring that your important files are safe and sound. In this article, we’ll explore everything you need to know about using Time Machine—from setup to restoration and tips for maximizing its efficiency.
1. What is Time Machine?
Time Machine is Apple’s backup software application designed for macOS. Introduced with OS X 10.5 Leopard in 2007, it allows users to back up their entire system automatically. It works by taking periodic snapshots of your files, applications, and system settings, allowing you to restore them to any point in time. The beauty of Time Machine lies in its simplicity—it requires minimal configuration and runs seamlessly in the background.
The program stores backups on an external drive, a network-attached storage (NAS) device, or through Apple’s own cloud service, iCloud. With Time Machine, you can recover lost data, restore your entire system, or even transfer files to a new Mac. It’s an essential tool for anyone who values their data and wants peace of mind.
2. Setting Up Time Machine
Before you can learn how to use Time Machine on Mac, you need to set it up. First, ensure you have an external hard drive or a compatible NAS device. Connect it to your Mac using a USB, Thunderbolt, or Wi-Fi connection. Once connected, follow these steps:
- Open the Apple menu and select System Preferences.
- Click on Time Machine.
- Choose Select Backup Disk and select your connected drive.
- Optional: Enable Encrypt Backups for added security, protecting your data with a password.
- Toggle the switch to On to activate Time Machine.
After you’ve set it up, Time Machine will automatically start taking hourly backups every hour, daily backups every 24 hours, and weekly backups every month. It’s that simple!
3. How Time Machine Works
Understanding how Time Machine operates can give you more confidence in using it. Time Machine creates a comprehensive backup of your entire system and documents, including applications, music, photos, and settings. The first backup is a complete snapshot, which might take some time depending on your data size.
Subsequent backups are incremental, meaning only the changed files since the last backup are saved. This efficiency helps minimize storage space usage while ensuring your data is always up-to-date. Time Machine also organizes backups in a user-friendly timeline, making it easy to navigate through versions and find specific files from different backup dates.
4. Restoring Files from Time Machine
One of the core reasons to learn how to use Time Machine on Mac is the ability to restore files when needed. If you accidentally delete a file or folder, Time Machine makes recovery straightforward. Here’s how:
- Open the folder where the deleted file was located.
- Click on the Time Machine icon in the menu bar and choose Enter Time Machine.
- A timeline will appear on the right side of the screen. Use it to scroll back to the date when the file was last present.
- Once you’ve found the file, click Restore. The file will return to its original location.
If the entire system needs restoration—say, after a hard drive failure—you can boot your Mac from a macOS installer and select the option to restore from Time Machine during the installation process.
5. Time Machine and Time Capsule
Time Capsule is Apple’s hardware solution that integrates router functionality with a hard drive for seamless backups. If you own a Time Capsule, using Time Machine becomes even easier. The setup process is similar, but you’ll select your Time Capsule as the backup disk instead of an external drive. (See: Time Machine on macOS Wikipedia page.)
The advantage of using Time Capsule is that it allows for wireless backups, effectively eliminating clutter from wires while ensuring your data is backed up without manual intervention. Keep in mind that while Time Capsule is an excellent solution, it’s no longer in production, so users may need to look into alternatives, such as third-party NAS devices.
6. Troubleshooting Time Machine Issues
Even with its user-friendly design, you might encounter issues while using Time Machine. Some common problems include backups not starting, the drive not being detected, or backups taking too long. Here are some troubleshooting steps:
- Check Connections: Ensure your external drive is properly connected and powered on.
- Disk Utility: Use Disk Utility to check and repair the backup drive.
- Delete Old Backups: If your backup drive is full, Time Machine may stop working. You can manually delete older backups through the Time Machine interface.
- Restart Time Machine: Sometimes, simply turning Time Machine off and on can resolve minor issues.
- Check for Updates: Ensure your macOS and Time Machine software are up to date to avoid compatibility issues.
If problems persist, consulting Apple’s support documentation can provide additional assistance.
7. Maximizing Time Machine Efficiency
To make the most out of Time Machine, consider the following tips:
- Exclusions: You can exclude certain files or folders from backups to save space and time. In the Time Machine preferences, click Options and add items you don’t need to back up.
- Keep Your Drive Organized: Regularly check your backup drive for errors and ensure it’s organized for easier recovery.
- Check Backup Status: Frequently monitor Time Machine’s status to ensure backups are being completed successfully.
- Use Multiple Drives: If possible, use more than one backup drive and alternate between them. This adds an extra layer of security.
Implementing these strategies will ensure that Time Machine serves you well as a reliable backup solution.
8. Alternatives to Time Machine
While Time Machine is robust, there are alternatives worth considering, especially for users with specific needs. Some popular alternatives include:
- Carbon Copy Cloner: This software allows for bootable backups and more detailed scheduling options.
- SuperDuper!: Like Carbon Copy Cloner, SuperDuper! offers bootable backups with a straightforward interface.
- Acronis True Image: A comprehensive solution that includes backup, recovery, and even cloud storage options.
- Backblaze: A cloud-based backup solution that provides continuous backup without the need for external drives.
Each of these alternatives has unique features, so explore them to see which fits your needs best. However, for most users, Time Machine remains a solid and integrated choice.
9. Current Relevance of Time Machine
In an era where data loss can be catastrophic—be it due to hardware failure, accidental deletion, or malware—Time Machine remains an essential tool for Mac users. As more people rely on their devices for both personal and professional use, understanding how to use Time Machine on Mac is vital.
With advancements in technology, including improved backup speeds and higher capacity drives, Time Machine continues to evolve, offering users an effective solution for their backup needs. As you navigate your digital life, remember that investing time in learning this tool can protect your valuable data and provide peace of mind.
10. Time Machine for Businesses
Time Machine isn’t just a tool for personal use; it can also benefit small businesses. For companies that rely heavily on data, having a reliable backup system is crucial. Time Machine allows employees to back up their individual machines effortlessly, ensuring that critical documents, financial records, and client information are secure. By using Time Machine on a network-attached storage (NAS) device, multiple user backups can be managed from a central location, simplifying the backup process.
Additionally, Time Machine’s ability to quickly restore files means that businesses can recover from data loss incidents much faster. This capability can minimize downtime, which is particularly important in a business environment where every minute counts. By integrating Time Machine into your business strategy, you can create a safety net that protects against unforeseen data loss scenarios. (See: CDC's computer safety guidelines.)
11. Time Machine and Data Security
Data security is a growing concern, especially with increasing cyber threats. While Time Machine offers a reliable backup solution, it’s essential to understand how to secure your backups effectively. Enabling encrypted backups is a critical step; this ensures that even if someone gains access to your backup drive, they cannot read your files without the encryption password.
Moreover, consider the physical security of your backup drives. Keeping them in a secure location and limiting access is vital. For businesses, implementing additional security measures, such as firewalls and antivirus software, can further protect both local and remote backups. Regularly updating your macOS and Time Machine software will also guard against vulnerabilities that could be exploited by malicious actors.
12. Common Myths About Time Machine
There are several myths surrounding Time Machine that can mislead users. Here are a few to clarify:
- It’s Only for Backing Up Files: While Time Machine is primarily used for backing up files, it also preserves system settings, applications, and system configurations, making it a comprehensive backup solution.
- You Need to Be an Expert to Use It: Many believe that using Time Machine requires technical skills, but its intuitive interface is designed for all users, regardless of tech knowledge.
- Time Machine Backups Take Up Too Much Space: While the initial backup can be large, subsequent backups are incremental, meaning they only store changes. This significantly reduces the amount of space used over time.
- Time Machine is Only for External Drives: While many use external drives for backups, Time Machine also supports network storage solutions, giving users multiple options for backup locations.
13. Frequently Asked Questions (FAQ)
1. How often does Time Machine back up my data?
Time Machine backs up your data every hour, daily, and weekly. The first backup is a complete backup, while subsequent backups only save changes made since the last backup, which helps save space.
2. What happens if my backup drive becomes full?
When your backup drive runs out of space, Time Machine will automatically delete the oldest backups to make room for new ones. However, you can also manually delete backups if you want to manage storage proactively.
3. Can I use Time Machine with a cloud service?
While Time Machine doesn’t directly support cloud backups, you can use third-party cloud storage solutions to back up your Time Machine drive or specific files. Some users opt for a hybrid approach, using both local and cloud storage for redundancy.
4. Is there a way to transfer my Time Machine backups to a new Mac?
Yes! When setting up a new Mac, you’ll be prompted to transfer data from another Mac or a Time Machine backup. Select the Time Machine option, and the setup assistant will help you migrate your data.
5. Can I access files from Time Machine without restoring them?
Absolutely; you can browse your Time Machine backups without restoring files. Enter Time Machine and navigate through your backups to find and copy any file you need.
6. What types of data are backed up by Time Machine?
Time Machine backs up almost everything on your Mac, including system files, applications, user accounts, files, and folders in your home directory, as well as photos, music, and documents. However, some system files that are part of macOS may not be included to ensure system efficiency.
7. How can I pause or disable Time Machine?
To pause Time Machine, click the Time Machine icon in the menu bar and select “Turn Off Time Machine.” You can also go to System Preferences > Time Machine and toggle the switch off. To resume backups, just turn it back on.
8. Can Time Machine back up an encrypted disk?
Time Machine can back up encrypted disks, but you’ll need to mount the encrypted volume on your Mac first. Once it’s mounted, Time Machine will treat it like any other data source and include it in backups.
14. Advanced Tips for Using Time Machine
For those who want to dive deeper into using Time Machine, several advanced features and tips can enhance your experience:
- Use Terminal for More Control: Advanced users can use Terminal commands to manage Time Machine settings. For instance, you can force a backup by using the command `tmutil startbackup`. This can be especially useful if you need to back up quickly before a big update or installation.
- Monitor Backup Performance: If you’re curious about how your backups are performing, you can monitor Time Machine’s activity through Console. This can help you identify issues, such as long backup times or failures.
- Configure Time Machine Notifications: Customize notifications in your System Preferences to receive alerts about backup status. This way, you’ll always stay informed about the health of your backups.
- Utilize Third-Party Management Tools: Tools like TimemachineEditor can give you more scheduling options beyond the built-in settings. This is great for those who want to backup during off-peak hours to improve performance.
15. Understanding the Time Machine Interface
When you enter Time Machine, the interface allows you to visually navigate through your backup history. It resembles a 3D space where you can scroll through a timeline on the side. Here’s a breakdown of the key components:
- Timeline: Located on the right side of the screen, this timeline allows you to jump to different dates and times to see previous backups.
- Finder Window: The central window shows your files and folders as they appeared at the selected time. You can browse through these folders as if you were in Finder.
- Restore Button: When you find the file or folder you want to recover, the Restore button is prominently displayed, making recovery straightforward.
The intuitive design means that even less tech-savvy users can easily navigate their backups and find the data they need without much hassle.
16. Backup Strategies for Power Users
If you’re a power user or manage large volumes of data, consider these strategies to enhance your Time Machine experience:
- Regular Cleanup: Regularly review what’s being backed up. Exclude large files or folders that you don’t need to keep, such as temporary files or media that can be easily retrieved from other sources.
- Combine Backups with Cloud Solutions: Consider using Time Machine in conjunction with a cloud backup solution for critical files. This provides an extra layer of security in case of localized disasters.
- Document Your Backup Schedule: Keep a log of when backups are performed and what content is included. This can help in case you need to troubleshoot or restore specific versions of files later.
- Test Restorations: Periodically test restoring files from your Time Machine to ensure that your backups work as expected. This is essential for maintaining trust in your backup system.
17. Final Thoughts on Using Time Machine
Mastering Time Machine can significantly reduce the stress of data loss and enhance your overall Mac experience. By understanding its features and capabilities, you position yourself to safeguard your valuable data effectively. Whether you’re a casual user, a business owner, or a power user, Time Machine offers a resilient solution to protect your digital life.
Don’t overlook the importance of regular backups. Take time to explore and utilize Time Machine’s features to ensure that when disaster strikes, you’re well-prepared to recover without missing a beat.
“`
Trending Now
Frequently Asked Questions
What is the purpose of Time Machine on Mac?
Time Machine is a built-in backup software for macOS that automatically backs up your entire system, including files, applications, and settings. It allows users to restore data to any previous point, ensuring that important files are protected and easily recoverable.
How do I set up Time Machine on my Mac?
To set up Time Machine, connect an external hard drive or NAS device to your Mac. Open System Preferences, select Time Machine, choose 'Select Backup Disk,' and select your drive. Optionally, enable 'Encrypt Backups' for added security and toggle Time Machine to 'On' to start automatic backups.
How often does Time Machine back up my Mac?
Time Machine backs up your Mac automatically, taking hourly backups every hour, daily backups every 24 hours, and weekly backups every month. This ensures that your data is consistently updated and protected without requiring manual intervention.
Can I restore files from Time Machine?
Yes, you can easily restore files from Time Machine. Simply open the Time Machine application, navigate to the date and time of the backup you want, and select the files or folders you wish to restore. This feature allows you to recover lost or deleted data effortlessly.
Is it necessary to encrypt Time Machine backups?
While not mandatory, encrypting Time Machine backups is highly recommended for added security. By enabling encryption, you protect your sensitive data with a password, ensuring that only authorized users can access the backed-up information on your external drive.
Have you experienced this yourself? We’d love to hear your story in the comments.